You might not know this, but the inkjet printer sitting around your house still has a few tricks up its paper tray. It can print on wood – well, sort of.
In planning for my daughter’s first birthday party, I attempted to track down a vintage sign related doughnuts (it was a doughnut-themed party). Rather than spend a bunch of money on Etsy, I thought, “Why not just make this sign myself?” The only problem was that trying to paint anything by hand would look not so great, so I took to Google to find a way to transfer a digital design from my computer to a piece of wood. It turns out that trusty wax paper sitting in your kitchen drawer makes this all possible. Let’s get to it.
What You’ll Need
For this project you’ll need the following:
- unfinished, untreated, sanded wood. I recommend a lighter wood like pine to help your design show through
- disposable paint brushes
- 400 grit sandpaper
- some type of finish to seal and protect your wood. I really like Poly Whey Furniture Finish
- wax paper
- an inkjet printer
- a tabletop paper cutter
Step 1: Prep Your Wood
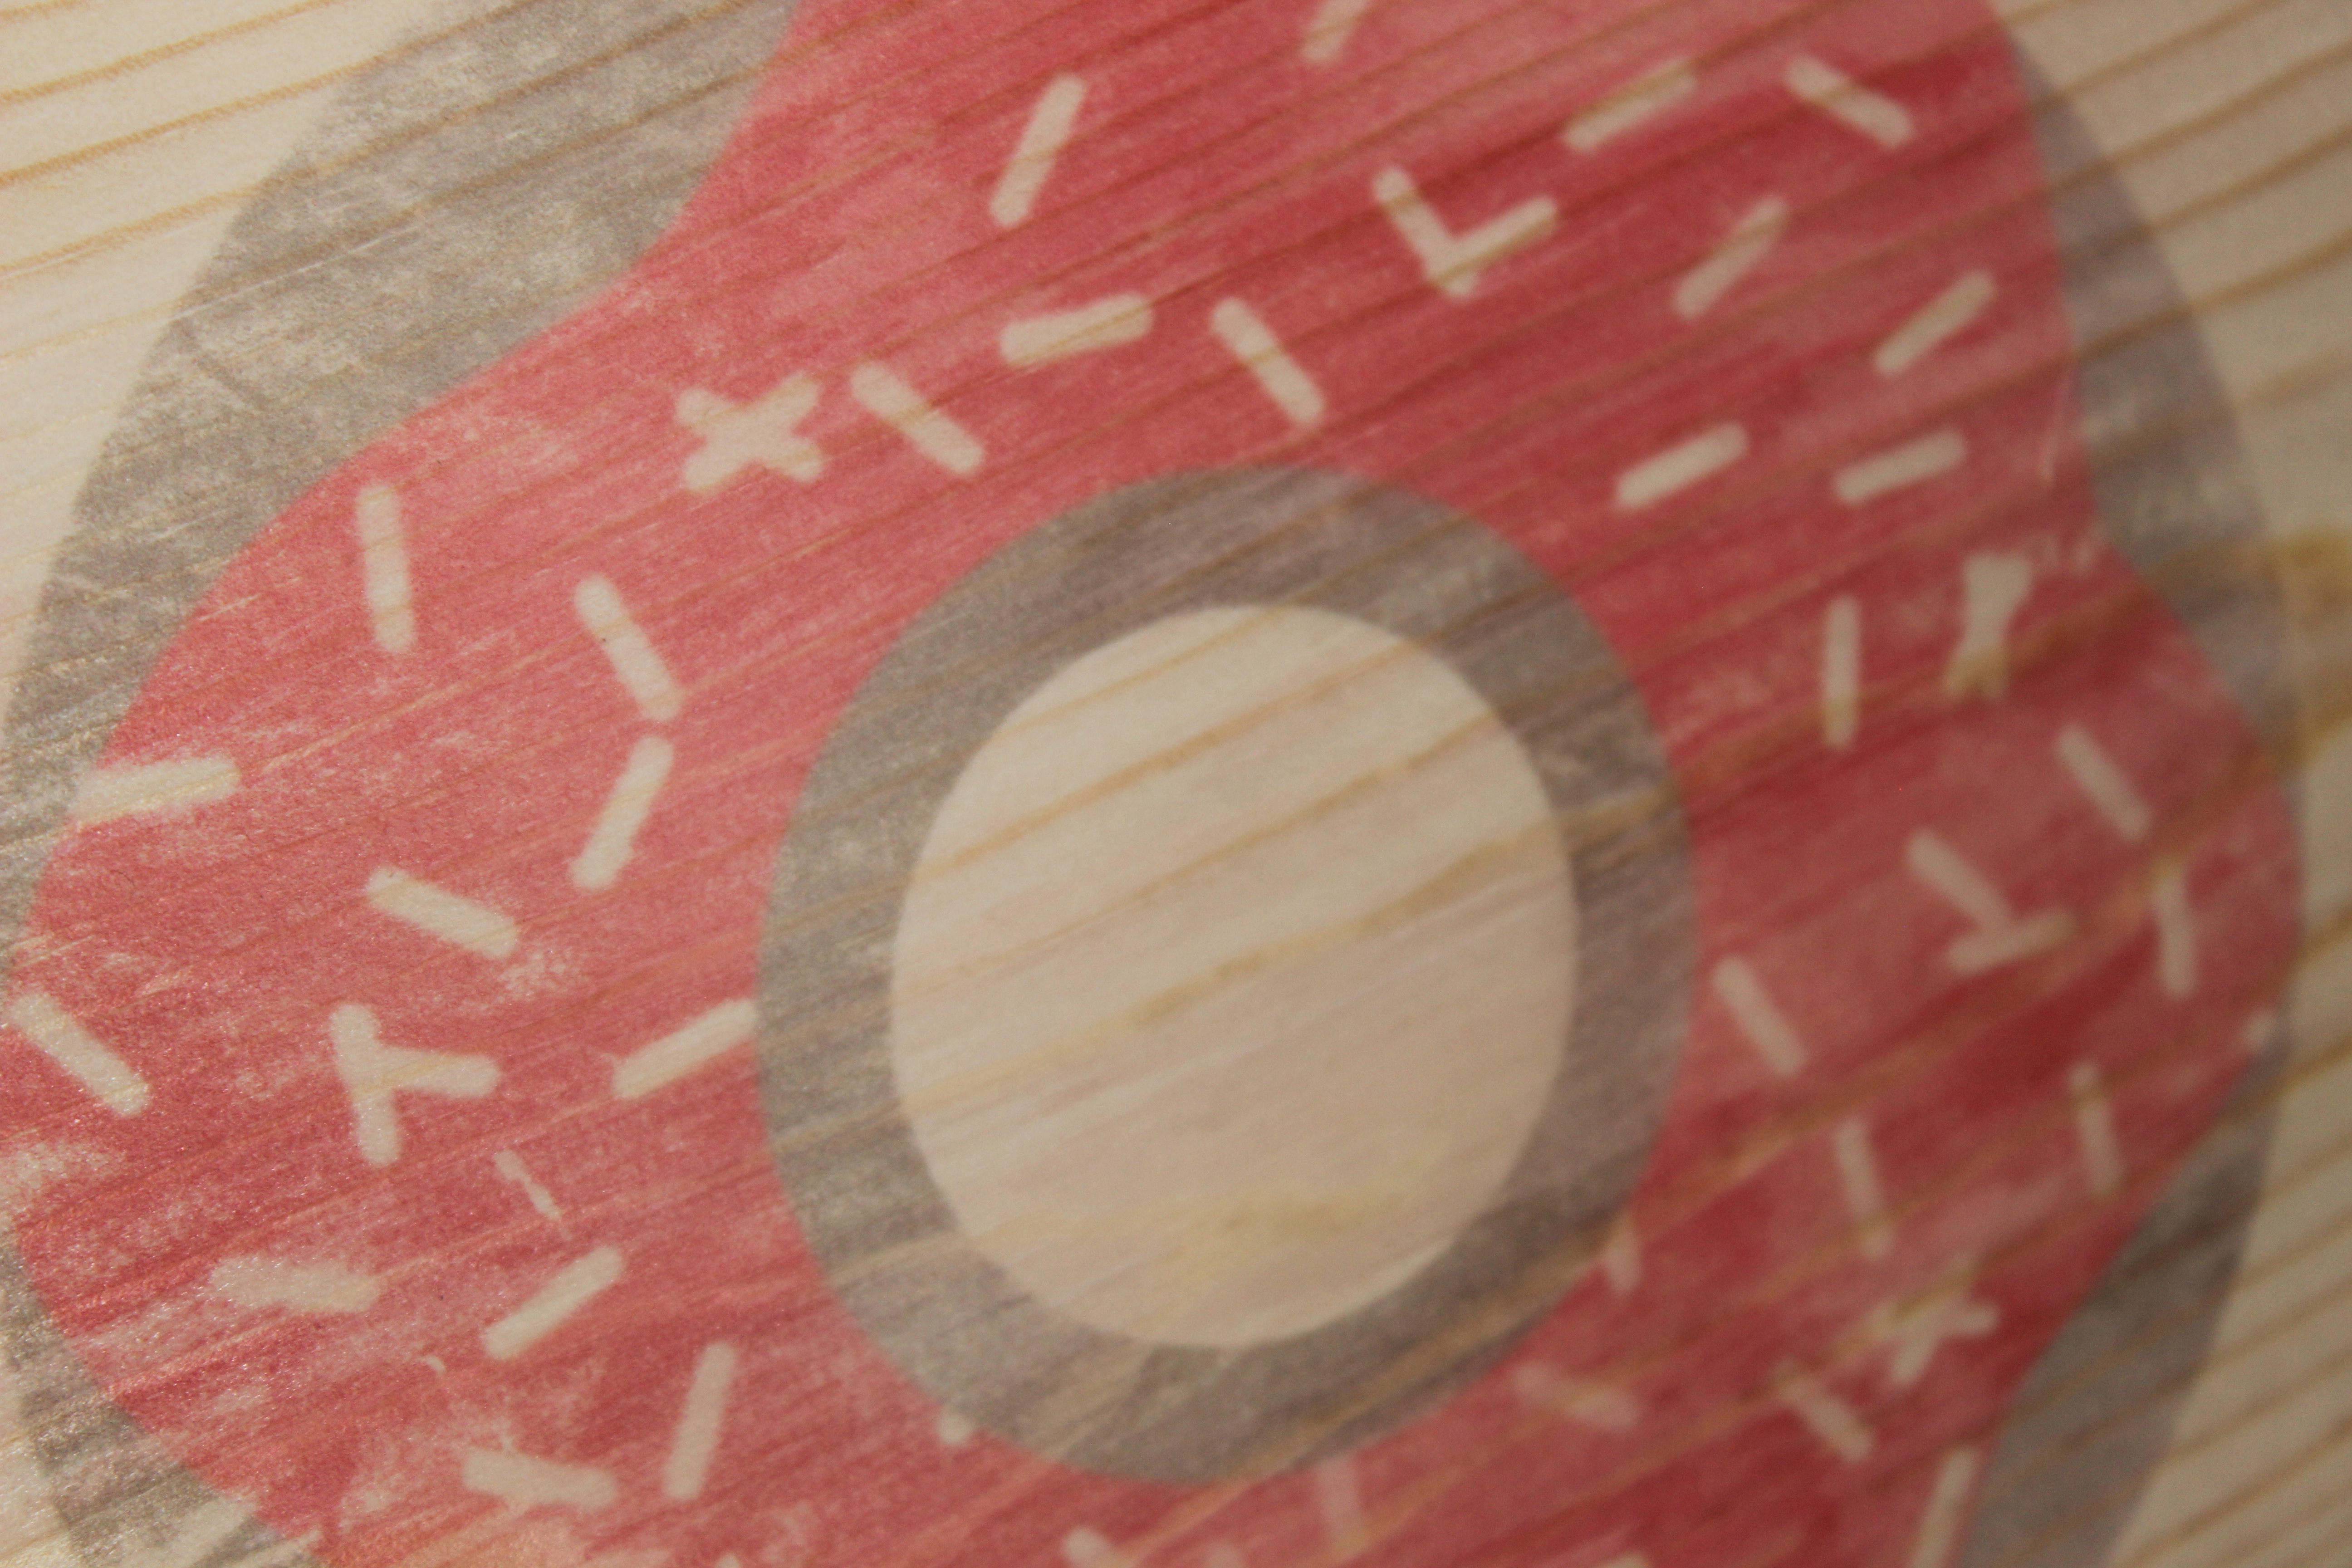
I used some common board made of pine for my sign. You can use whatever wood you like, but just remember that the tone of the wood will show through any design you transfer. For instance, if you use a darker wood like mahogany, light colors like yellow will have a hard time standing out. If you’re using a very detailed or colorful design, stick to a light wood like pine. Once you’ve selected your wood, give it a good sanding with 400-grit sandpaper. This will help your design transfer evenly and smoothly.
Step 2: Create Your Design
Using Word, Pages, PowerPoint, or even Photoshop (if you’re a pro like that), make your design. The key here is using some program with a virtual ruler so that you can appropriately size your design to the size of your wood.

As you’re channeling your inner graphic designer, print out your creation and cut it to size to see how if fits on your wood.

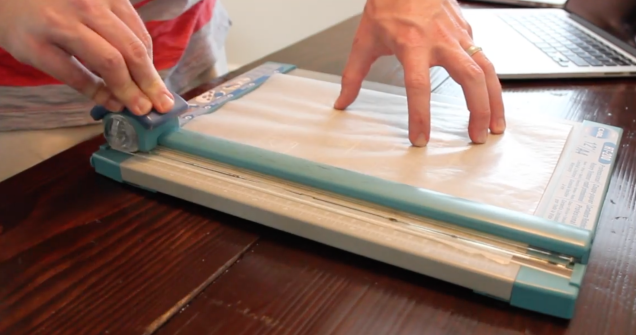
Step 3: Cut Wax Paper Sheets
To prepare everyday wax paper for the journey through an inkjet printer, it will need to be cut down to 8 1/2-inch by 11-inch sheets. You can do this with scissors and a ruler, but the process is much easier with a tabletop paper cutter. After being cut, the wax paper will naturally curl up since its been rolled up in its retail packaging. You’ll want the paper to be nice and flat for printing to avoid nasty paper jams. To do that, I placed my wax paper sheets in a folder and placed a heavy book on top of the folder. 24 hours of flattening should do the trick.
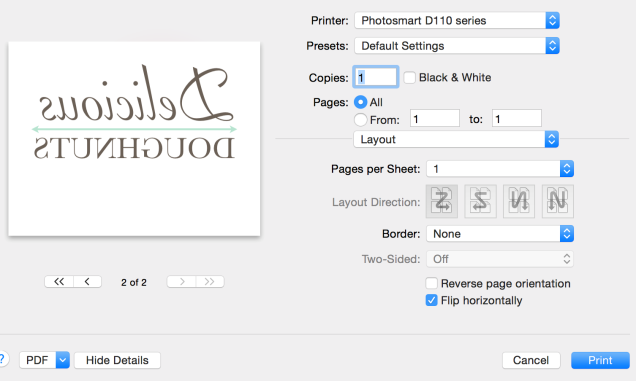
Step 4: Print (Backwards)
Before you hit the “Print” button in your design software, you’ll want to make sure you print the design backwards – especially if it has text. Every printer is different, so search through the print settings to flip the design horizontally. The design will be backwards when it comes out of the printer, but when you transfer it to the wood, it will be correctly oriented. You may also want to take extra care handling the wax paper with your printer. As you can imagine, the paper is very delicate, and you might run into a few (wax) paper jams. Be careful. Be patient. And make sure you have a few spare sheets.
Step 5: Transfer (Very Carefully)
After the wax paper has been printed on, it’s essentially a big, floppy stamp. Carefully align the design on top of the wood and try anchoring the paper at one point with a finger – just avoid having the paper shift across the wood otherwise you’ll get a ghosting effect. Then, using a plastic card (like a credit card, gift card, drivers license, etc.), swipe across the wax paper with lots of firm pressure to transfer the design evenly onto the wood. Once the design has transferred, peel off the wax paper and voila!

Step 6: Seal It!
For the finish, I use a clear semi-gloss Poly Whey Furniture Finish from Vermont Natural Coatings. This is a really easy-to-use finish with low odor, quick dry time, and it feels great to the touch. I can’t recommend it highly enough, and you have it shipped right to you from Amazon. When applying the finish on top of design, be careful to use very light coats as to not smear the ink on the wood.
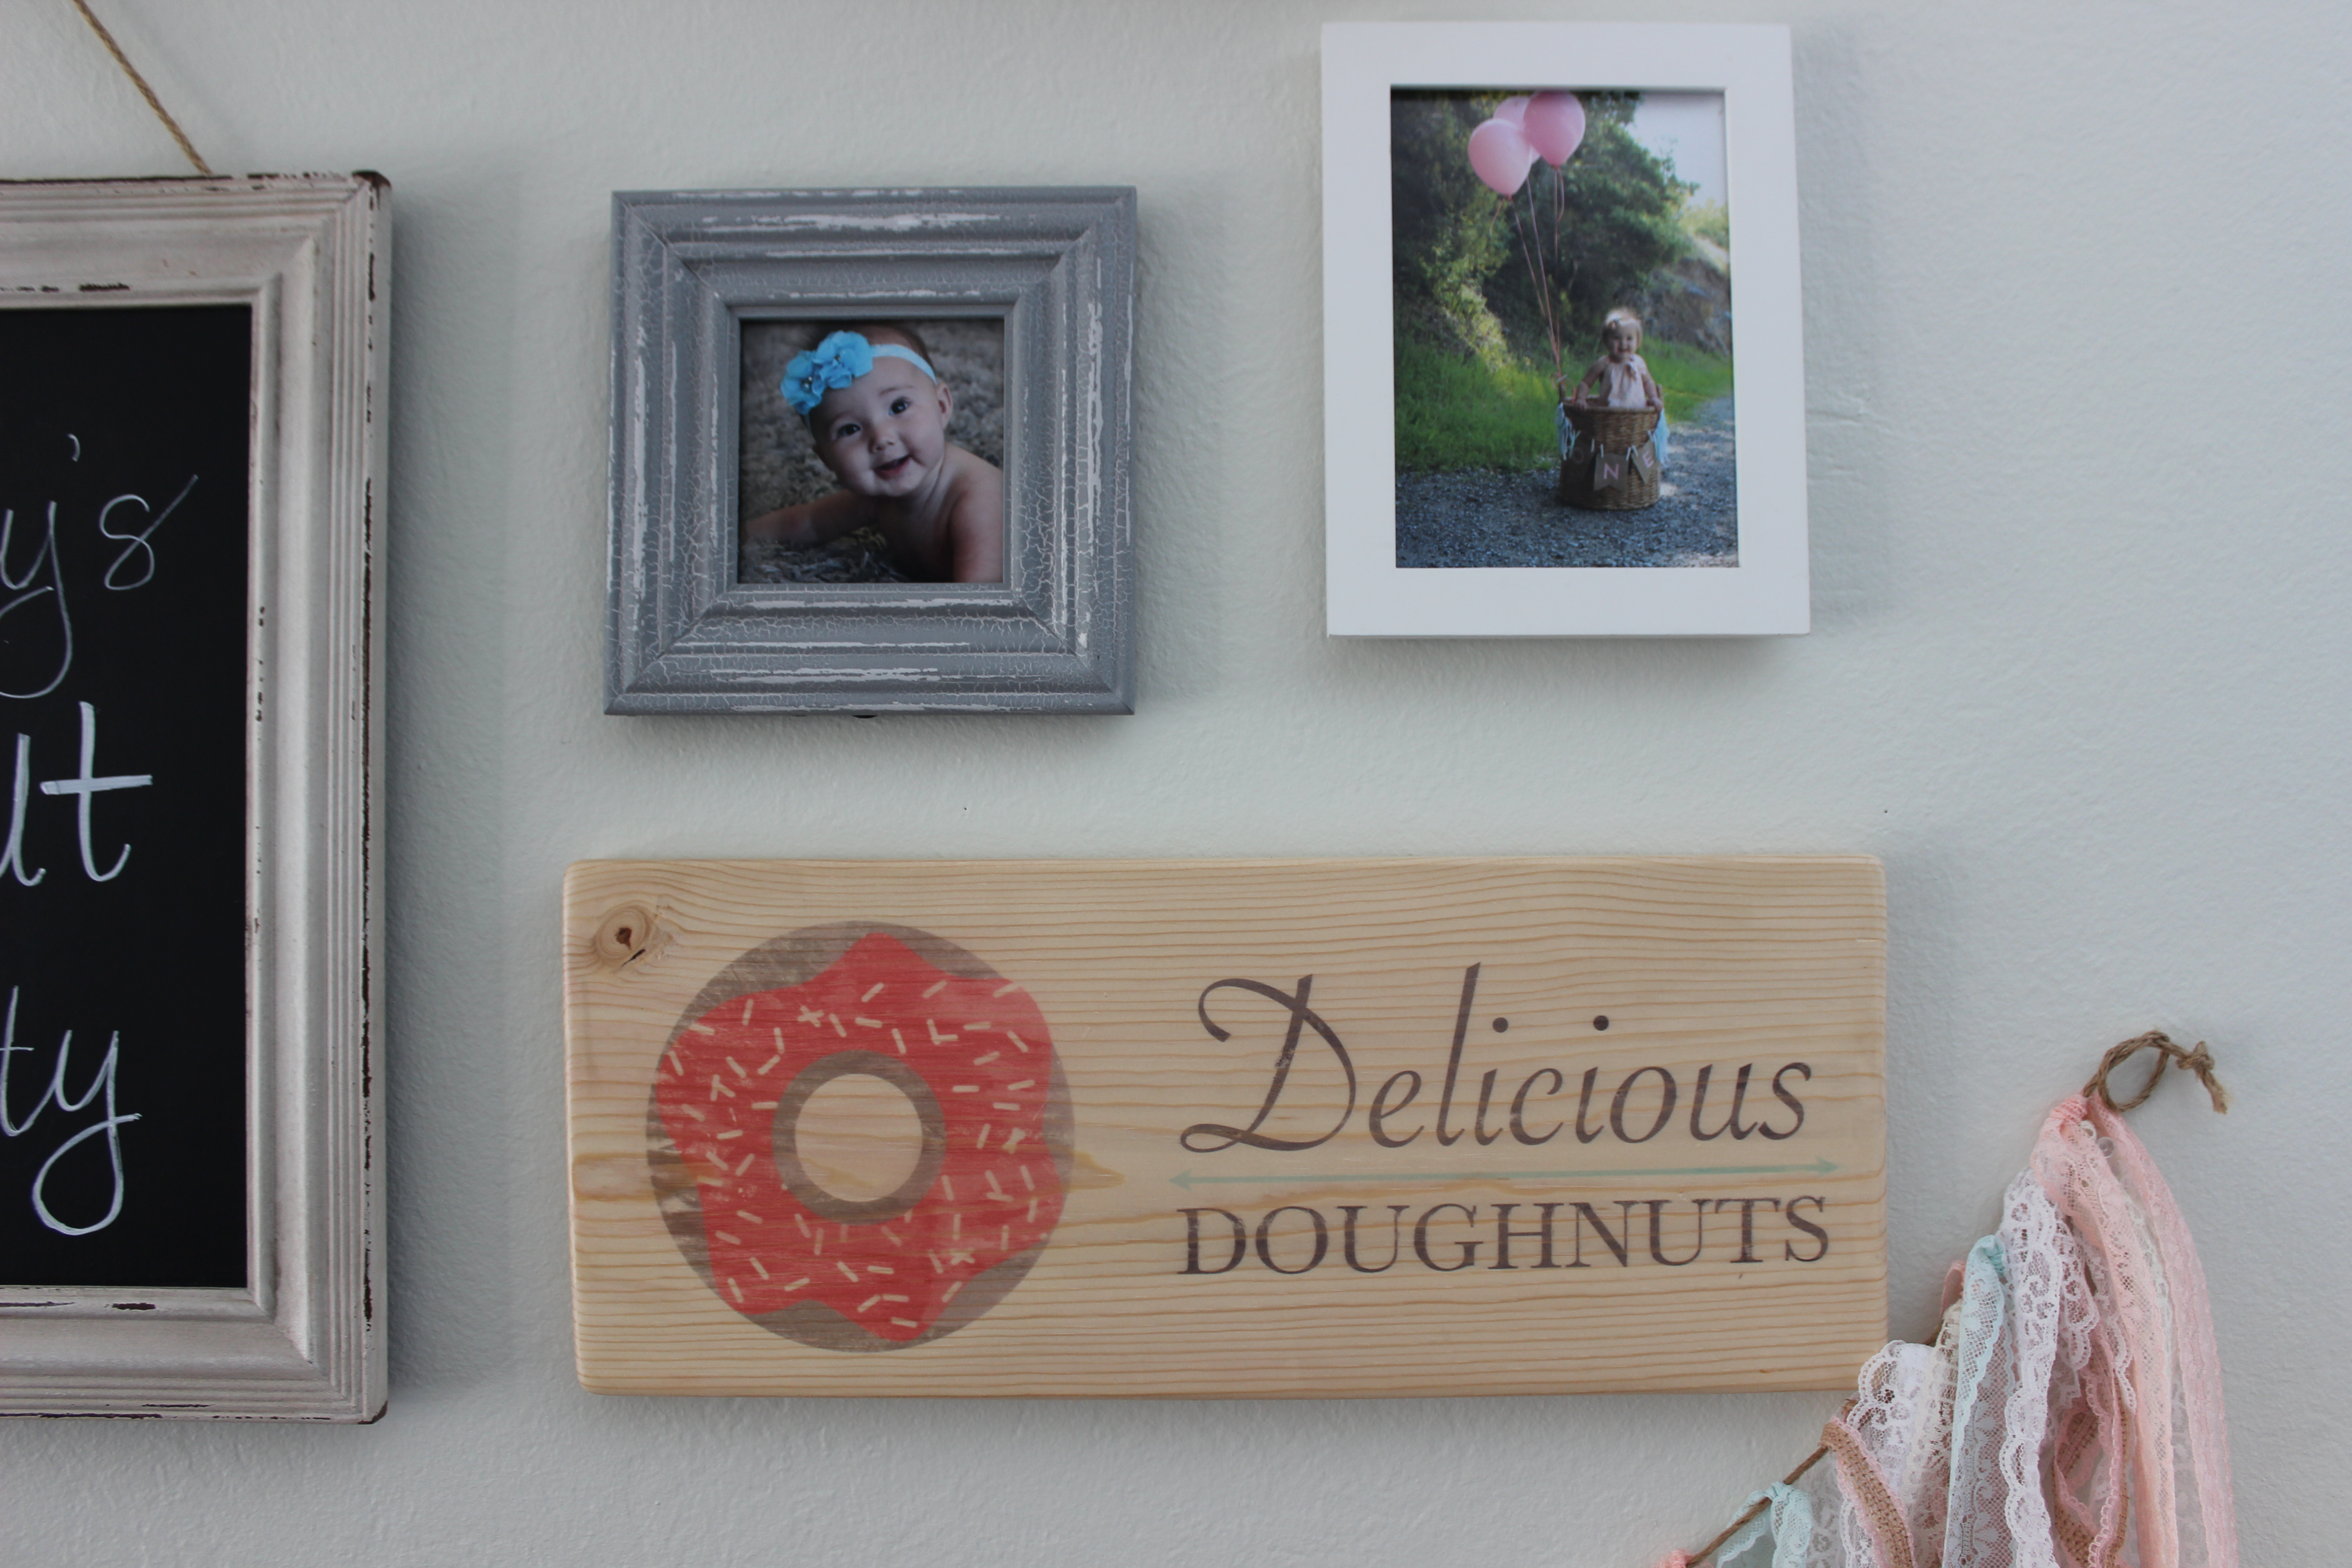
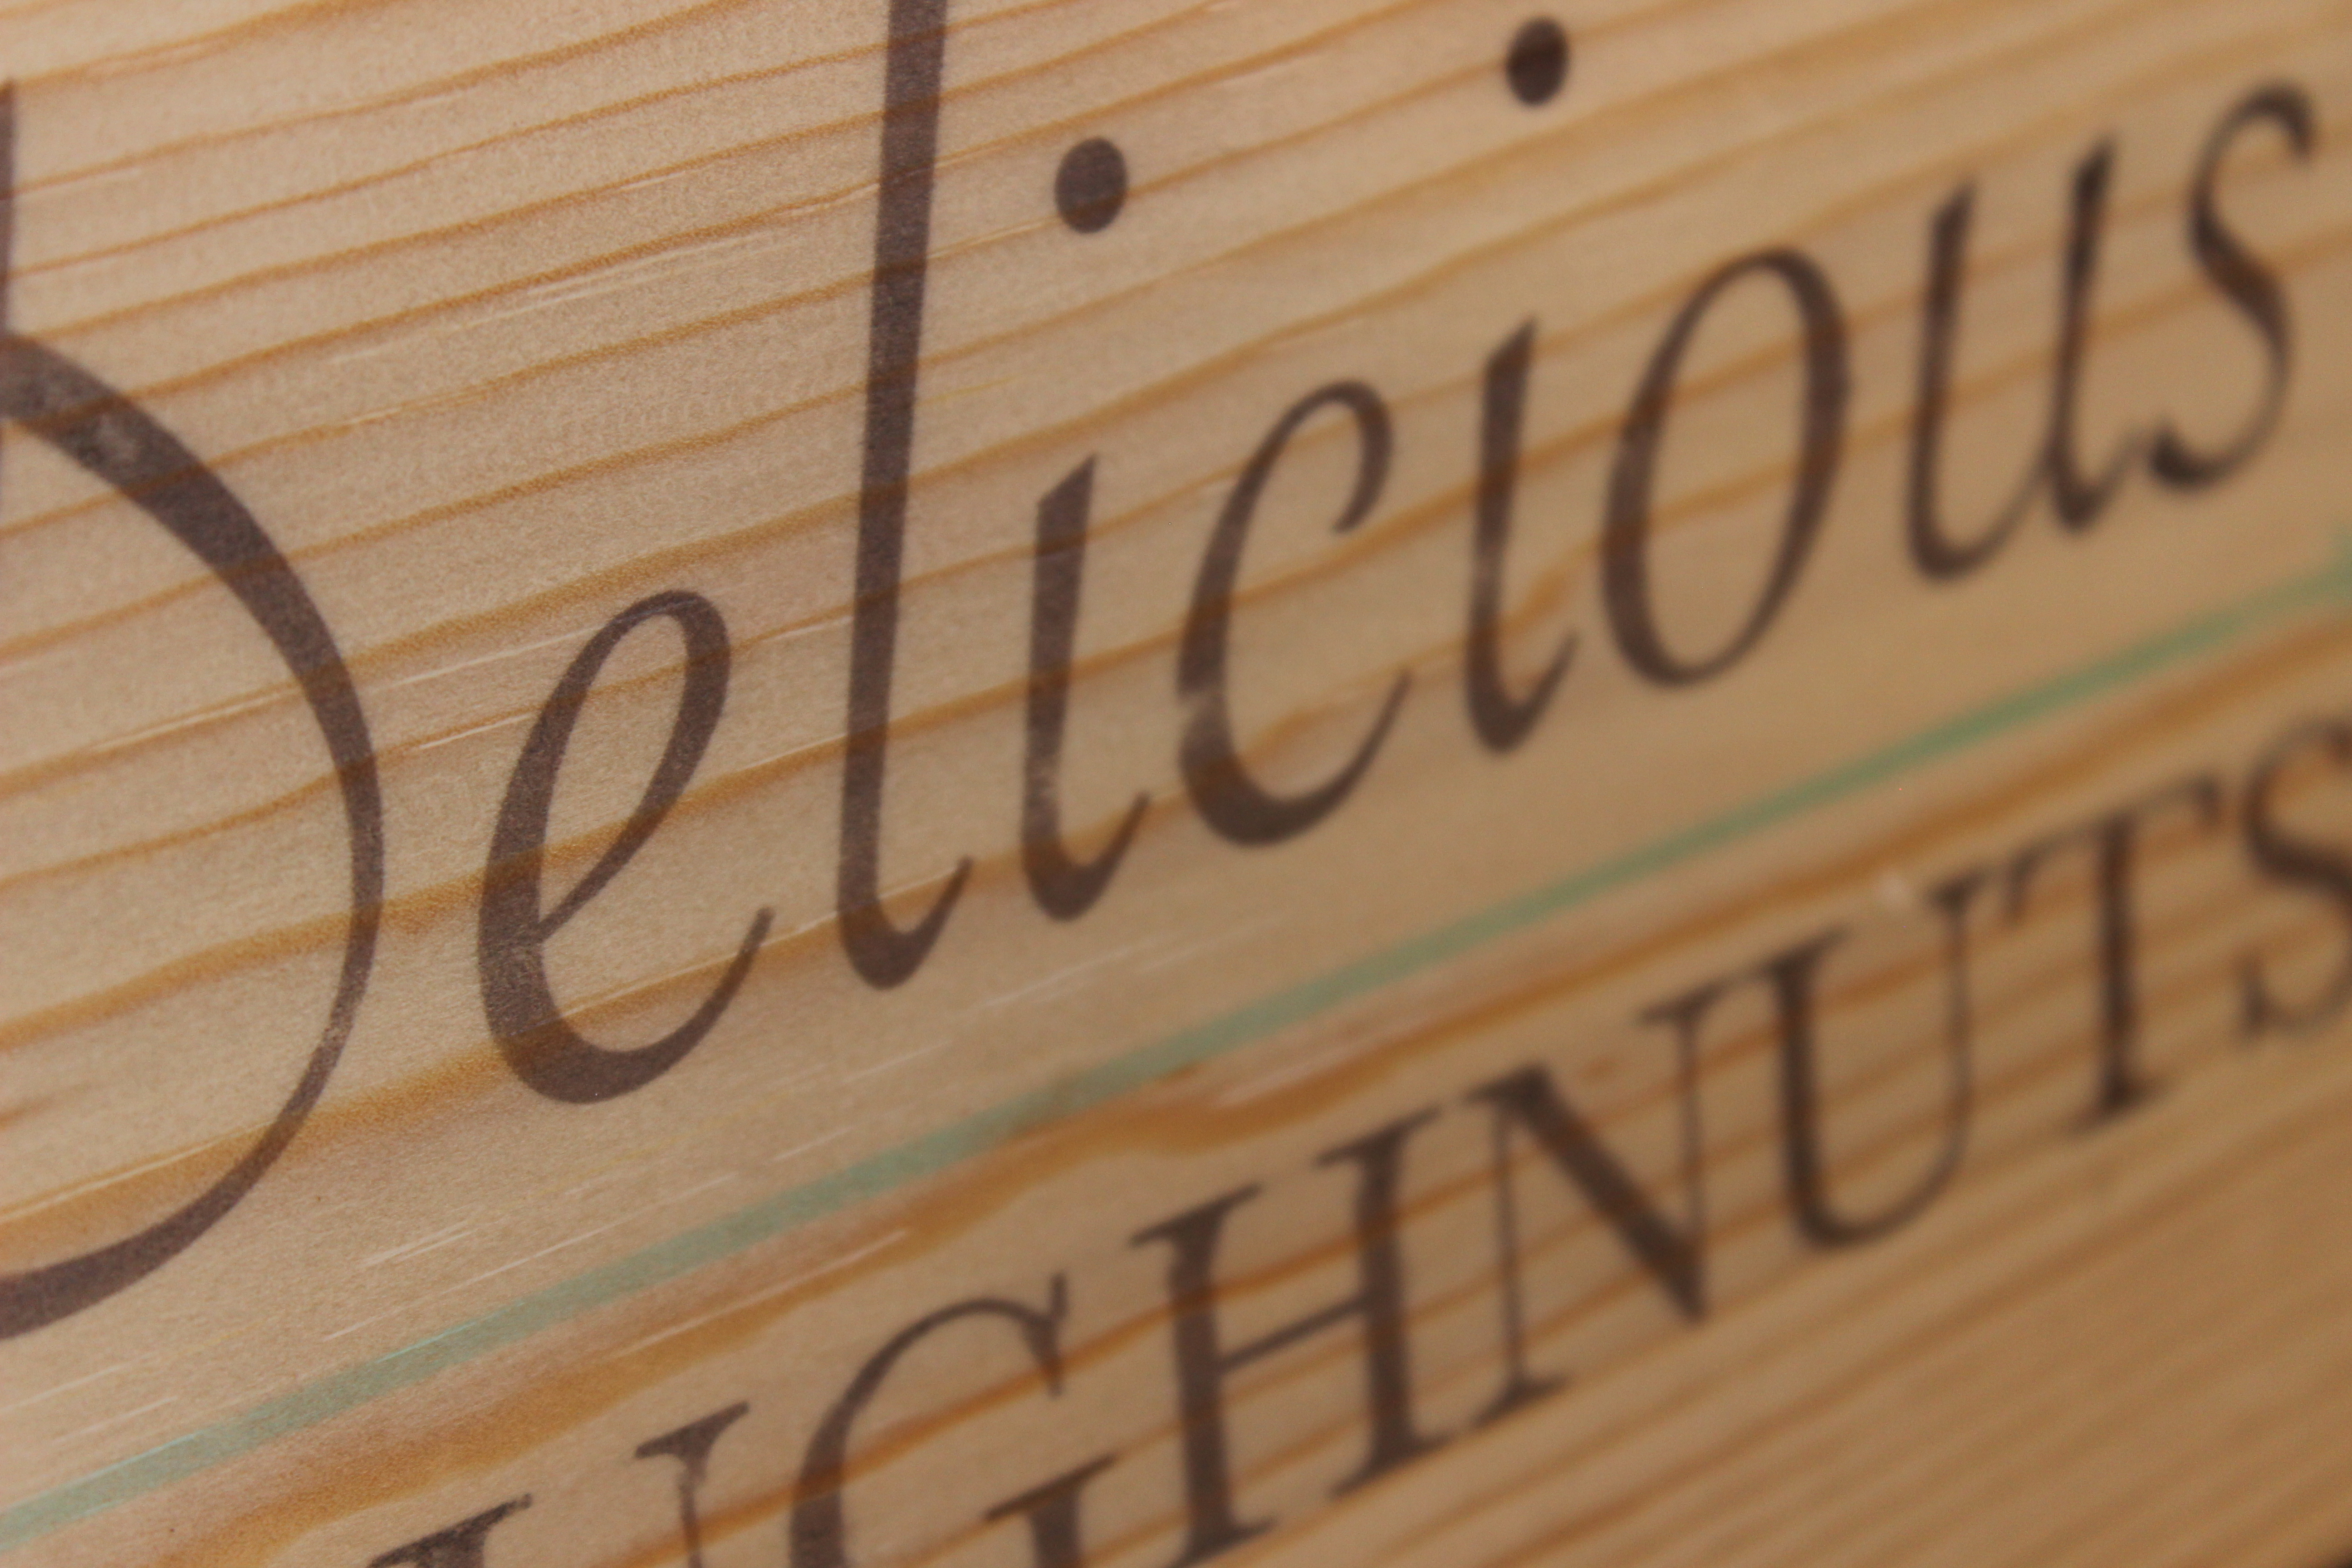
Here are just a few projects where I’ve used this technique


no matter what i do the ink runs.Can you tell me what im doing wrong.
LikeLike
Hi Pam. Sorry you’re having trouble. Is your wood unfinished? If it already has a coast of finish on it, that could prevent it from absorbing the ink. Or do you mean that your ink runs when it’s being printed on the wax paper? Hope I can help.
LikeLike
Looks great! Can’t wait to try this. Have you ever printed on recycled pallets?
LikeLike
Thanks, Victoria. I have not tried this on recycled pallets yet. One might have be careful when using coarse wood like that. The wax paper might not get entirely flush with the surface. Just something to think about.
LikeLike
Fabbylous idea. Thanks
LikeLike
Does this process work with laser printed material?
LikeLike
Hi Gary. To my knowledge, this would not work for laser prints. You’ll need good old fashion ink to transfer on to the wood, and laser printing uses toner.
LikeLike
With laser printers you can print the image flipped horizontally, just like in this article, and then lay the toner side sown on the wood and iron it with a clothes iron. It does pretty much the same thing seen here. The heat from the iron causes the toner to transfer to the wood the same way the toner transfers to the paper while it’s in your printer.
LikeLike
Sounds interesting! Test it out and let me know how it goes.
LikeLike
[Edit: fixed a typo] With laser printers you can print the image flipped horizontally, just like in this article, and then lay the toner side down on the wood and iron it with a clothes iron. It does pretty much the same thing seen here. The heat from the iron causes the toner to transfer to the wood the same way the toner transfers to the paper while it’s in your printer.
LikeLike
Did this today! Took a few changes in printer settings. Photo or Presentation worked better because it slows the inkjet printer down and didn’t have as many ink globs. I did two B&W photos. Noticed I needed to lighten up the exposure more than I would normaly to print. The wax paper was way too flimsy so I tried some parchment paper but it is a little porus and ink dried a bit. Then I remembered I had some waxed stencil paper which is heavy like card stock. Waxy on one side, glossy on the other. This worked well. I think freezer paper would also work well. I tried on a pine board. It was ok but wood was too grainy and yellowish. Tried on Birch plywood and it was much better. Sanded both before. Haven’t done a top coat since I was just testing. I am going to make a few of these for Christmas gifts.
NOTE: I happen to have an HP Photo type printer so the ink is actually more stable than standard jet printer inks. I tried wiping it off the wood after it dried and it would not come off!
LikeLike
Great to hear Christine and thank for sharing!
LikeLike
I did this with a photograph. I tried with the waxed paper first. It was ok but did tend to get blobs of ink on the waxed paper that transferred to the wood. I tried parchment paper but it absorbed some of the ink. Then I found some waxed stencil paper that was stiffer in my stash of junk. It worked great!! I can also clean it off and reuse it! I did put my printer on Presentation print setting and did an ink jet cleaning before I did a final test. My printer is an HP photosmart which uses separate cartridges for each color and the ink is photo quality so it is permanent on paper.
LikeLiked by 1 person
I wanted to stain before transferring but I get that an oil based product won’t let the ink absorb. Have you ever stained with anything water based/ natural coloring like coffee?
LikeLike
Hi Kate. Yes – I usually use water-based stains and in this case, I was actually using a solution of steel wool dissolved in vinegar. I would recommend staining, transferring the wax paper print, then sealing the wood with a lacquer or varnish. If you want to see some great natural stains, check out this video: https://www.youtube.com/watch?v=PhjXC8A-cRs
LikeLike
When printing on the wax paper, do you print on the shiny side or the dull side of the wax paper?
LikeLike
Good question, Bill. I always used the shiny side. Can’t say I have a scientific reason as to why – I just assumed that the shinier side would repel the ink best. Try both and let me know what happens.
LikeLike
Have you tried doing pictures or portraits yet? Curious if something with that much detail would work
LikeLike
You can certainly try. I noticed that super-detail images can get a little cloudy as the ink is absorbed by the wood. That might the look you’re going for and it can look pretty cool. Otherwise, try to keep your imagery pretty simple.
LikeLike
Can you use this technique on painted wood?
LikeLike
Hi Penny. The ink will probably have hard time absorbing into the paint, but test it out first. Glossy and latex paint especially might be troublesome as the surface might note “grip” the ink and absorb it. Instead of paint, you might want to look into staining the wood to achieve the background color you want. There are even white washing type of stains if you’re looking to make the wood really light. Hope that helps.
LikeLike
Good afternoon, I would like to know in which year I should buy a printa as the oldest model. Because I have two one like 5 years HP 6520 once gives and other not from, it is now that I bought the ink is worse, and the other Espon WorForce WF-3640 is that it does not give anything at all, the paper gets curled up is stuck inside the Printa.eu I was thinking of buying another one I would like to know which one I should buy. Without any further obligation.
LikeLike
Hi Maria. I’m not sure the year of the printer matters as much as the feed type. Some printers move a little too quickly and can bind up the paper. I don’t have any solid advice here because every printer is different – sorry! Good luck!
LikeLike
Well presented and explained, i will use this as i have to make some wine boxes as presents thank you.
LikeLike
Thanks William!
LikeLike
My printer keeps chewing up the wax paper
Will sticking it to standard printer paper allow the wax paper to go through the printer correctly ?
LikeLike
Yes! Great idea.
LikeLike
I just stick the wax paper to regular copy paper with a glue stick, run a thin glue line along the top, this allows the printer to pick up the paper very easy and then just take off the copy paper and discard.
LikeLike
Great tip!
LikeLike
Will this technique work on a piece of wood that is painted? Say I wanted to transfer gold text onto a piece of wood that is painted purple?
LikeLike
Doing this on painted wood will not work very well. The ink color from the transfer will also blend with the color of the surface. For example, a yellow-ish wood that will make blue ink look a bit green-ish.
LikeLike
I used freezer paper as the wax paper kept getting stuck if you use the freezer like I did just make sure you print on the shiny side as the other side won’t let you transfer the image onto the wood just an FYI
LikeLike
On your bottle opener, was it difficult to get the print to wrap around the edges of the wood? Did you have a technique to not move the wax paper print when pulling around the edges? It looks so flawless and cool.
LikeLike
Ha! Stupid question. The charcoal color is just the stain that you used…. Duh. Upon second glance, a light bulb went off…. LoL. Thanks for this tutorial, it’s really cool.
LikeLike
No worries. Good luck making your own!
LikeLike
I’m looking at printing wireless charging symbol in simple black ink and applying it to an unfinished piece of wood. After applying it, I wanted to stain (dark walnut on pine). Would an oil based stain work if I applied the stain on after transferring the symbol? (I wanted it as a way of indicating the “hidden” charging pad underneath the surface so being somewhat dull is the goal for this idea)
LikeLike
That should work as long at you lightly apply the stain and make sure the ink has enough time to dry.
LikeLike