When you go to a restaurant, I imagine you’ll ask for booth seating. But when you build your own banquette at your home, you’ll always have a cozy place to cuddle up to with your family for game night, dinner, or taking a quick coffee break from life.
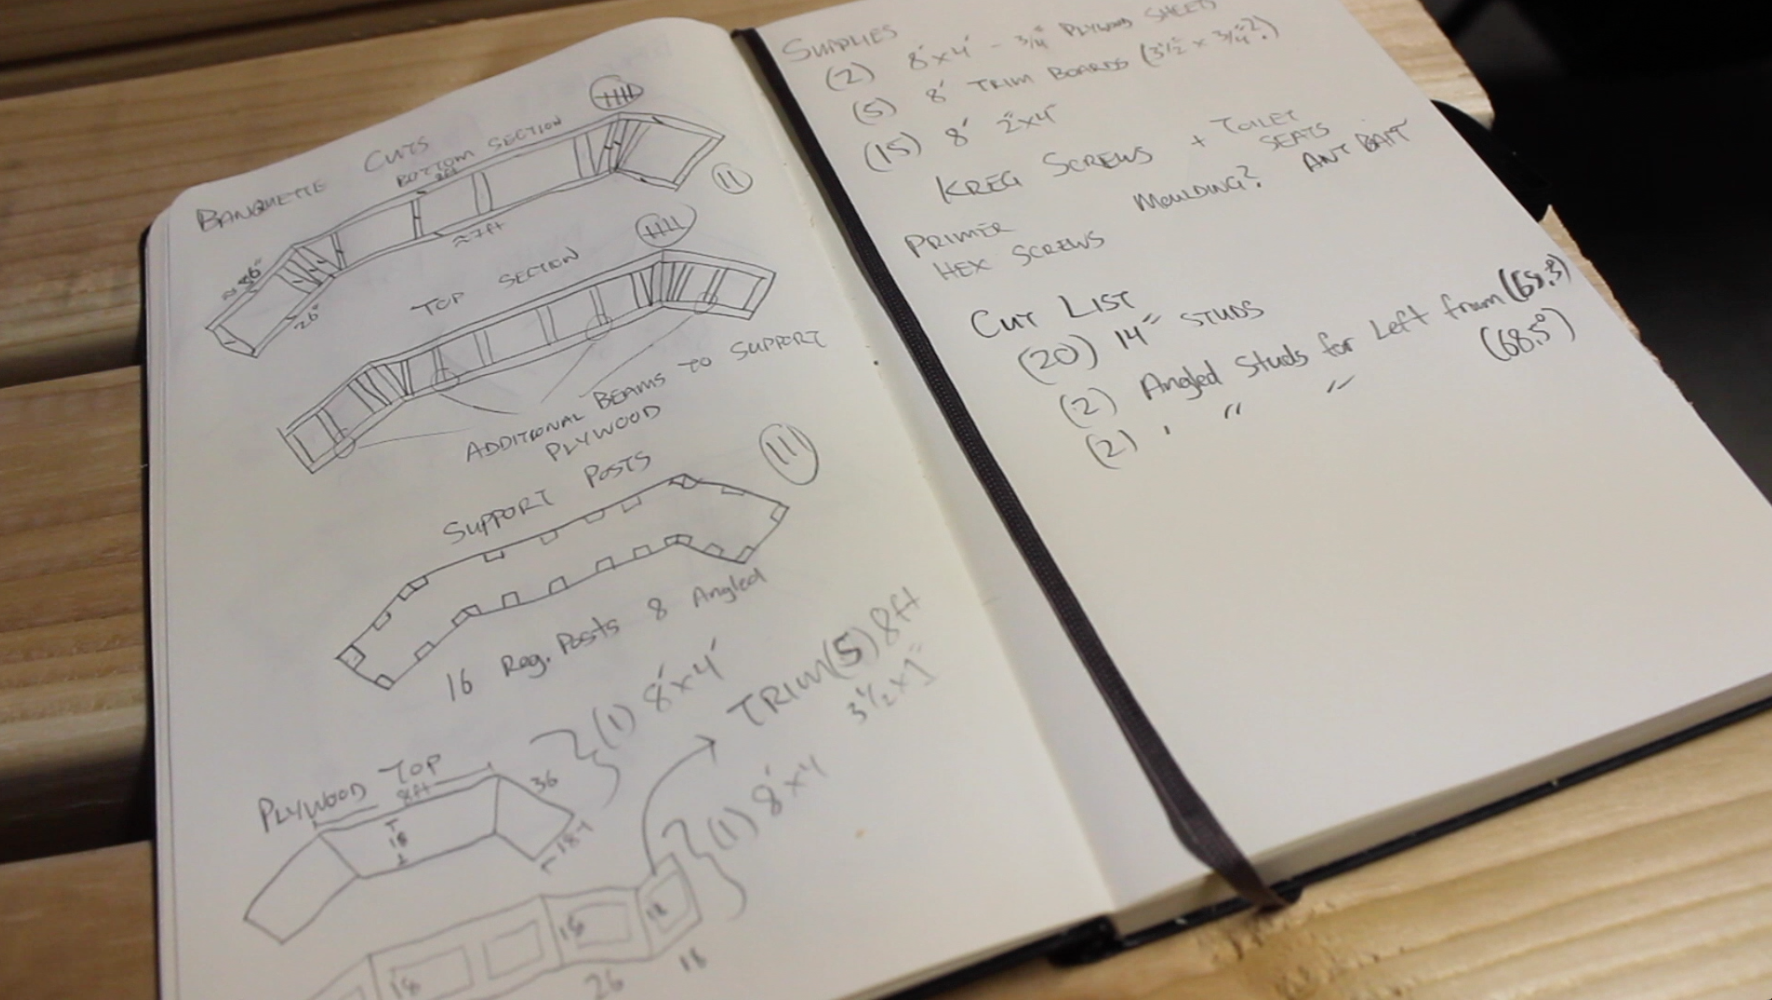
What you’ll need:
- 2 x 4 lumber to frame the banquette
- Cabinet-grade plywood
- Pine, board for trim pieces (I used 1 x 4’s)
- Primer and paint color of your choice
- Caulk to seal the edges of the banquette where it meets the wall and floor
- Lots of screws and nails (types and sizes just depend what you’re building)
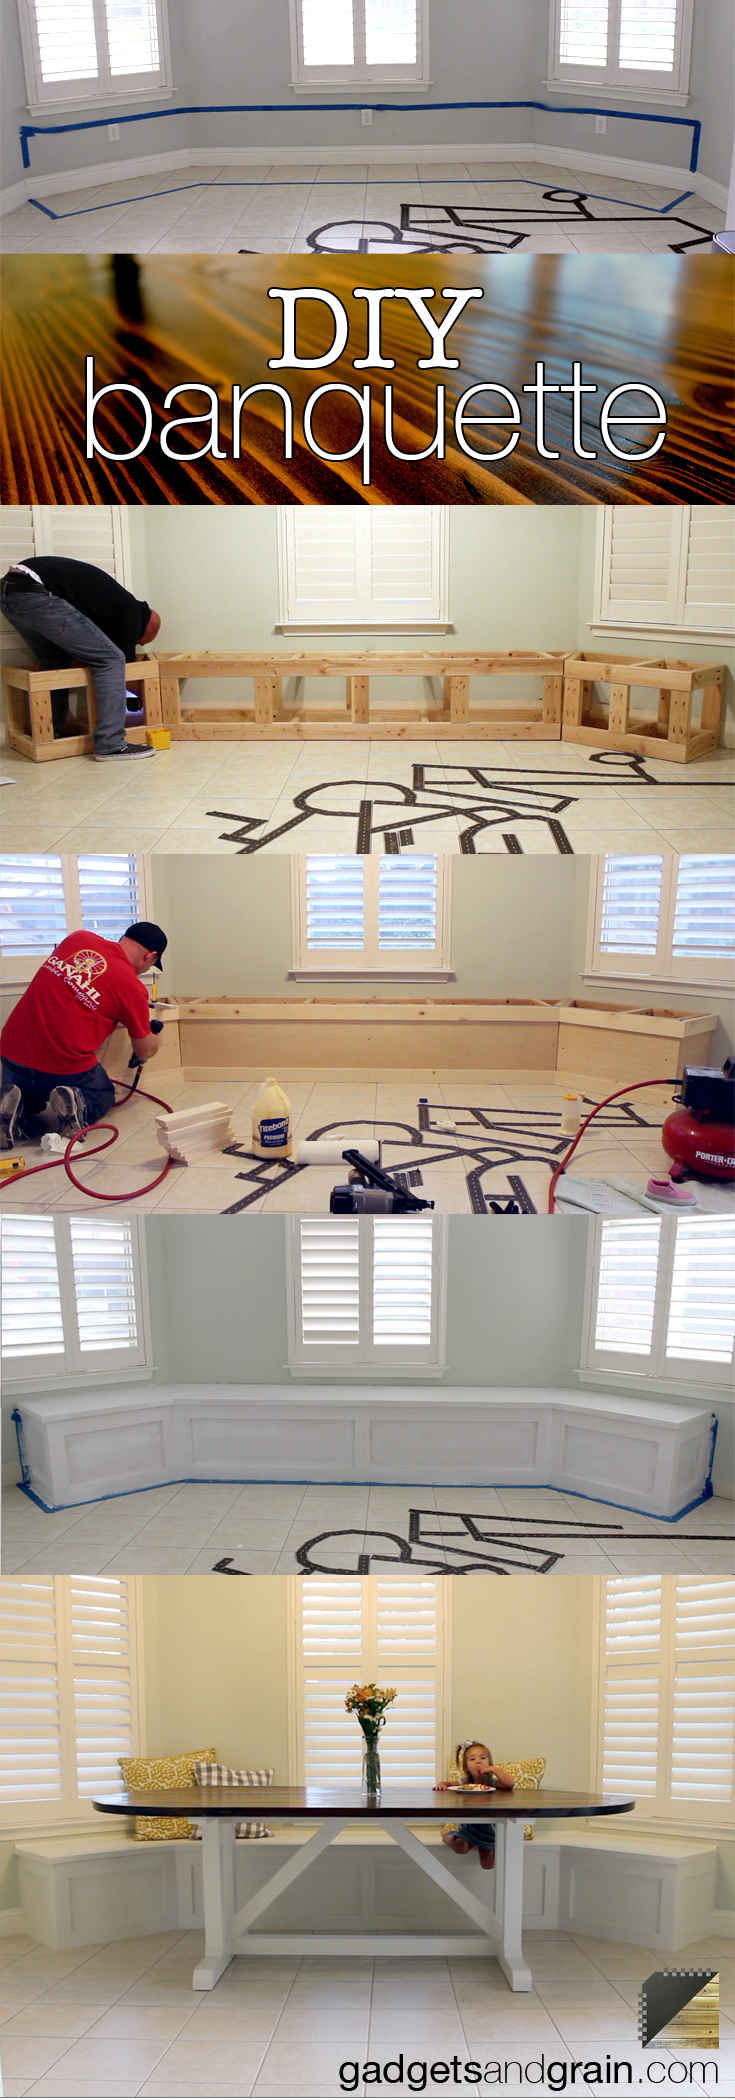
Building the Frame
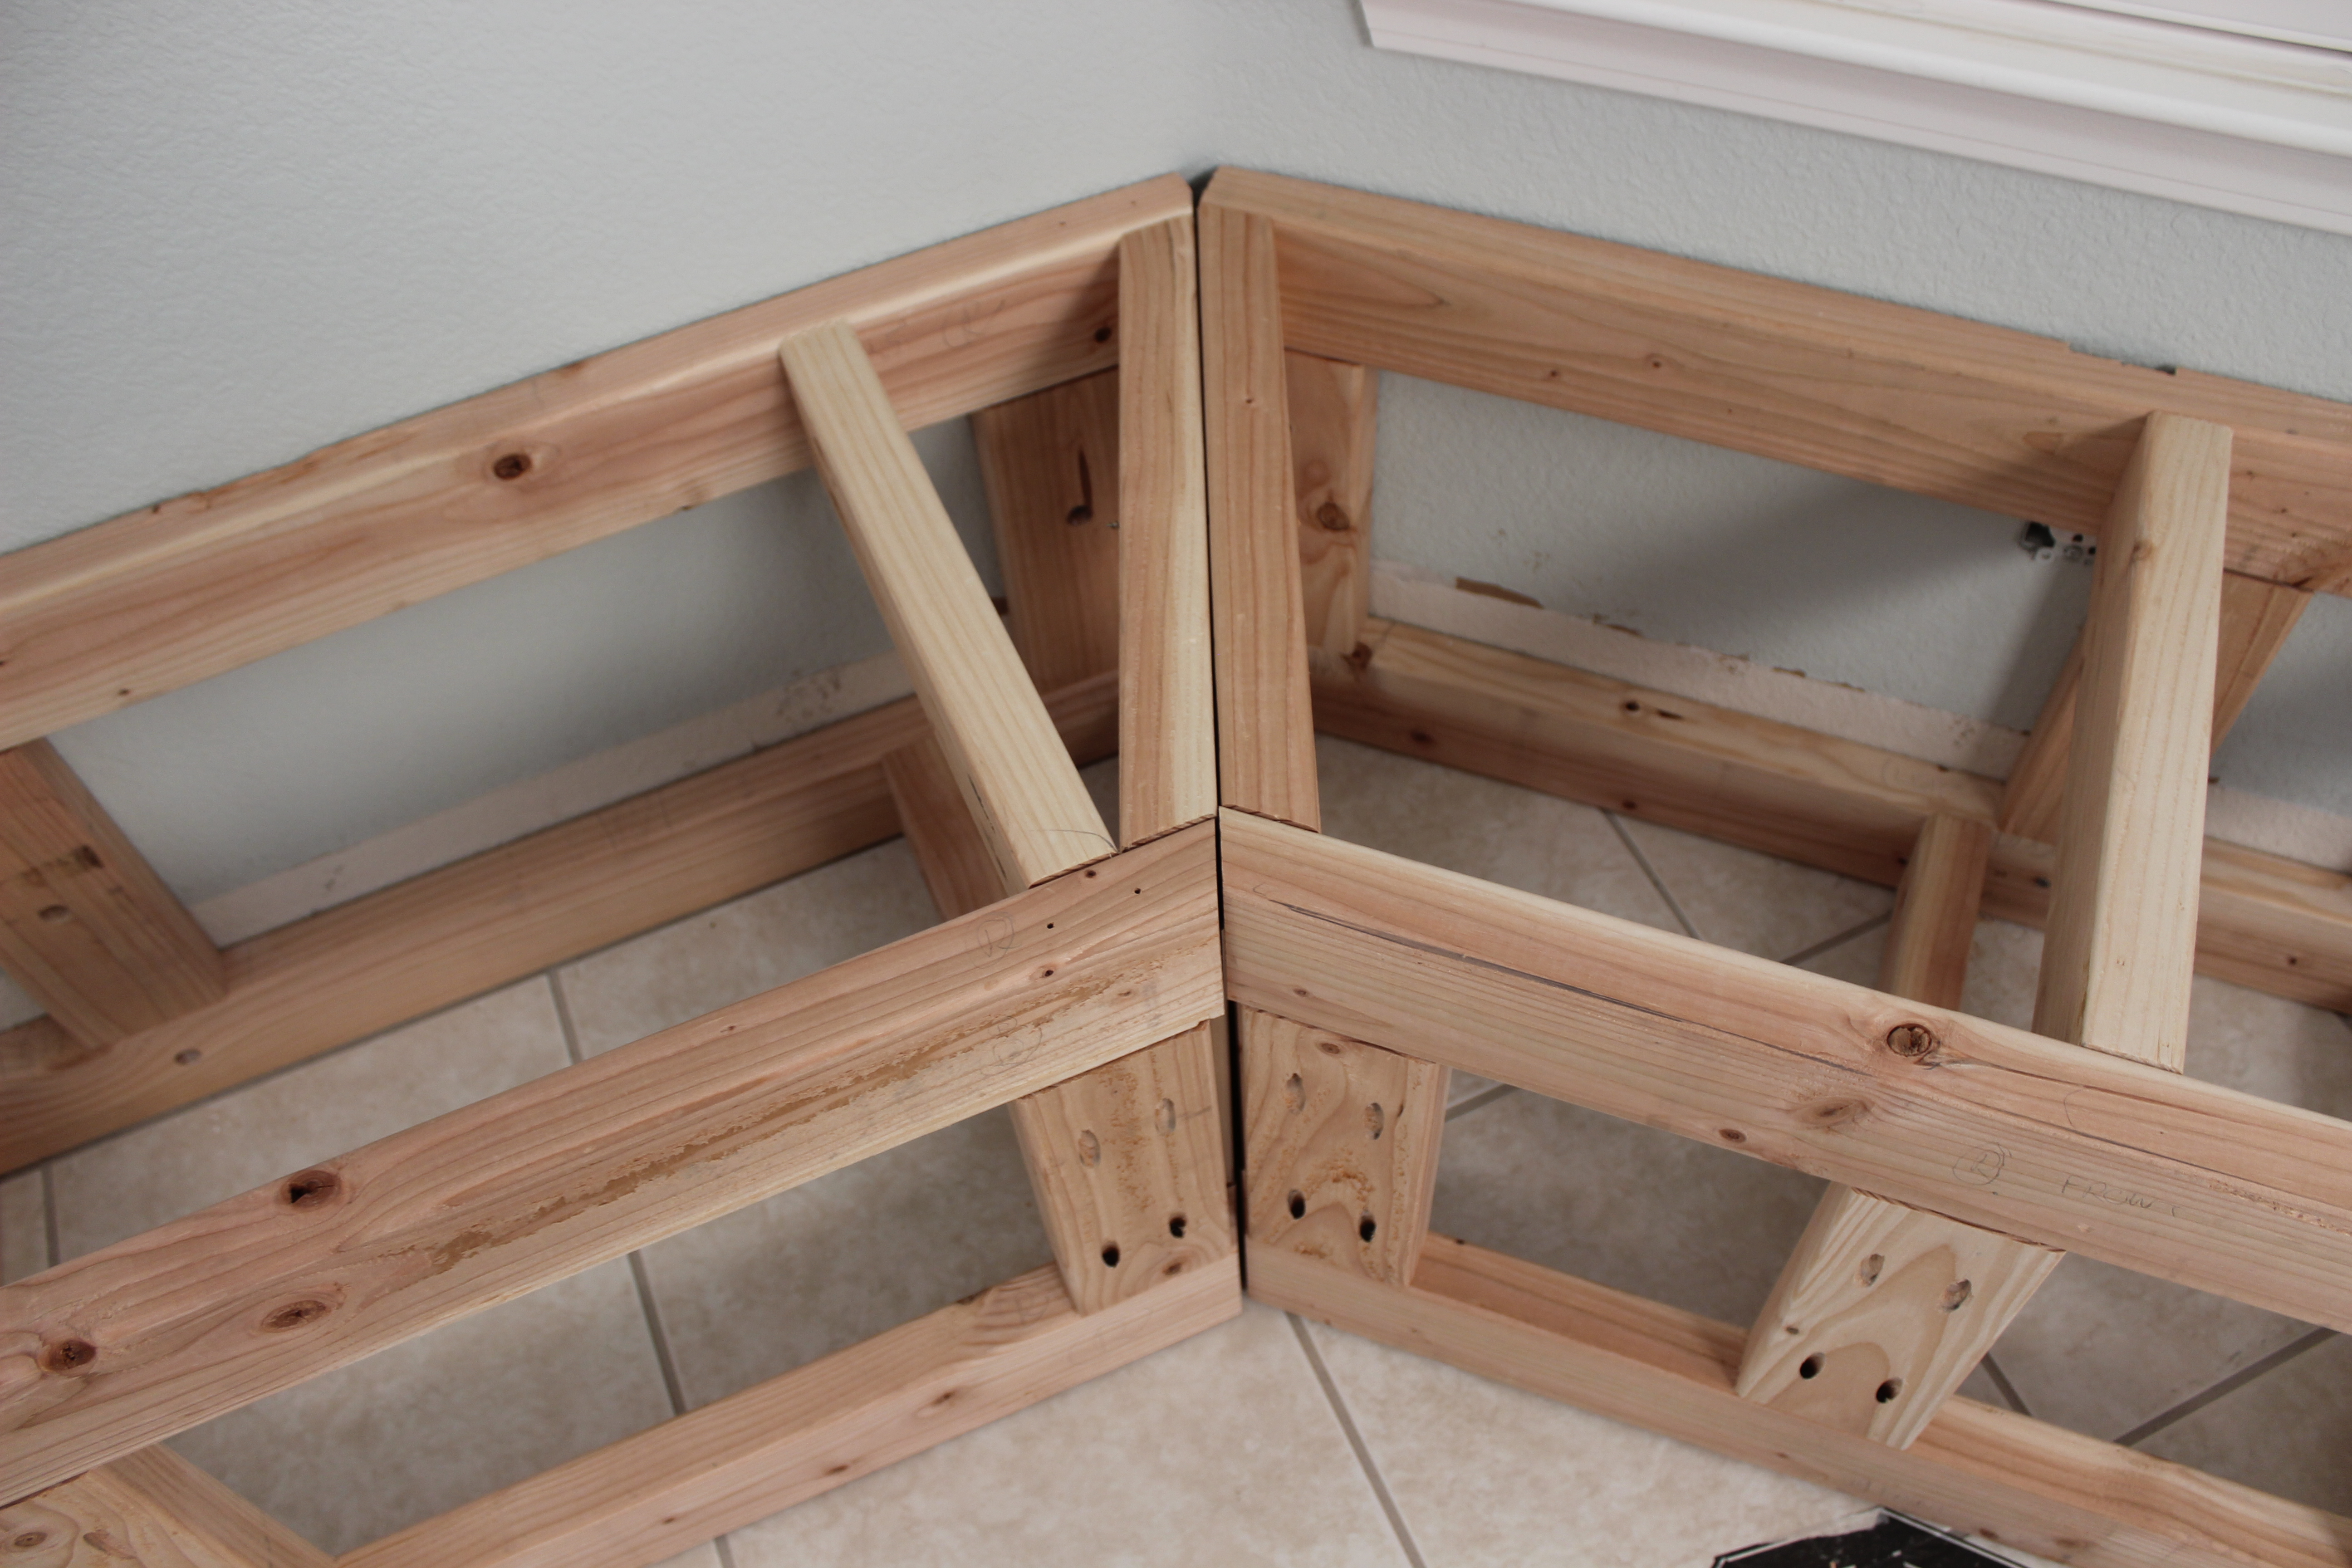
Building a banquette is rather straightforward, and it really starts with a solid frame. You’ll want to build something that can withstand years of jumping, sitting, nudging and pushing from all types of houseguests. I chose to build my frame as a standalone piece rather than mounting it – I didn’t want the strain from people sitting on the banquette to be directed on the walls of my house. Building the banquette this way also gave me greater flexibility in assembling the frame outside of the home.

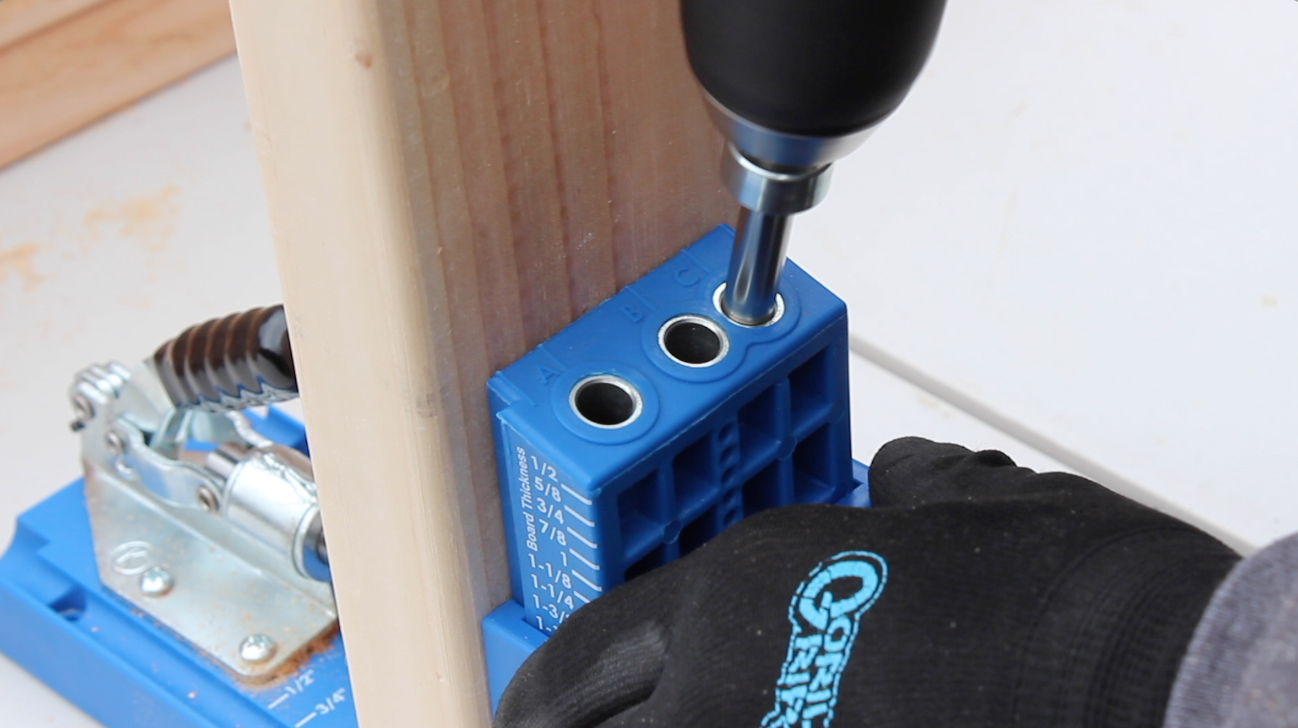
If you’re familiar with framing, you’ll know how pocket holes can really come in handy. They make for a really great joint between two pieces of wood. If you’ve never done pocket holes before, but you’re willing to build your own banquette I highly recommend buying the Kreg pocket hole jig. Their jigs that start as little as $20, but for a project like this where you will be drilling dozens of pocket holes, buying the hundred dollar Kreg Jig
it will pay for itself after one project – trust me. And look at it this way: if you do one project like this with the K-4 jig, you will most likely do another.
For this project I measured the size of the banquette I wanted, and then translated that to the dimensions of the frame. This frame was built in the three different sections: the center, the left, the right. For many homes, you might be building your blanket into a 90° corner, and that is rather straightforward. In my case, my nook is basically one half of a hexagon, so to calculate the angles I used a digital bevel gauge so I could get a basic idea of how to cut my 2 x 4’s and design frame.
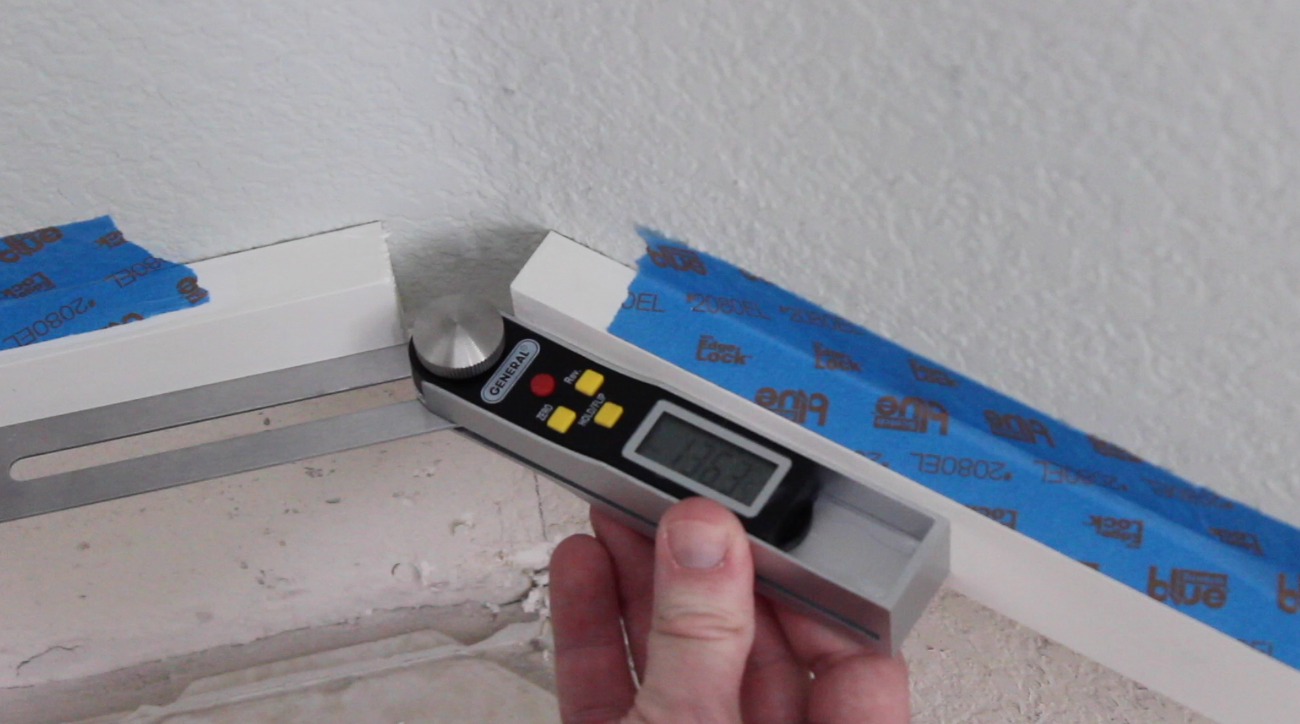
If you are building a banquette into a room that has non-90-degree angles (like mine), you’ll always want to divide the room angle by two so that your frames and sections will have equal depth.
For the height of the frame you’ll also want to account for the thickness of any boards are going to place on top of the seating surface. In my case I wanted a seating height of 19 inches. I knew my plywood was going to be about an inch and a half thick, so that meant I needed to build the frame about 17 1/2 inches tall.
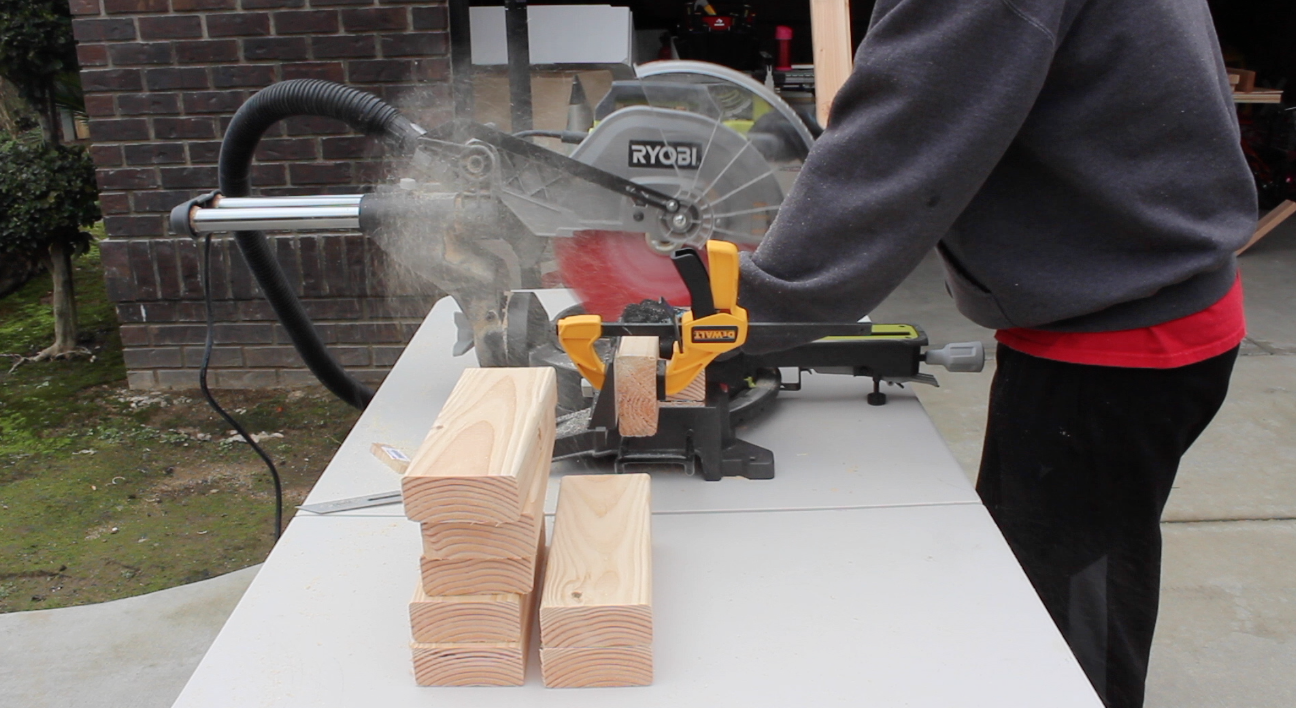
As shown in the video, there was plenty of cutting, measuring and drilling pocket holes to prepare the frame for assembly. Framing is pretty simple, so things come together pretty quickly, plus if you have the proper power tools such as a miter saw (mine is a Ryobi 12-inch sliding,compound miter saw), the job goes really quick. For repeated cuts such as the beams and posts of the frame, I highly recommend using a stop block when using your miter saw. This allows you to accurately and quickly make the same cut – over and over.
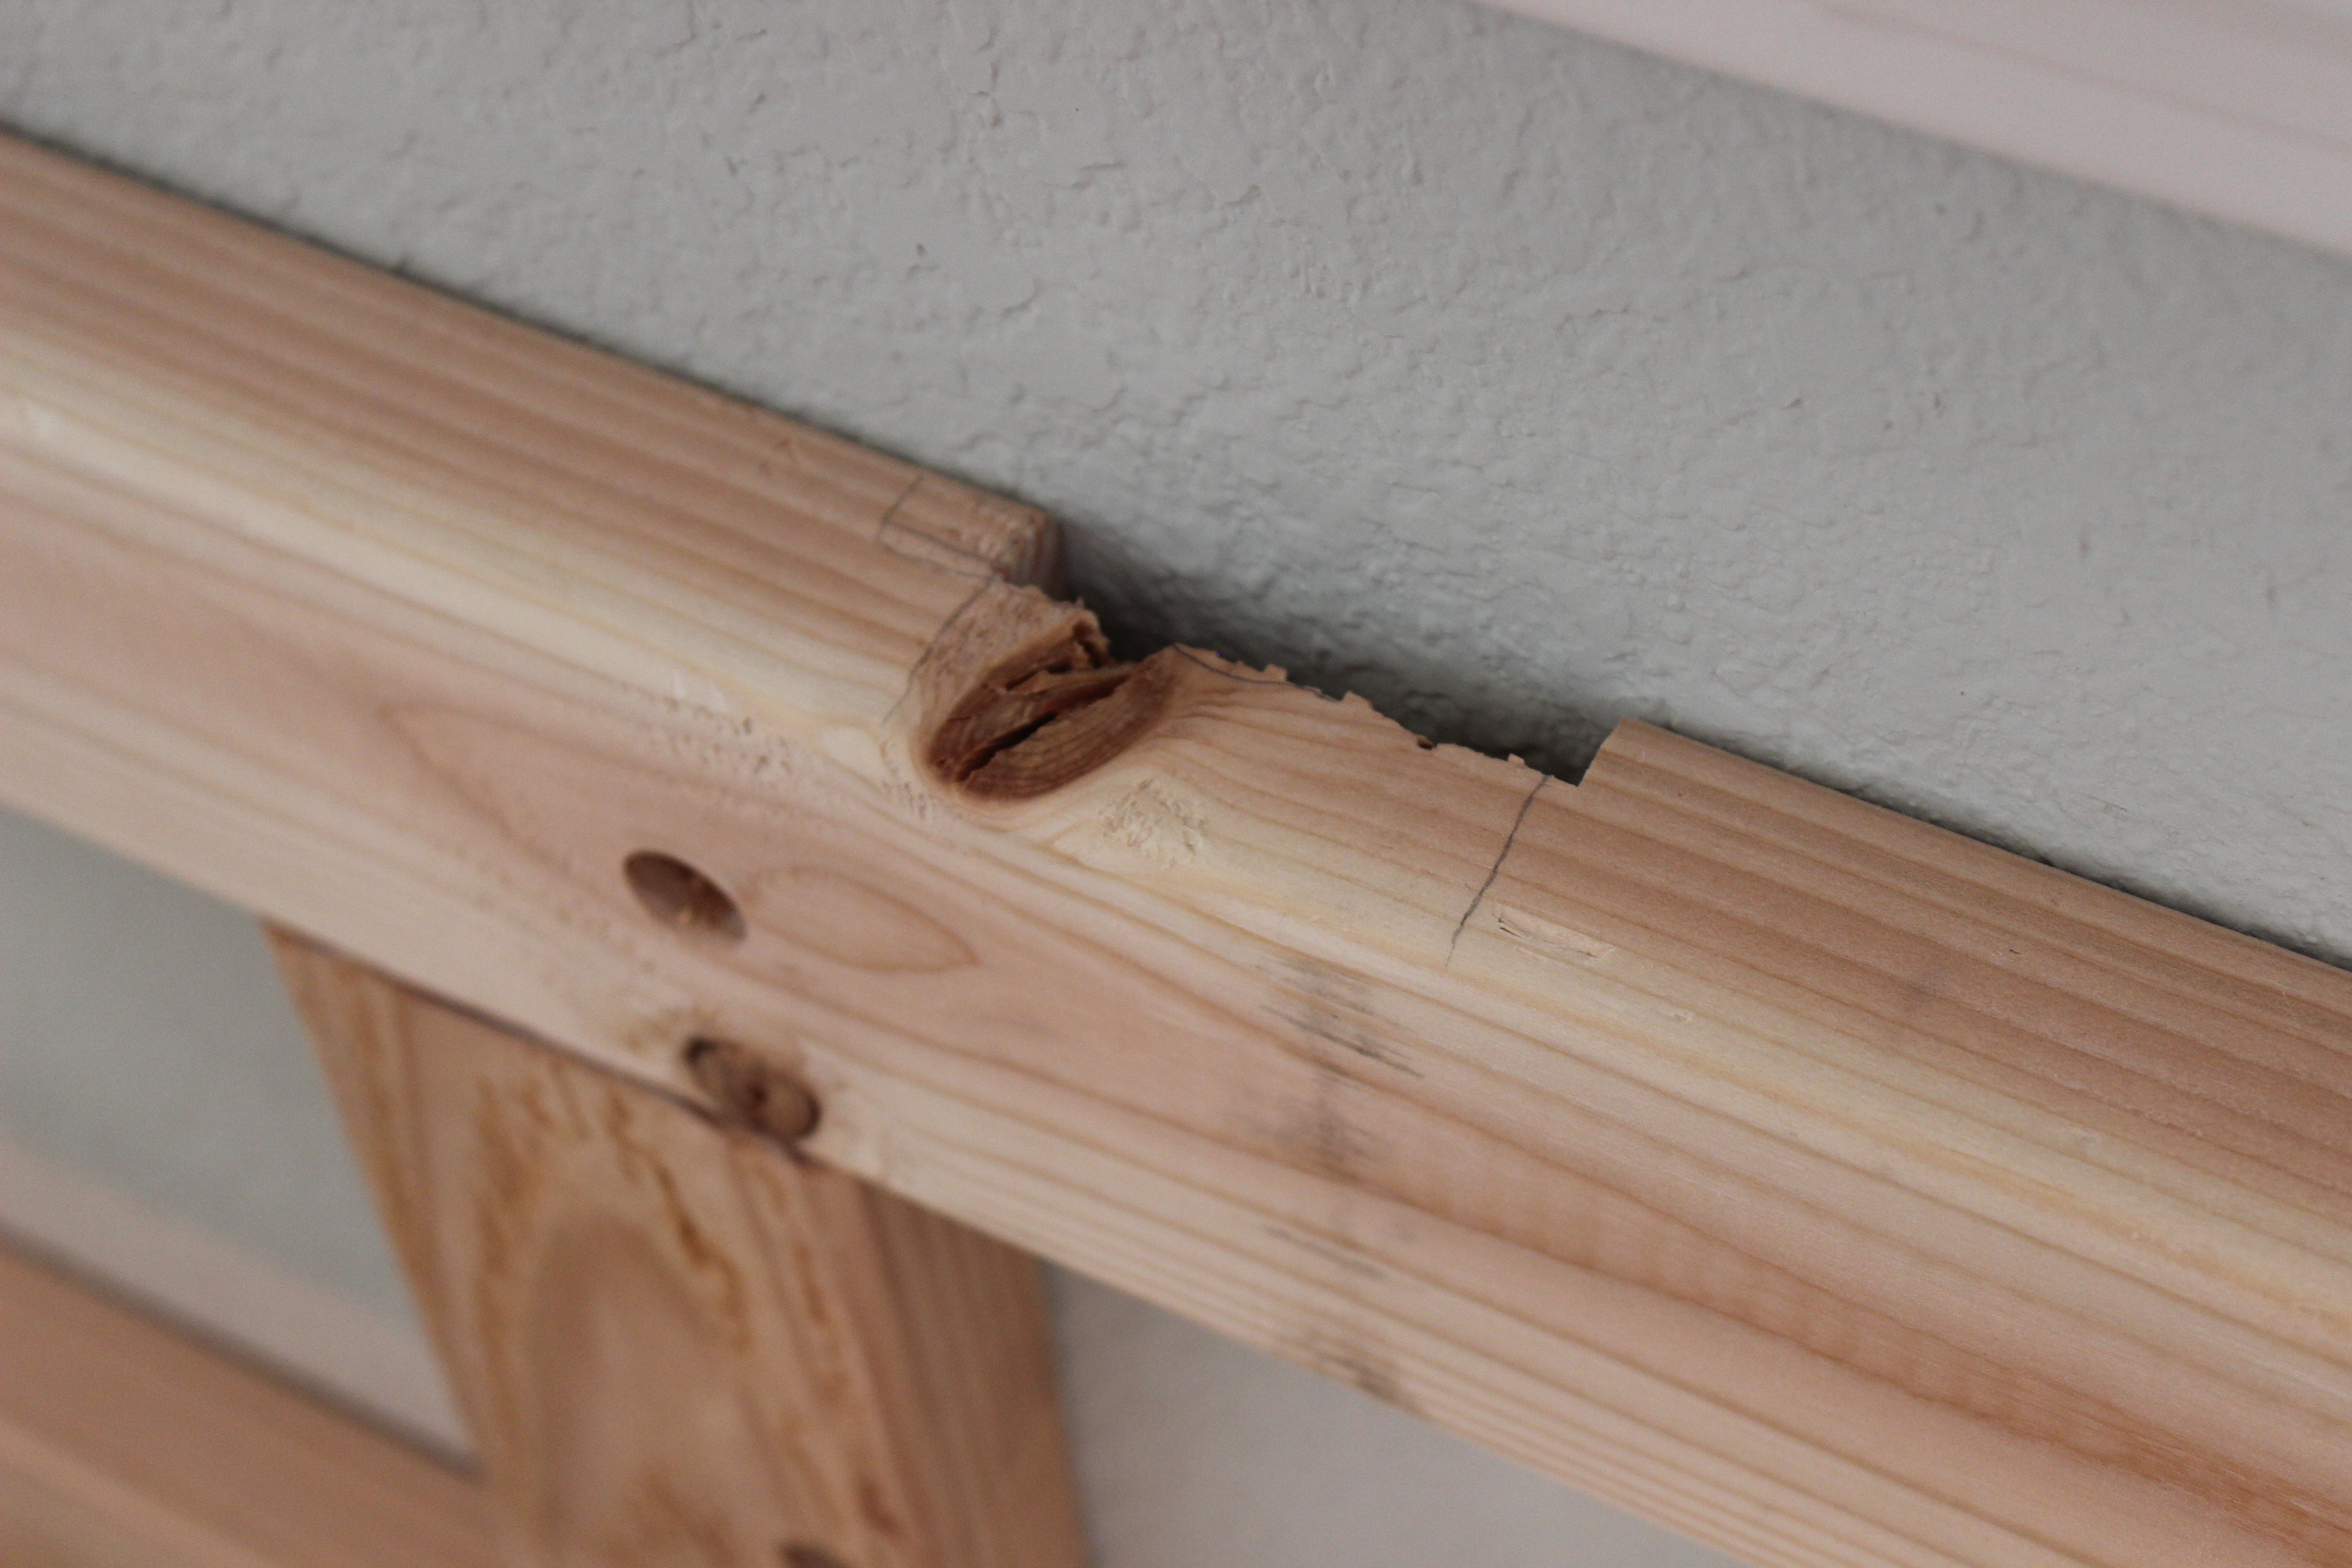
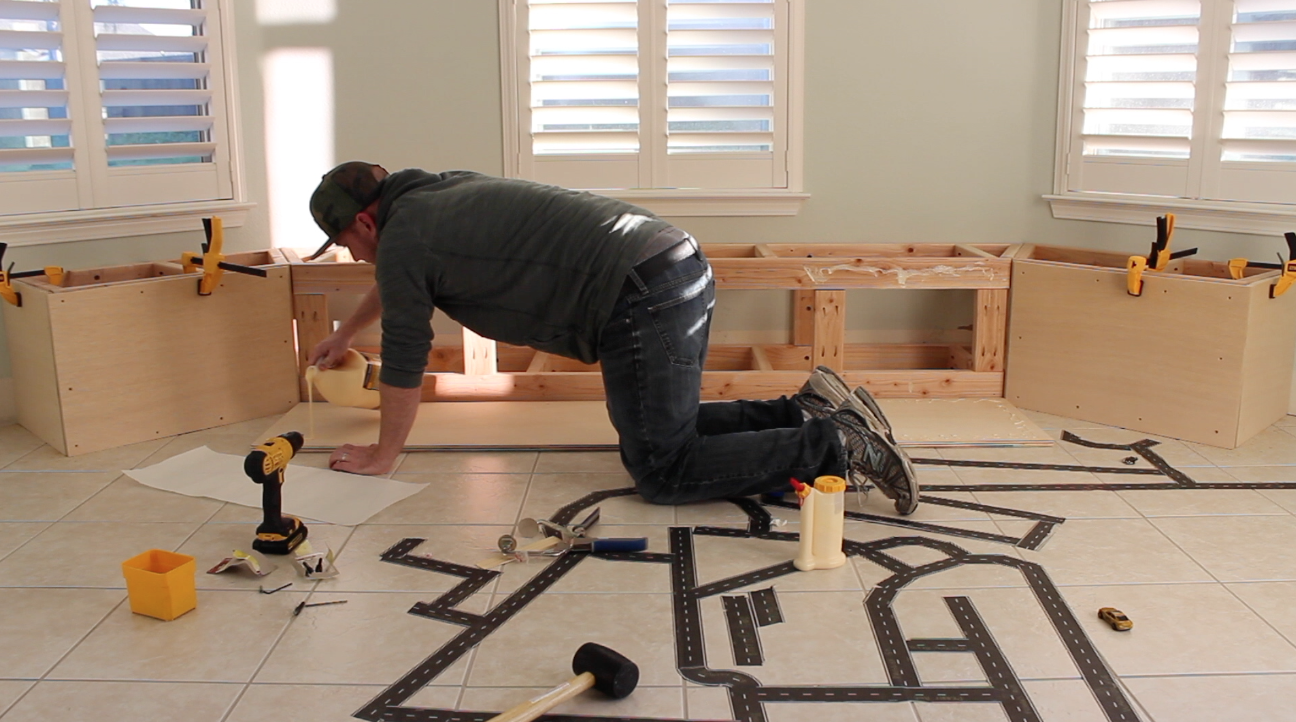
Once framing is complete you can take the whole project inside to secure it to the wall. In my case I use 2 1/2-inch screws to secure the whole frame into studs in my wall. I also screwed the sections together so it was extra secure once your frame is in place she can with your hand to make sure it’s nice and secure. Some electrical outlets were also covered up by the banquette, so I had to make some notches in the frame to keep it flush to the wall.
Cutting and Attaching Paneling
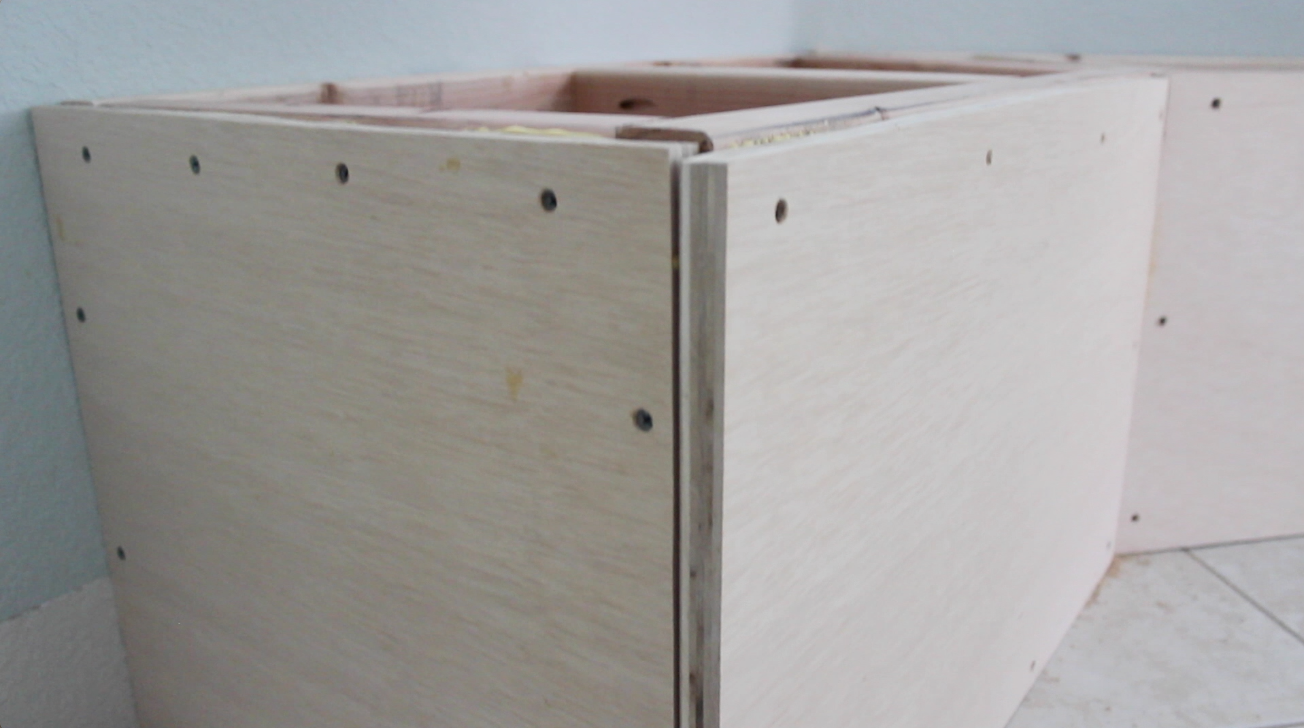
Next, I took measurements to find our how I should cut the plywood panels that would cover up the whole frame. I purchased really nice plywood that was very smooth and required very little sanding. I cut the plywood panels to size, pre-drilled holes for screws, and secured the panels to the frame with wood glue and screws – this thing is solid! I know – the glue is a little bit of an overkill, but I want this thing to last for many years, and not hear it start to squeak after a few years of use. Remember: wood glue is the best way to secure two pieces of wood together. When screwing the plywood into the frame, I made sure that my screws were in places that could be easily covered up with the trim pieces later in the build.
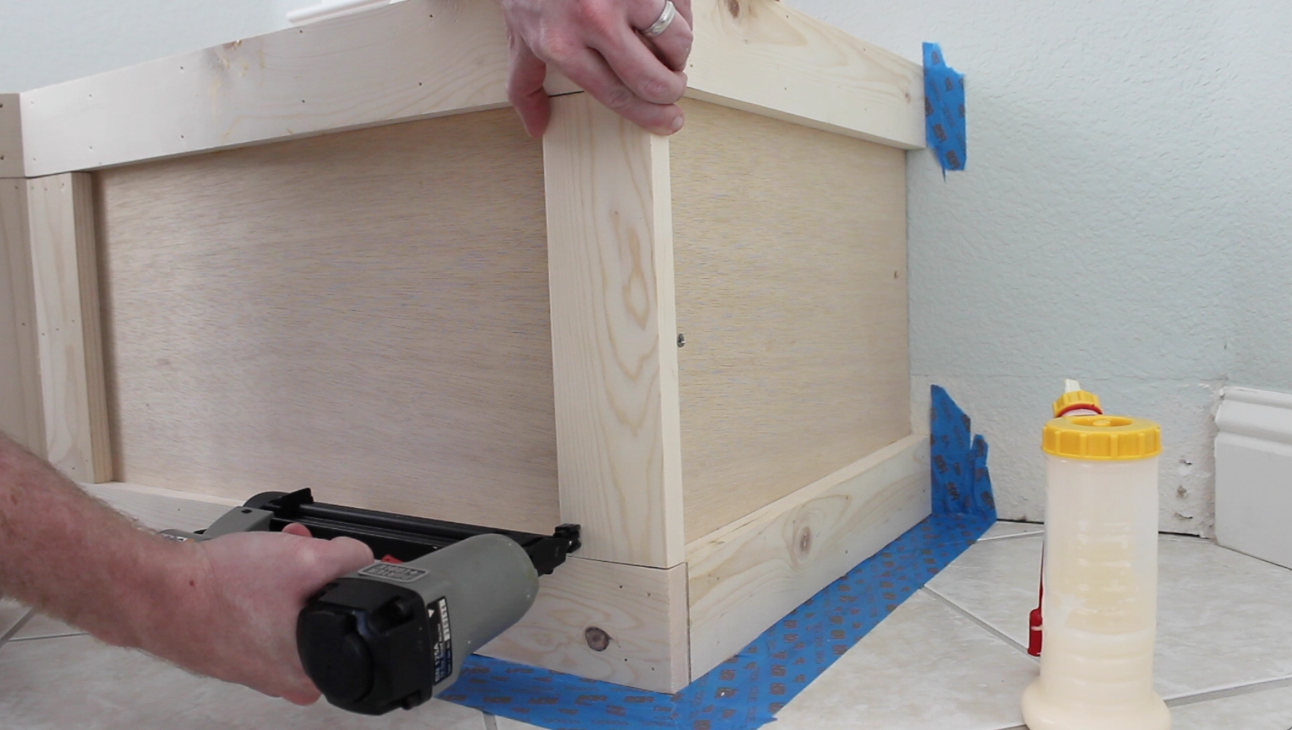
Next, I ripped down 3 1/2 inch thick strips of common board to use for my trim pieces. These pieces are purely for decoration, and they add a nice touch of elegance to the banquette. Once, cut down to size, I used a brad nailer and wood glue to secure the trim pieces to the banquette. I made sure that the width of the trim pieces was consistent throughout the bench, so some pieces had to be thin and some might have to be thick. To cover up the nail marks from the brad nails I use wood putty.
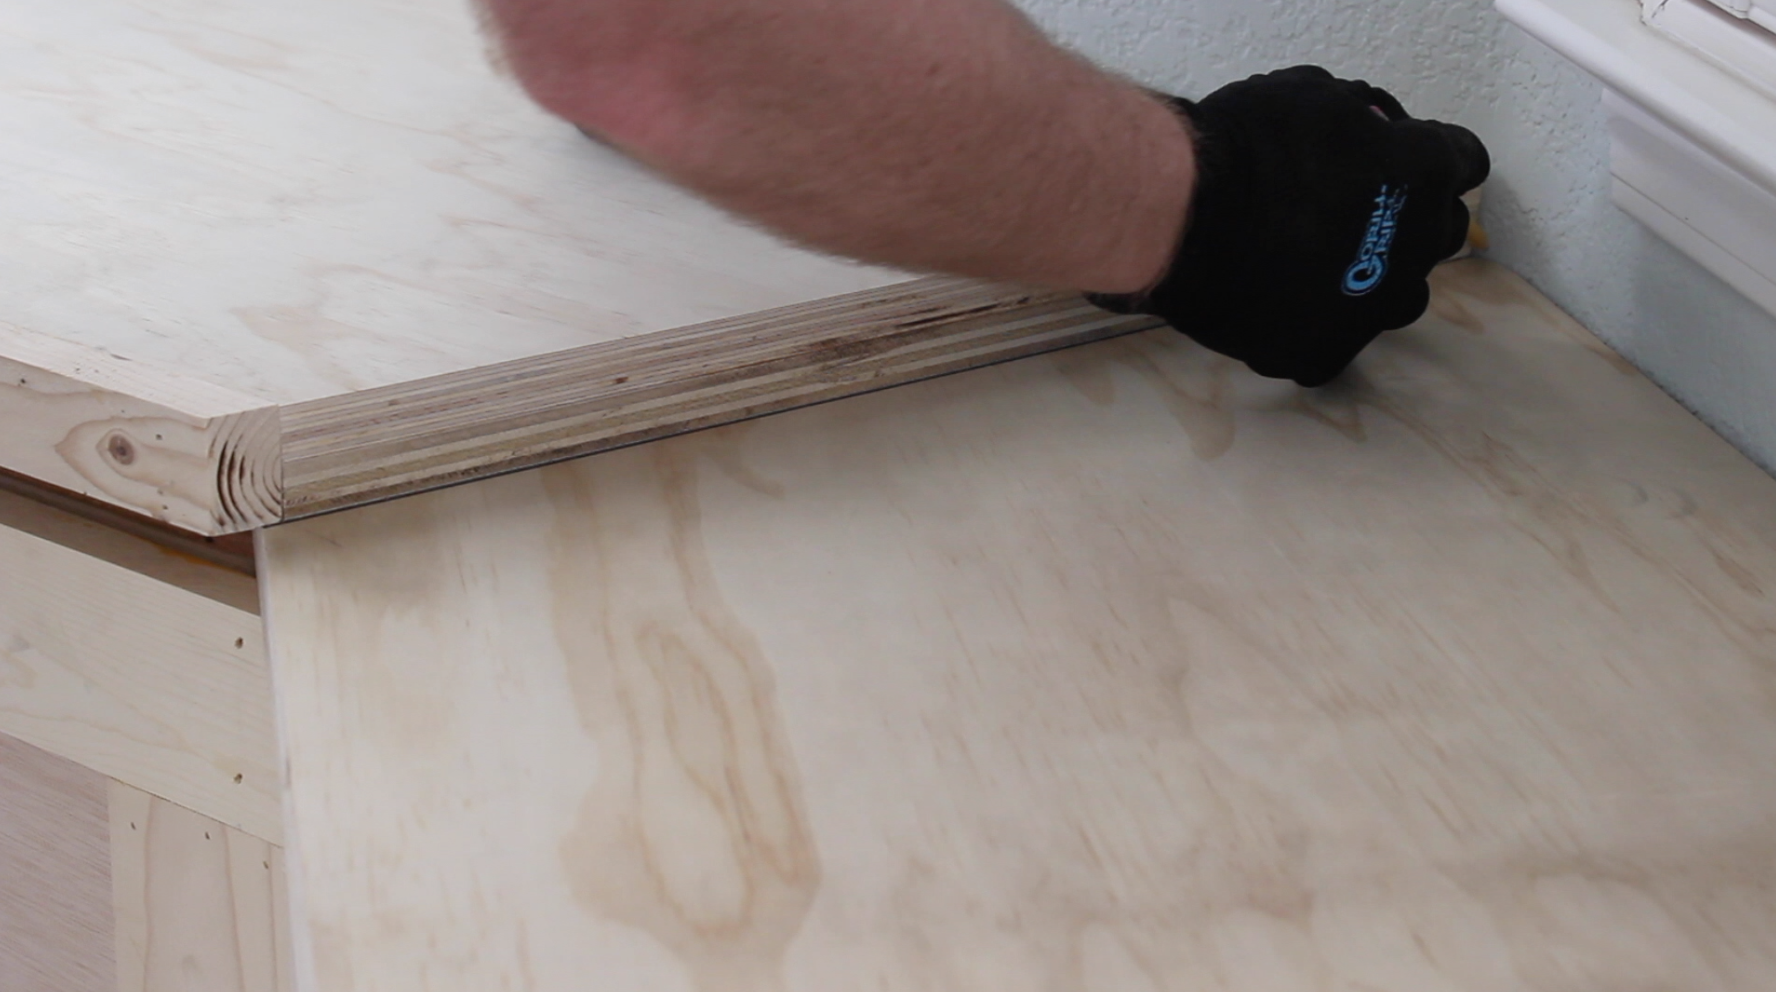
Creating the Banquette Top
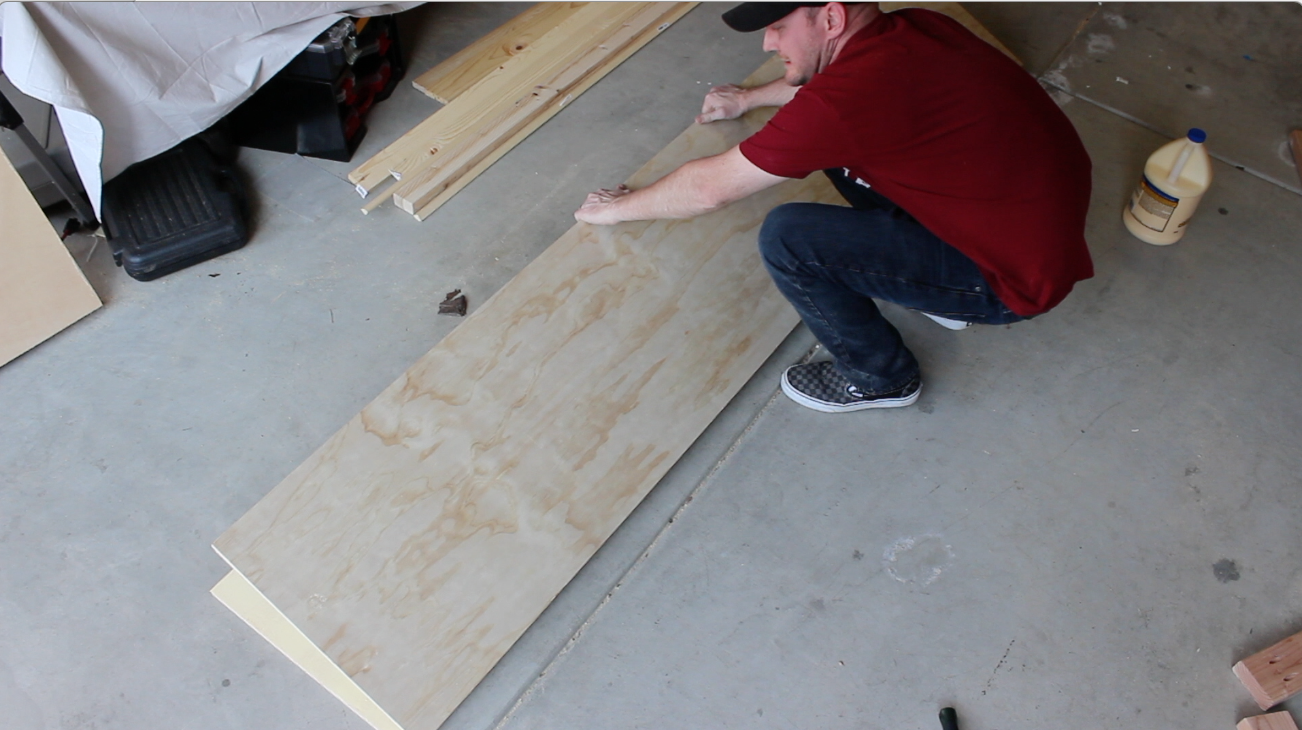
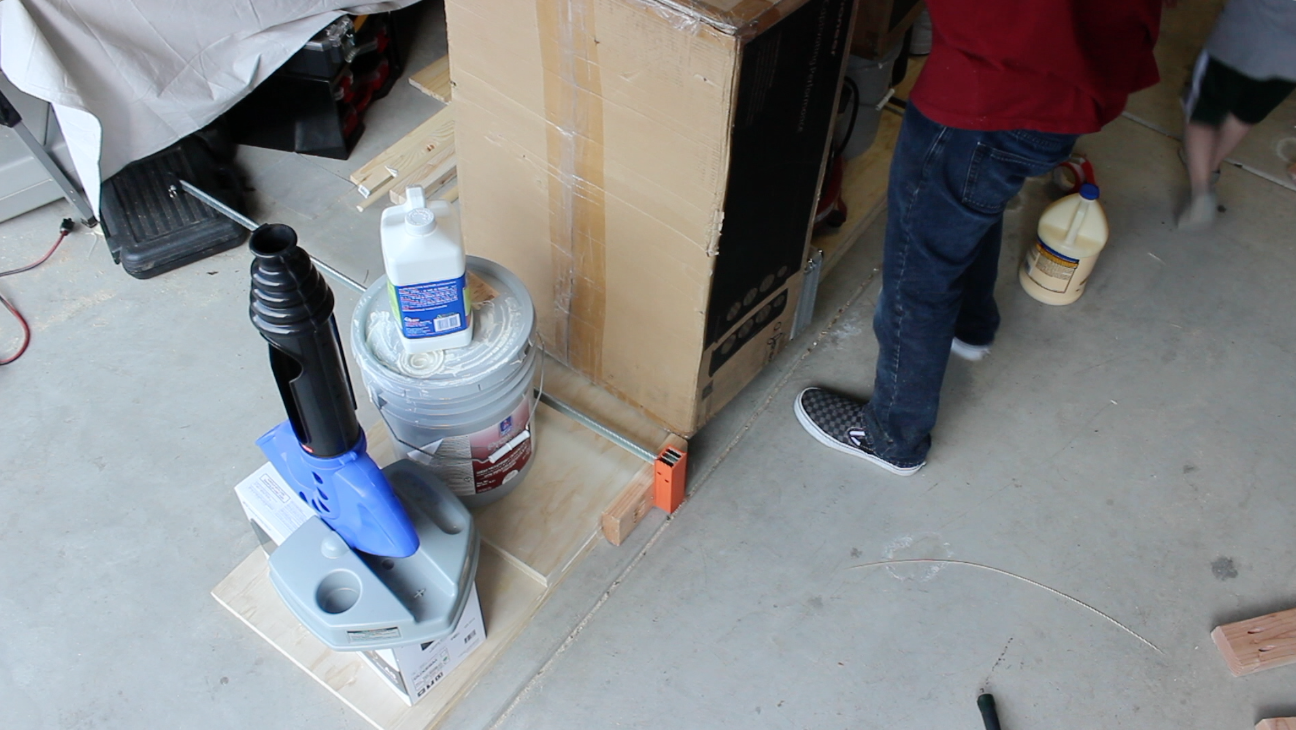
For the top of the banquette, the actual area that you sit on, I decided to laminate two layers 3/4-inch high grade plywood. This gave the sitting surface an extra solid feel with no creaking or flexing. Laminating the plywood together it’s rather simple – I just painted wood glue onto one layer or plywood and set the other layer of plywood on top. To make sure the layer bond tight together, I used as many heavy objects as I could find around the garage to provide extra compressing force.

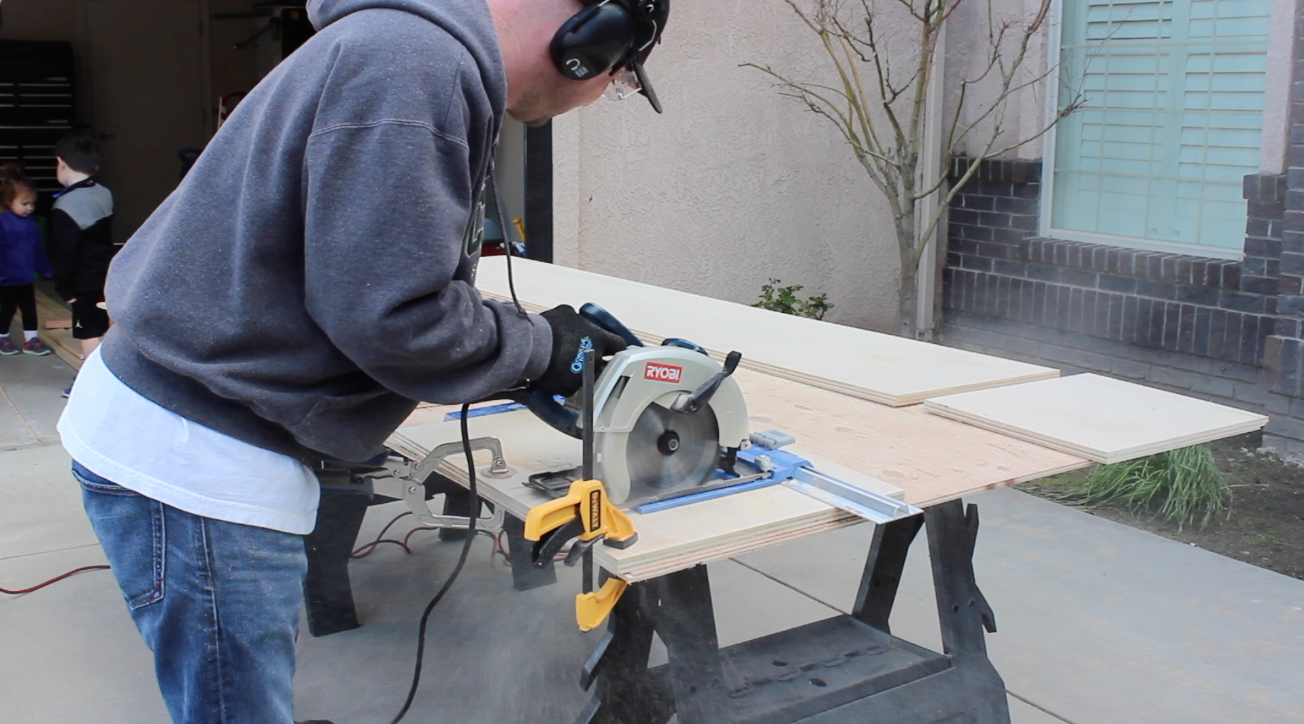
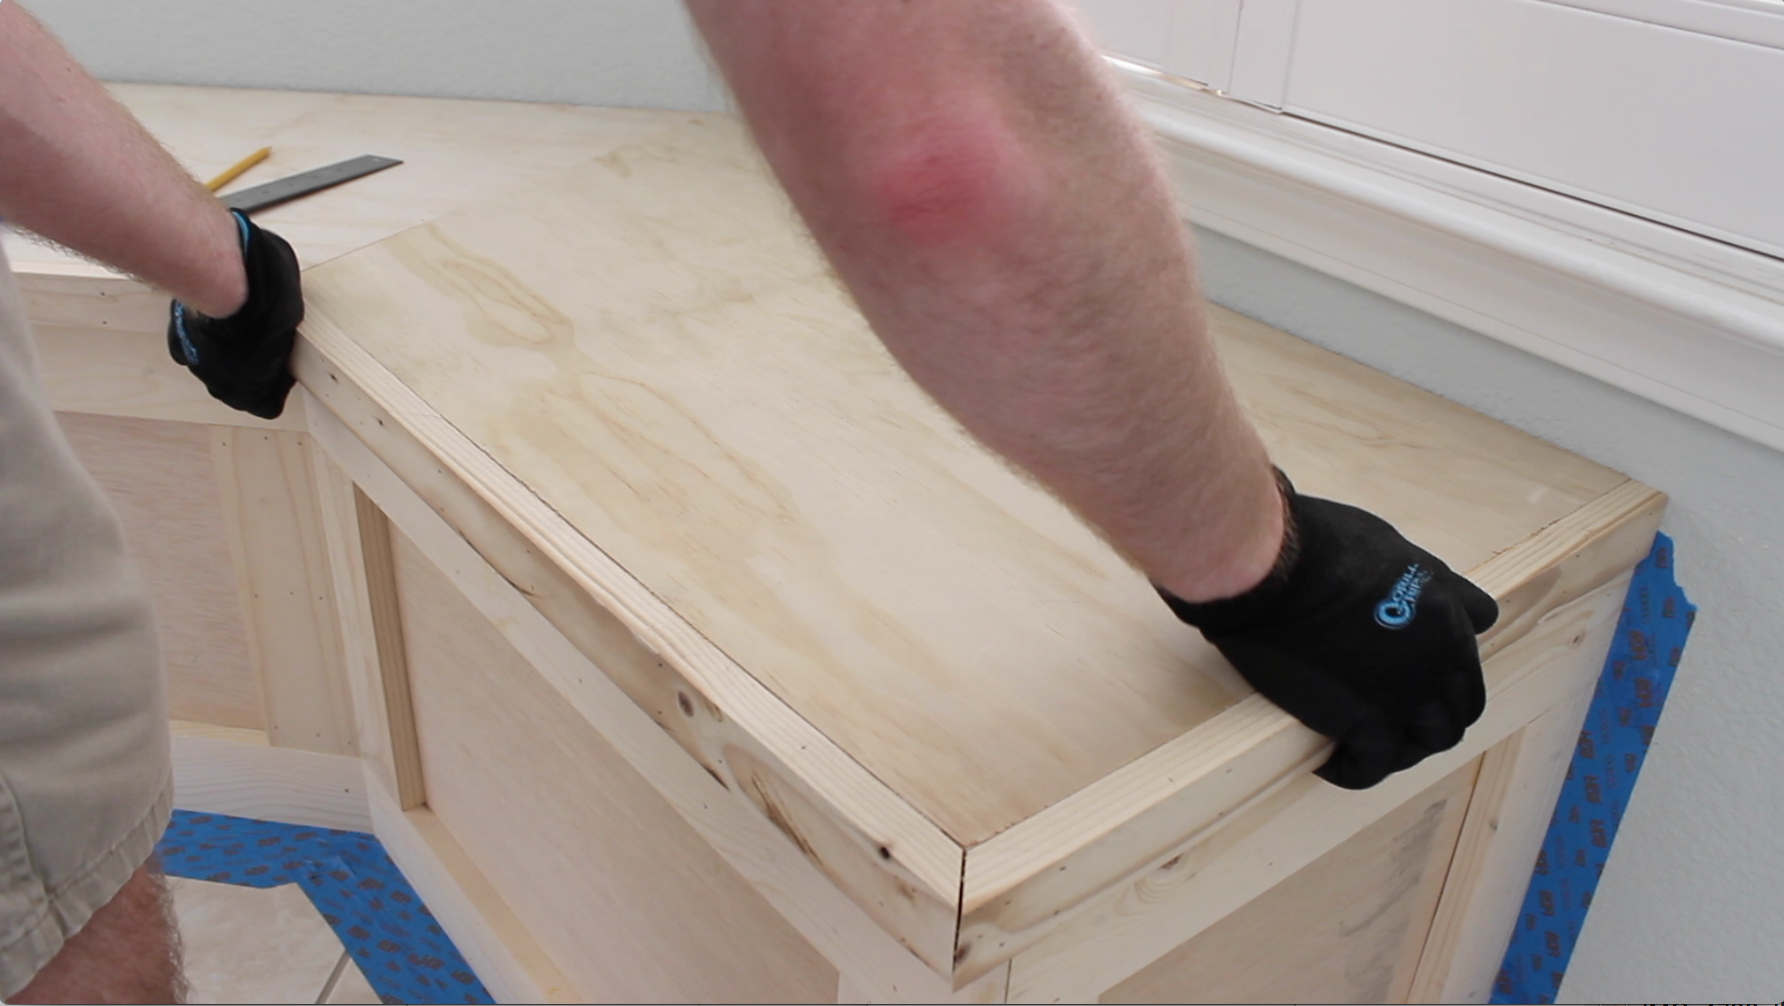
Once my top pieces were done drying I cut them down to size. To make sure the left and the right sections were cut at the proper angle, I placed them underneath the center piece and drew a pencil line to get the absolute perfect angle. I then took the side pieces outside, cut them with a circular saw.
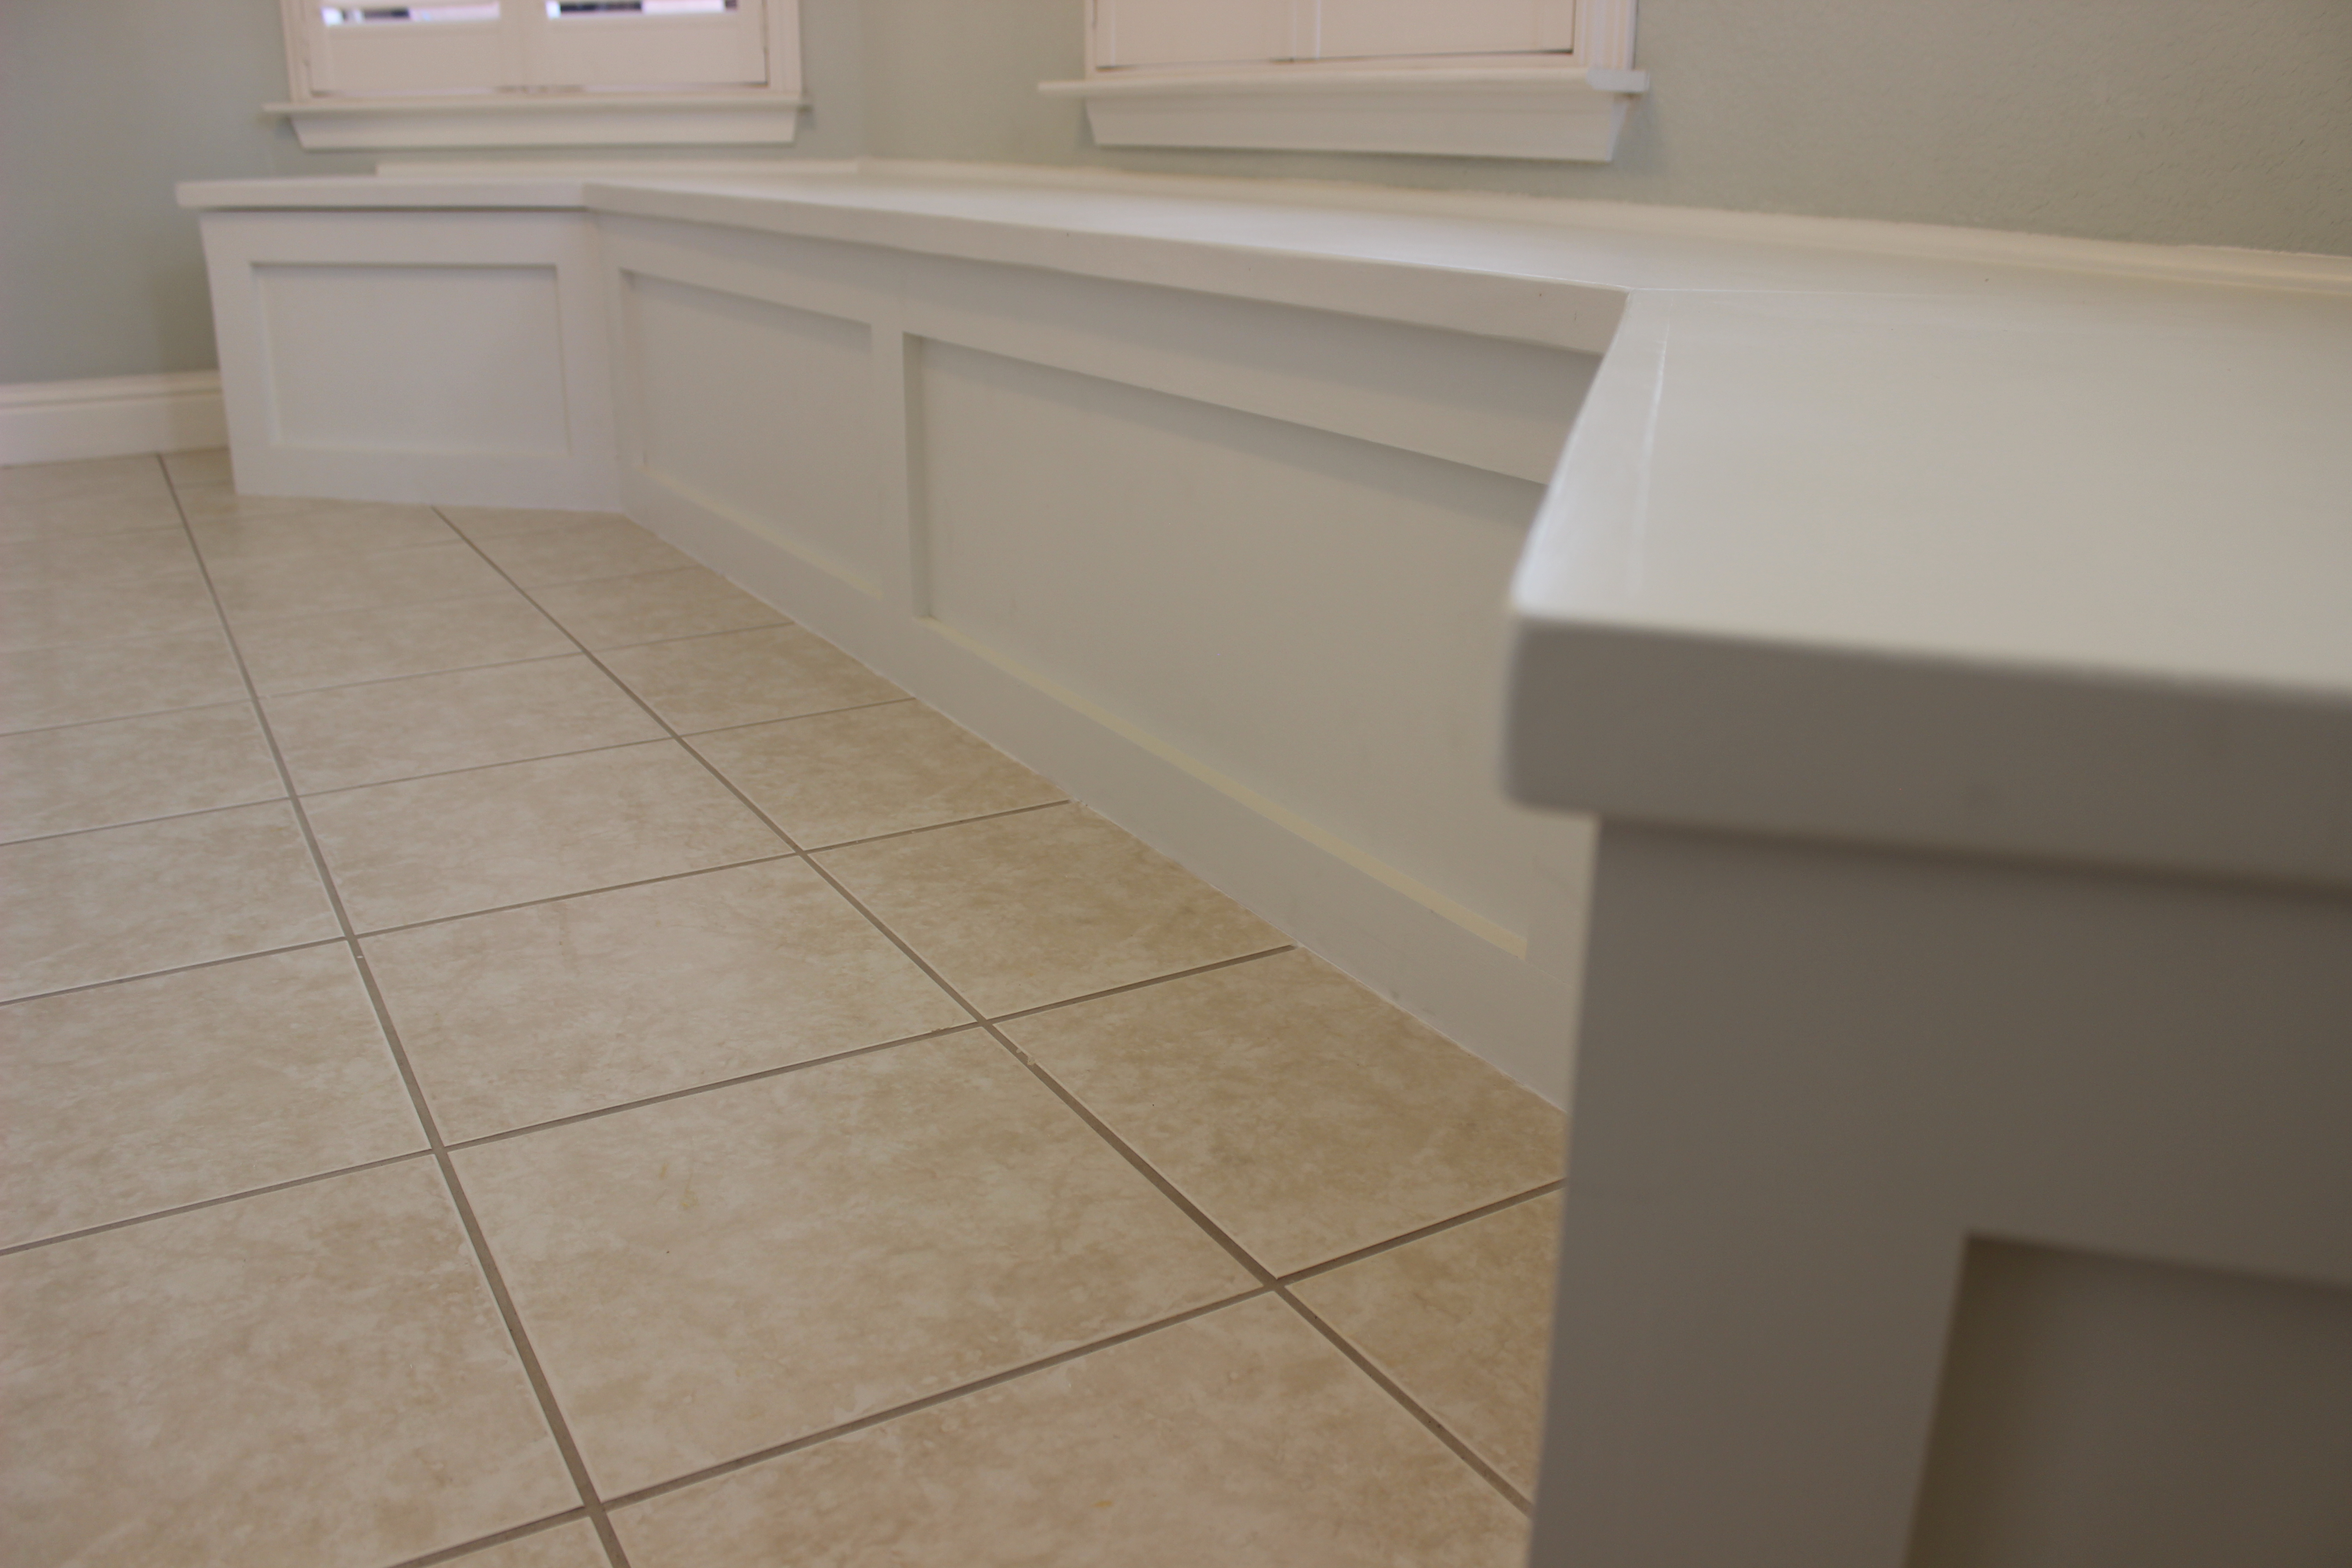
Primer and Paint
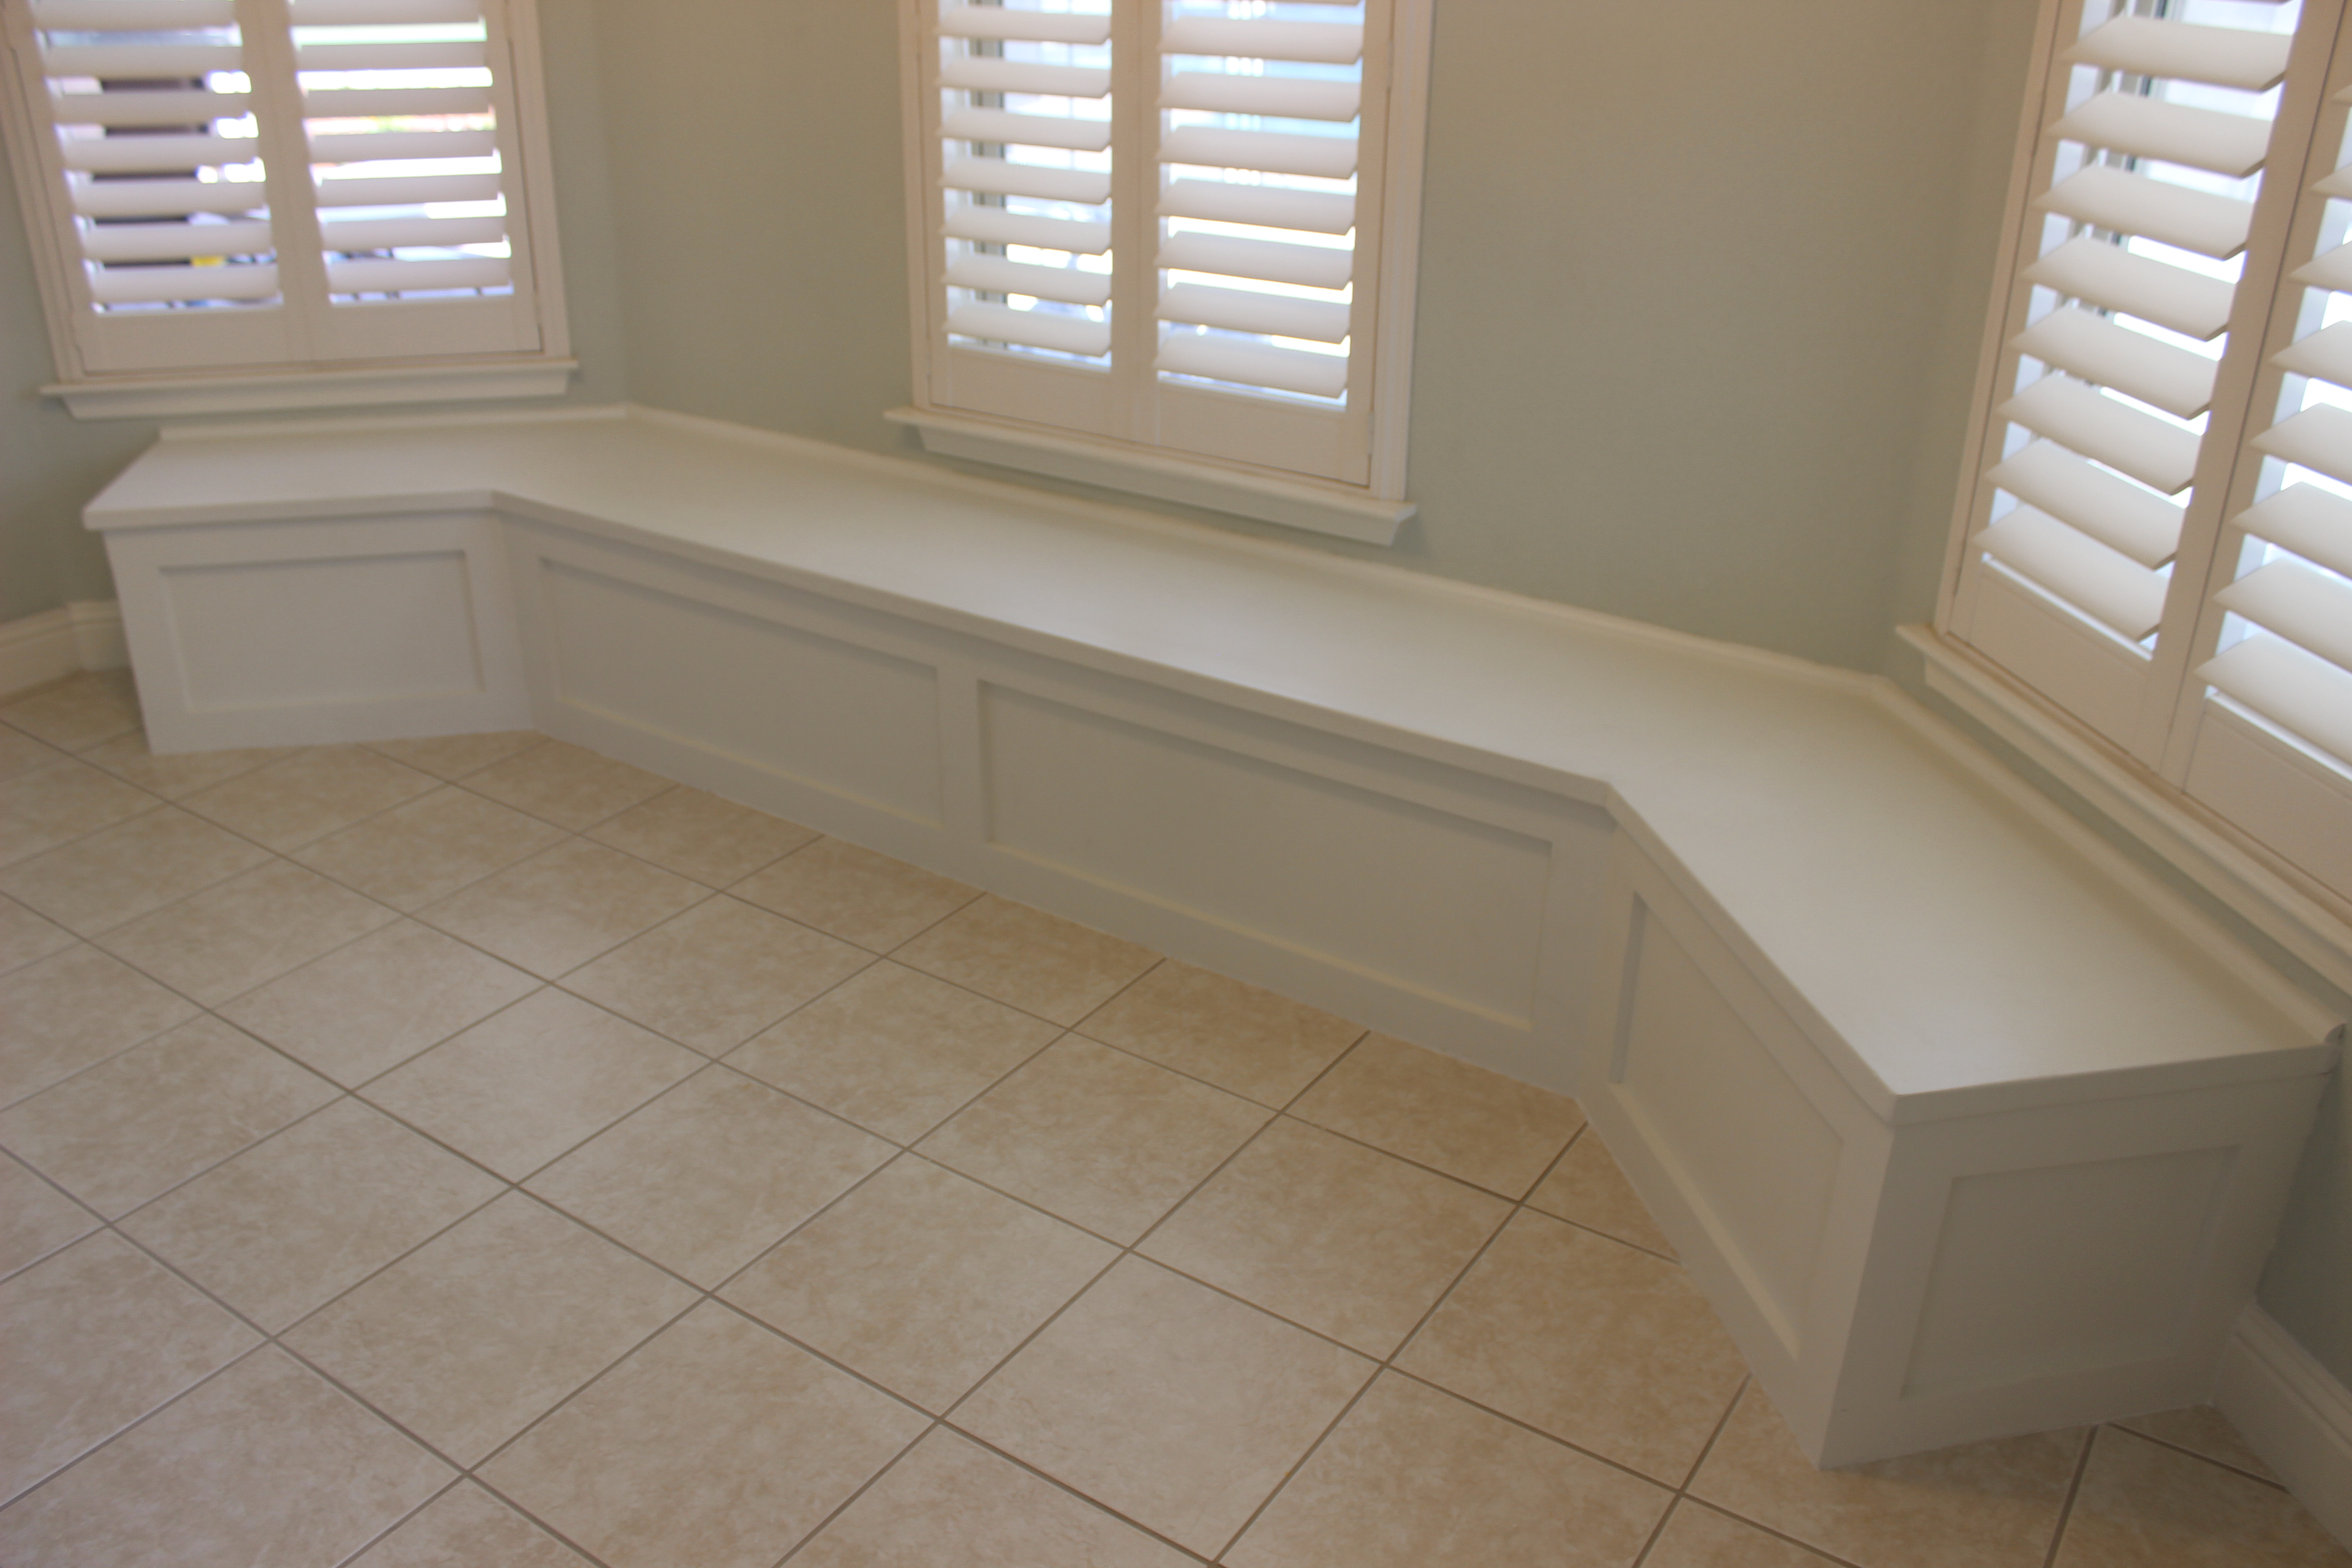
Originally I wanted to stain the top of the banquette, and paint the base, however as I was sanding the top plywood pieces I noticed that the beautiful wood finish was sanded away to reveal a red laminate glue layer of some kind – it looked ugly. So I decided to paint the whole thing white. But before we get to paint, of course, I had to apply one coat of primer. After priming, I applied two coats of paint.
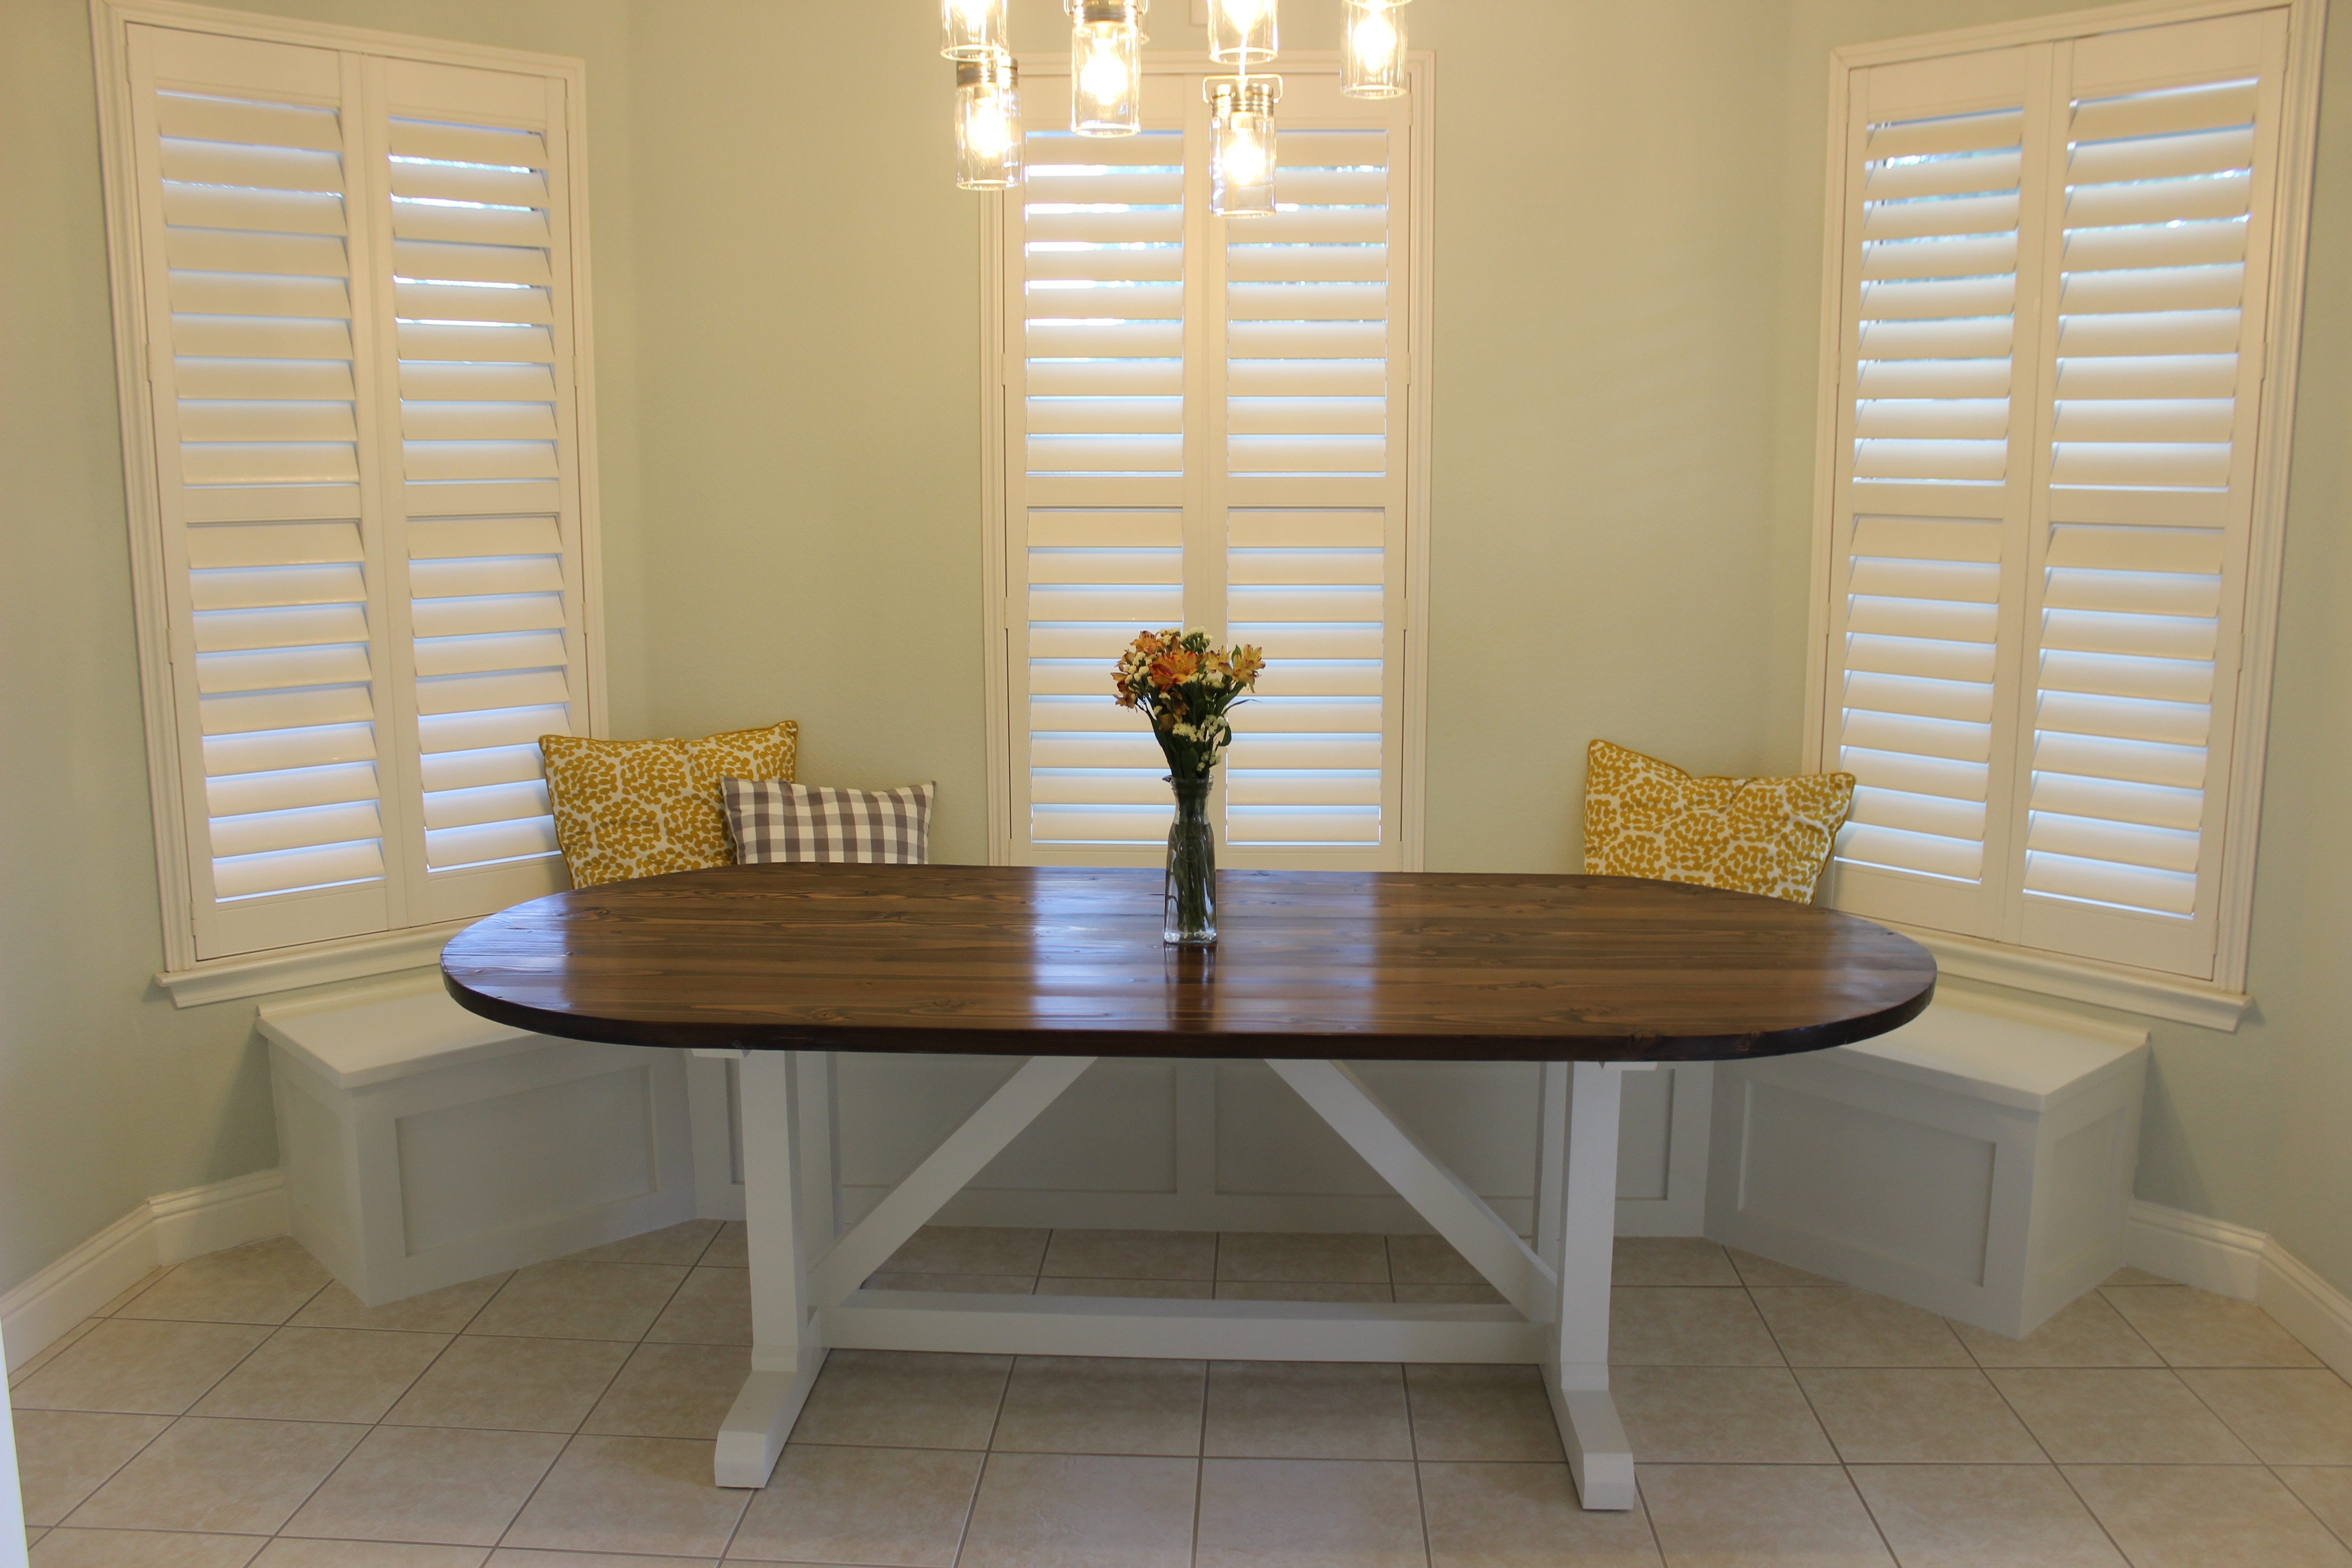
Here is a look at the finished product. I also built a rounded farmhouse-style table for which I will be posting another video and blog in the near future. I also plan on getting a custom cushion made to pad the surface of the banquette and make it a little more comfortable.
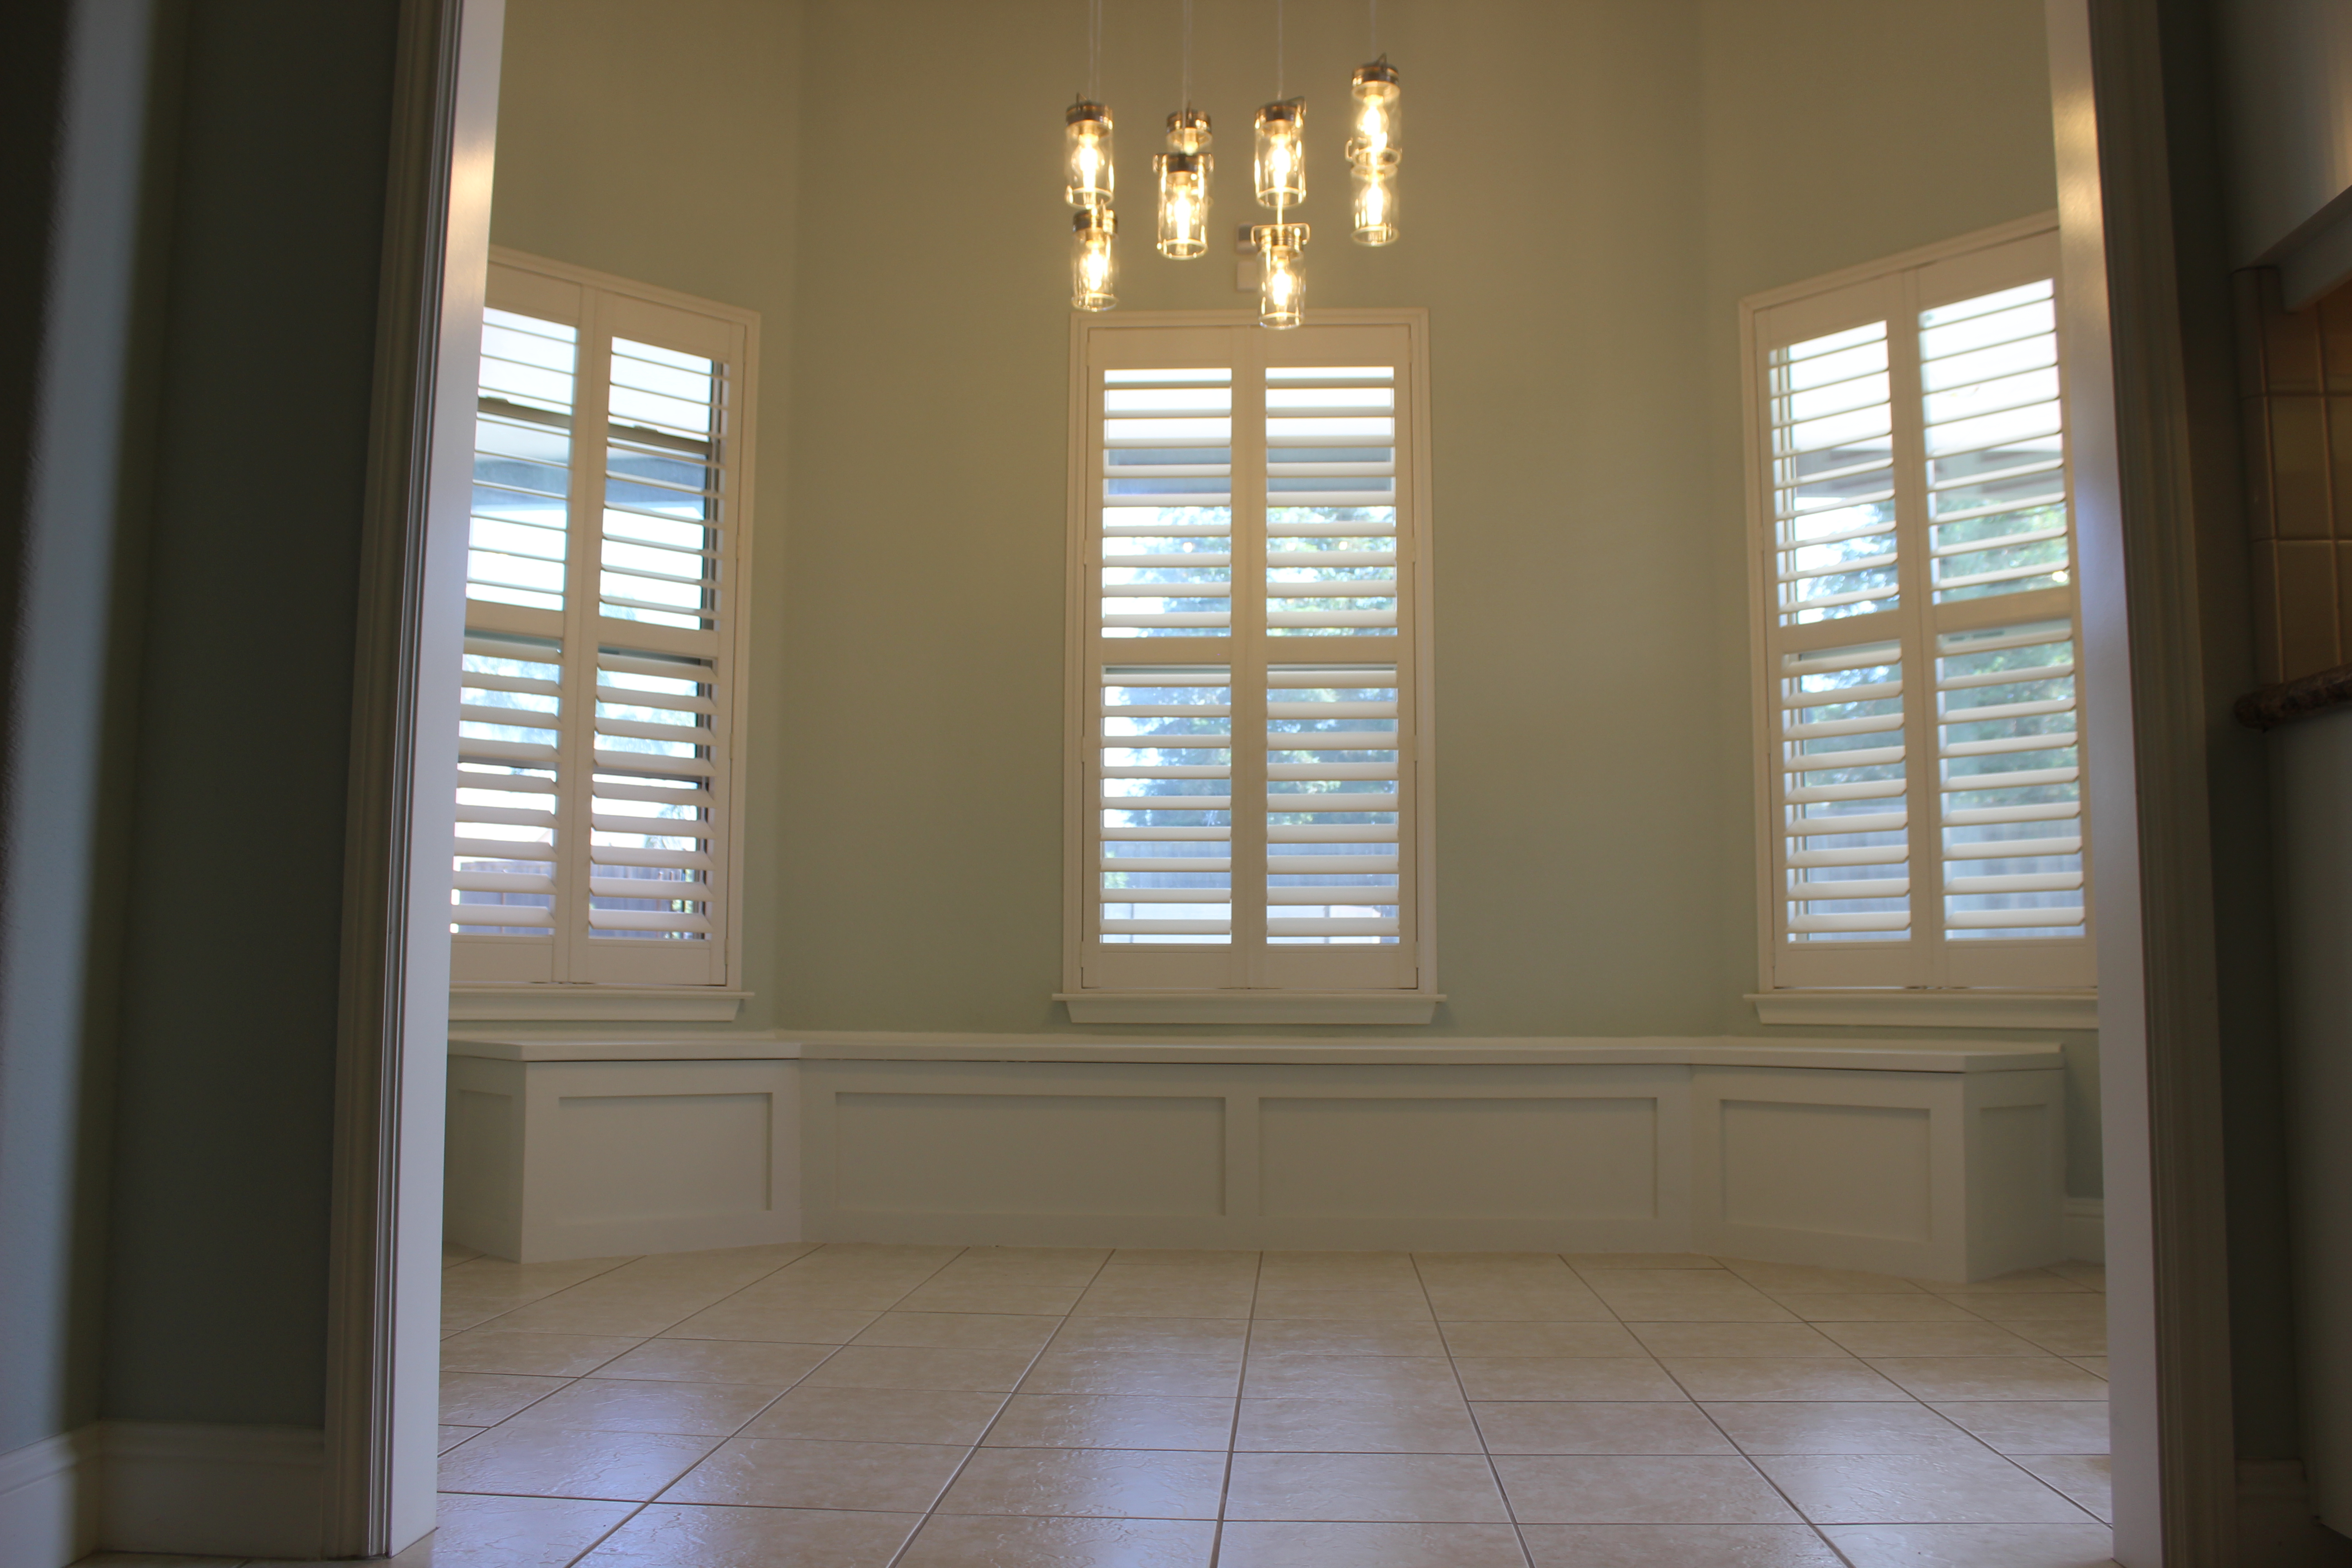

I hope this provided some sort of inspiration, and most importantly, it showed you that it’s not that hard. As with most of these projects, your imagination is the limit. Have fun, and let me know if you have any questions about the build.
Links to Tools I Used
If you’re curious about some of the products I used on this project, check them out on Amazon. When you click on the links below, Gadgets and Grain gets a little commission when you check out – I would greatly appreciate it!
- Kreg Jig K4 Pocket Hole System
- Kreg Pocket Hole Screws
- General Tools Digital Sliding Bevel Gauge
- Kreg Face Clamp
- Dewalt Trigger Clamps
- Dewalt 20V Cordless Drill
- Kreg RipCut Circular Saw Guide
- Titebond II Wood Glue
- GluBot Glue Applicator

Great build! I was wondering, how deep is the actual seating area from the wall? And how high is it?
Looking to build one this week. Thanks for your help
LikeLike
Hi Conor. Thanks! I made the banquette 19 inches deep and that feels about right. It sits 18.5 inches tall, which is about the stand height of a chair. Good luck on your build!
LikeLike
Hi. I also watched your youtube video of the build and my wife and I are attempting this in a much smaller bay window area. I was just wondering what type of nail you used to secure the top seating panel to the frame? You just screwed in the side panels because you covering them with trim anyway, but it looked like you took care to minimize visible nail/screw holes on the top.
Thanks
LikeLike
Hi Cullen. I used wood glue and finishing nails to attach the plywood top to the frame. I made sure to cover the nail holes with wood putty to keep the surface looking smooth. Good look on your banquette and let me know if I can answer any more questions.
LikeLike
We finished our banquette. It was our first project of this scale and it took a month of working on weekends. We’re very happy with how it turned out. It was little more complicated with a few more angles and we wanted it square with an existing wall, but we managed. Your video and guide made it possible. Thanks!
LikeLike
Cullen it looks fabulous! Thanks for sharing!
LikeLike
Hi! My husband & I are VERY new to DIY but really want to get started learning. This is our planned first project. We have literally only a hammer & screwdrivers. What tools do you recommend we purchase as need to own for this, the farmhouse table & general DIY projects?
LikeLike
Hi Lauren. That’s great that you and your husband are doing! Building something on your own is so rewarding. For projects like these, it’s really helpful to have a circular saw, table saw and cordless power drill. Don’t bother paying top dollar for tools – more expensive doesn’t always mean better. And since you’re just getting started, maybe consider borrowing tools from friends and family or getting a deal on CraigsList.
Also, you might want to check out this online course from a DIY guy that I really admire and have learned a lot from. He does a great job telling your what kind of tools to buy and walks you through different projects. Here’s a link to the course: https://theweekendwoodworker.com/signup/
And here is a guide on a list of tools that beginners should start with. You’ll have to submit your email: https://theweekendwoodworker.com/tool-list-2b
LikeLike
Great site! I followed your guide and made my own banquette. You’re right about the pocket hole jig, it’s proven to be well worth the investment.
//s.imgur.com/min/embed.js
LikeLike
That looks awesome, Greg! Nice job!
LikeLike
Thanks for taking the time to make such an informative video, its going to be my first DIY project in my first house. I understood why you didn’t secure the seating to your wall, but would you recommend securing to anything (like the floor) or does it stay put on its own?
LikeLike
Hey Ross. I actually did screw the frame into the wall at the studs, so it’s solid. You can see me driving the screws through the frame and into the wall at about 2:50 into the video. Hope that helps and good luck on your new place.
LikeLike