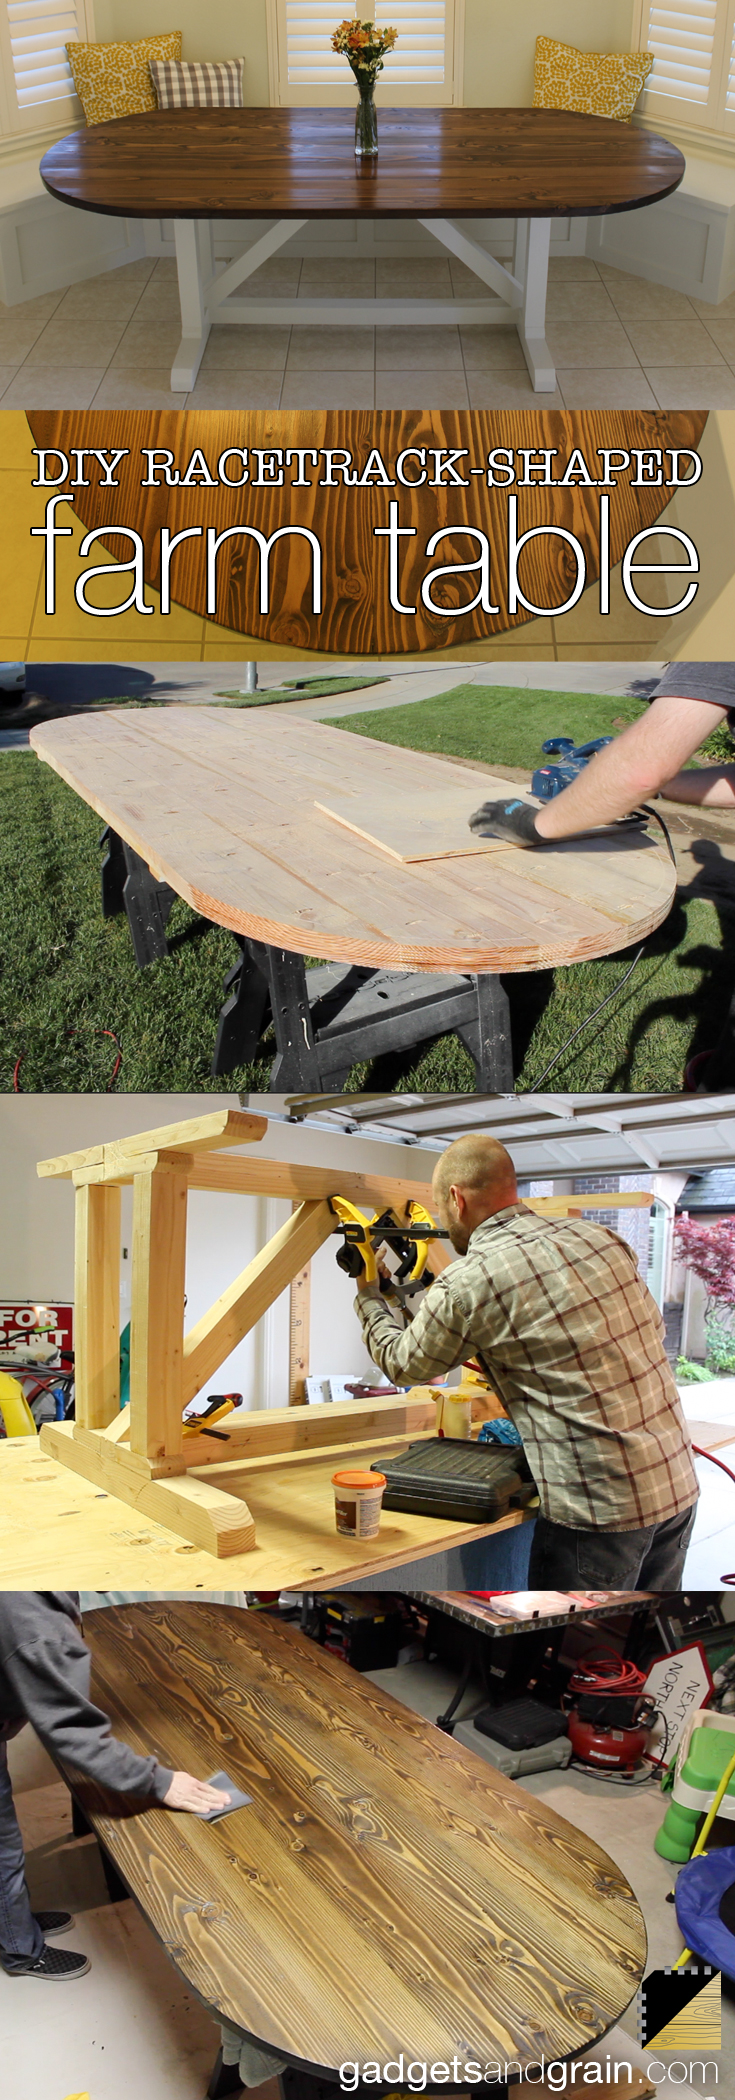
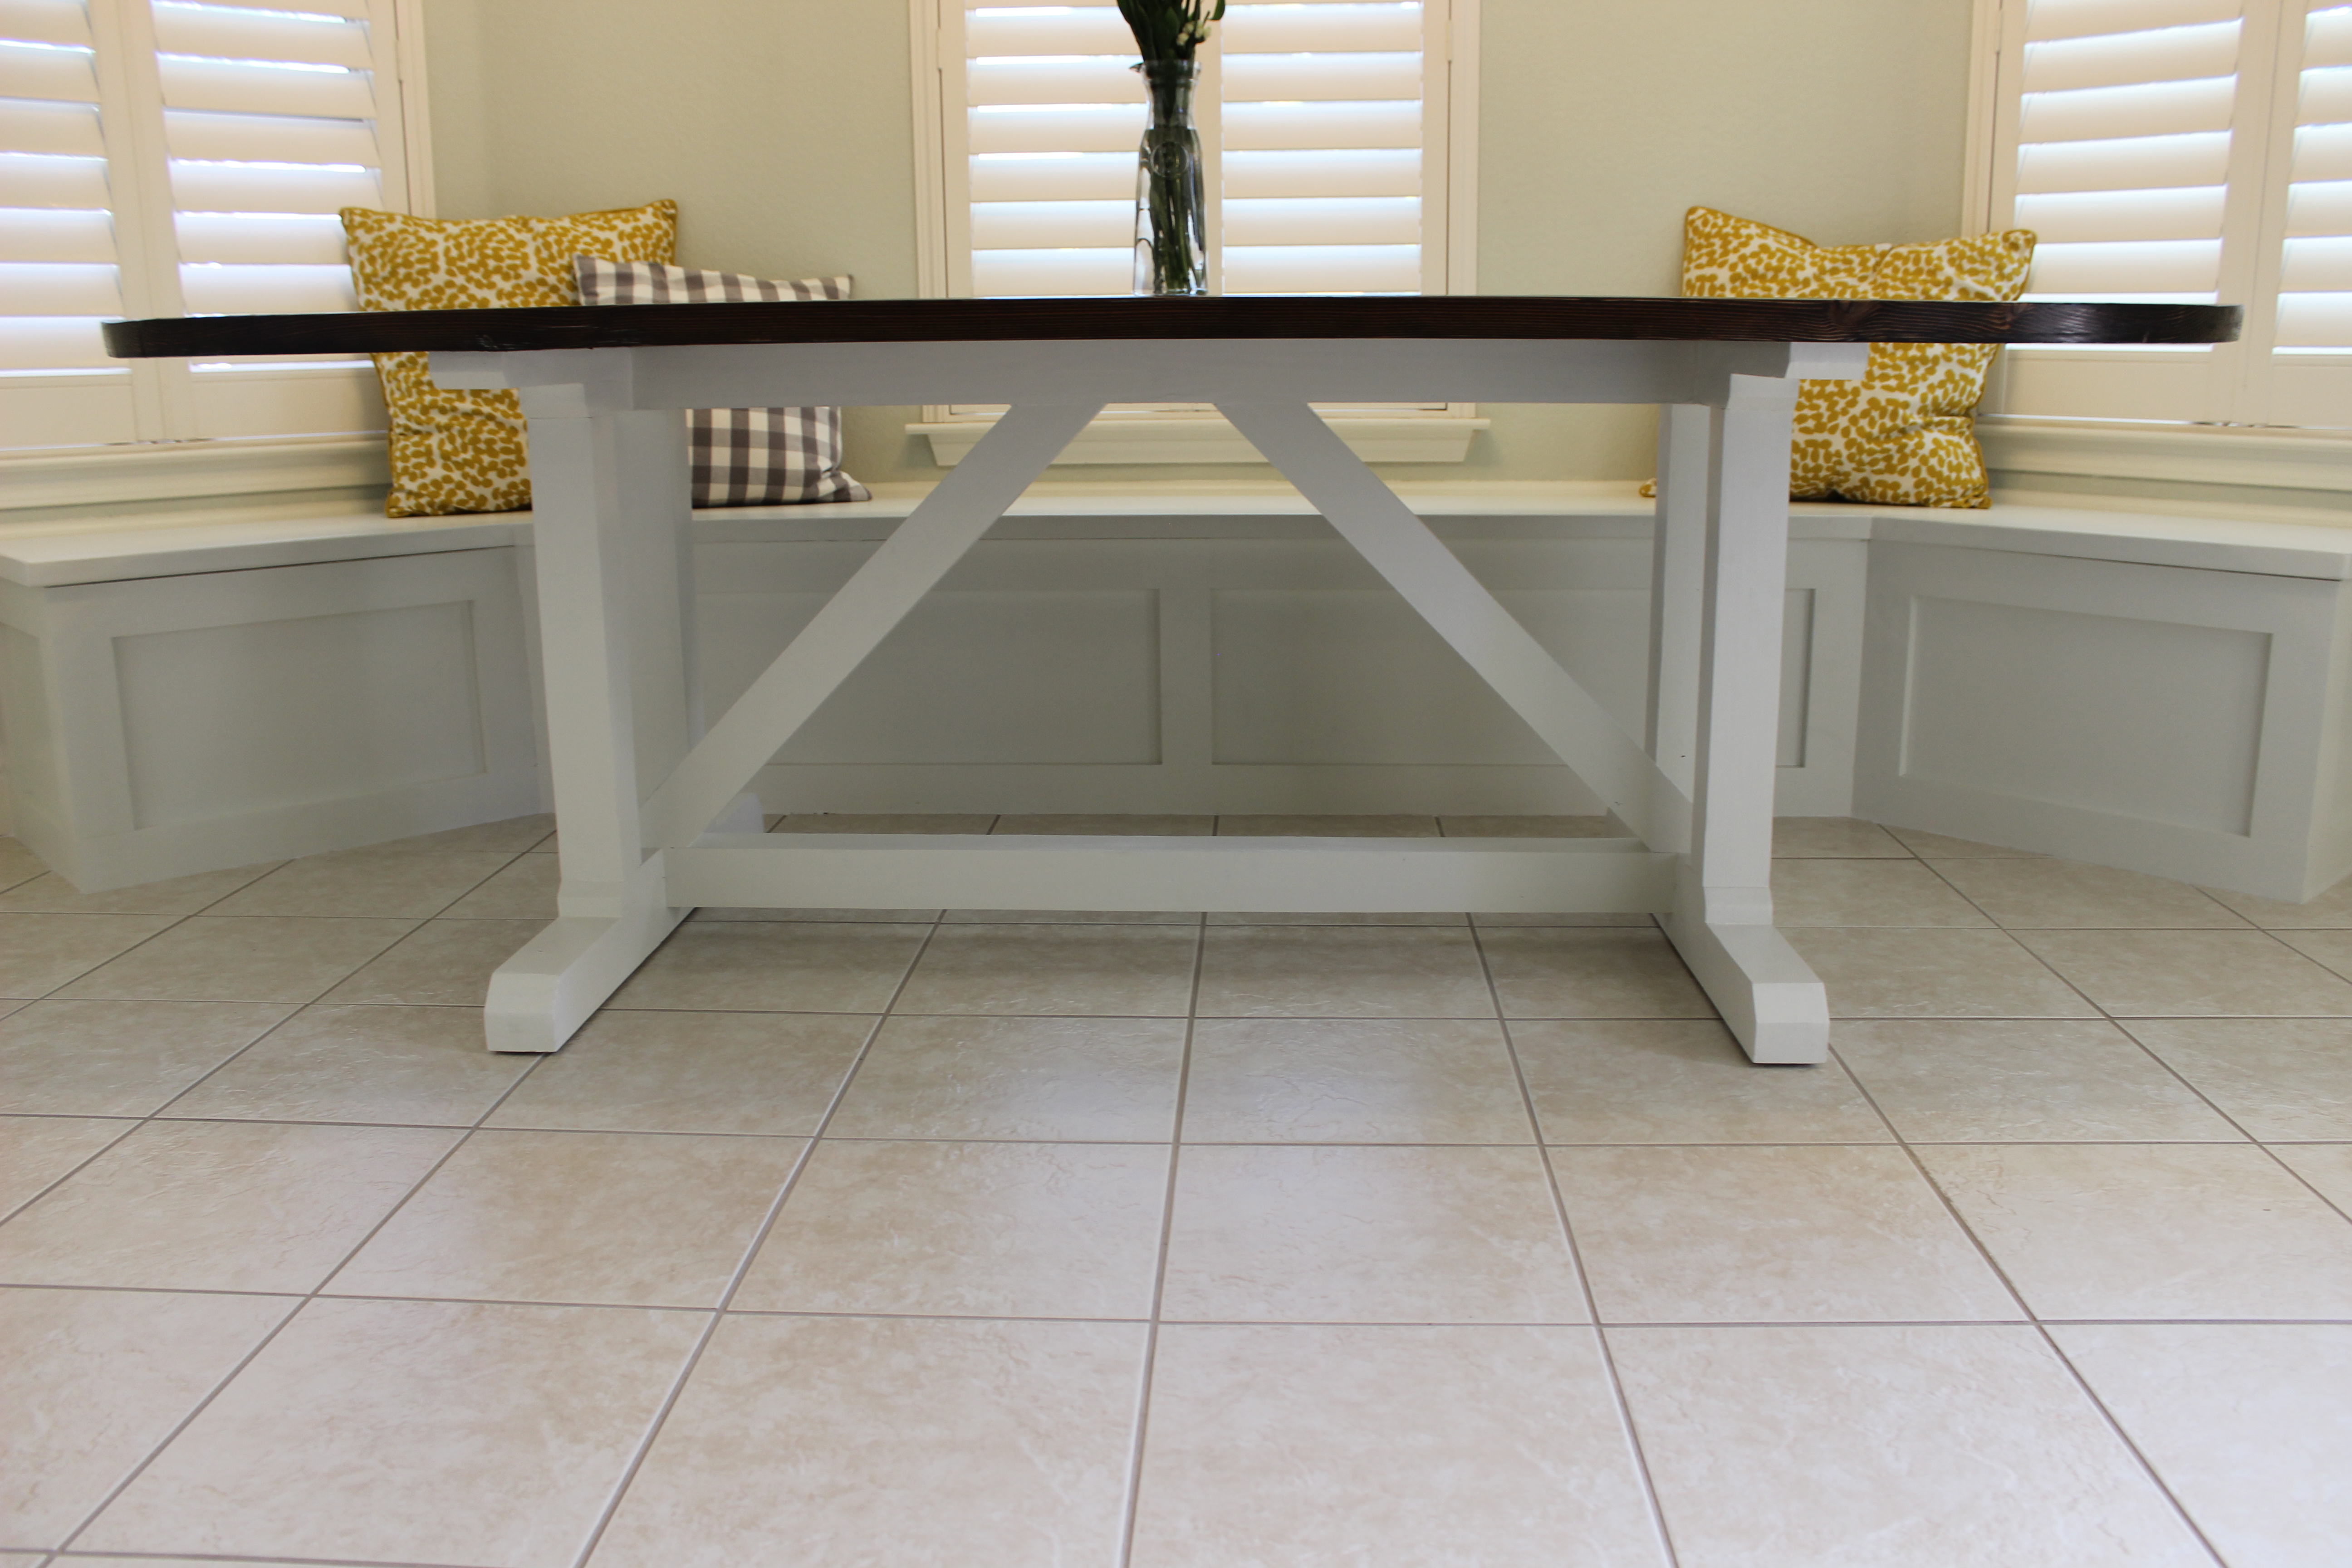
After building a banquette in my kitchen’s nook, I needed to a table to go with it. Because of the angular shape of the banquette, I needed a table that would allow people to easily scoot around it, and that’s where the racetrack shape works perfectly. The tricky part of building a racetrack table is making large circular cuts. For woodworking novices like myself, this might seem daunting, but with a circular saw and a simple jig made of plywood, it can be done. Here’s how…
Materials
- 2×4 lumber for the trestle base
- 2×8 lumber for the tabletop (I used 8ft boards)
- Wood glue
- 2 1/2 inch Kreg pocket screws for joining the tabletop boards
- Primer and paint color of choice for the base (1 quart of each)
- Wood stain (1 quart)
- Wood floor finish (1 quart)
- Sandpaper (80 grit for leveling surfaces, 120 grit for smoothing and 220 grit in between coast of finish and paint)
The idea of the classic farmhouse table is so appleaing to DIYers because of its simple design, rustic charm and basic ease of construction. Farmhouse tables consists of two parts: the top and the base. Let’s first start with the tabletop itself while covering the technique of cutting perfect semi-circles which will give the project its signature look.
Building the Tabletop
The key to building the tabletop is acheiving a smooth, level surface while tightly joining the boards so that it all feels like one big piece of wood. This starts by being very picky when selecting lumber at the local home center. Be patient and take your time finding boards that are dry (not heavy) and have minimal bowing or warping.
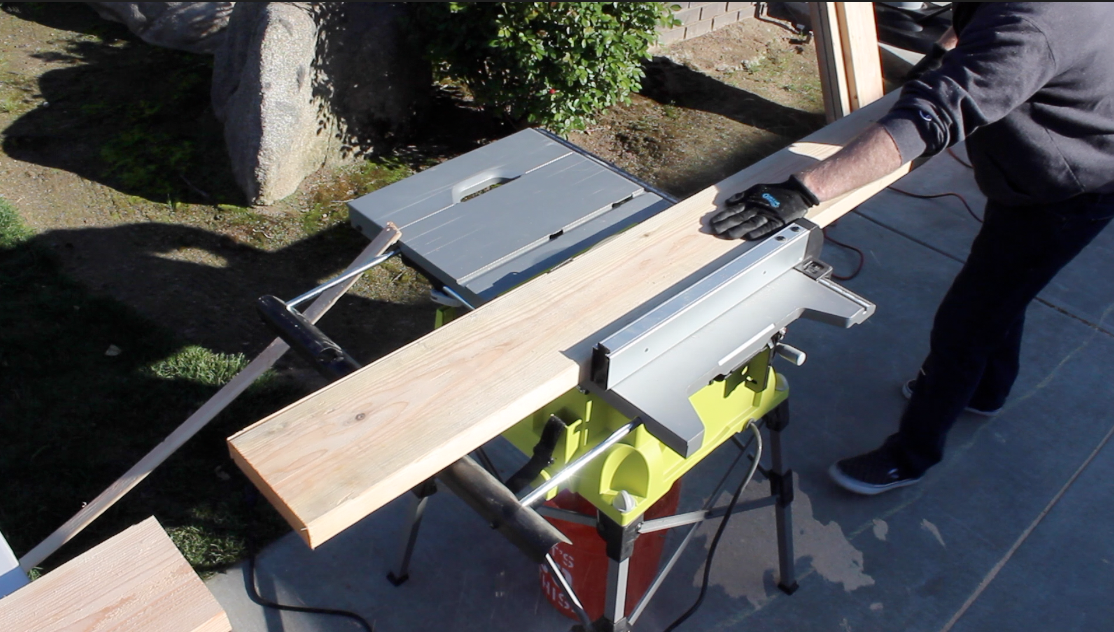
To ensure the boards are as flush as possible, you might also want to consider ripping the boards lengthwise (about 1/4-inch) on a table saw. This removes the rounded corners that comes with store-bought lumber, and it make the table much easier to clean. Leaving those rounder corners can make it tough to clear off crumbs or liquid spills.

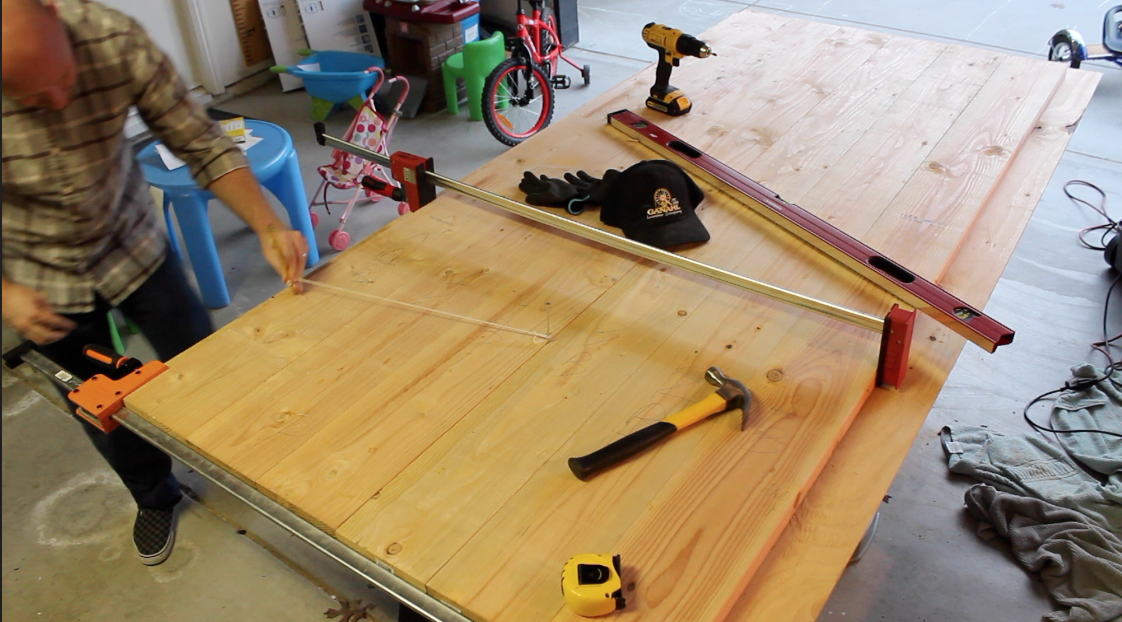
Prepare the boards for joining, by laying them our on sawhorses or an assembly table. If you don’t have a planer (and most people don’t), your boards will not fit perfectly next to one another, so play around with which can make the tightest fit. Number the board with a pencil to keep track of which ones align with one another.
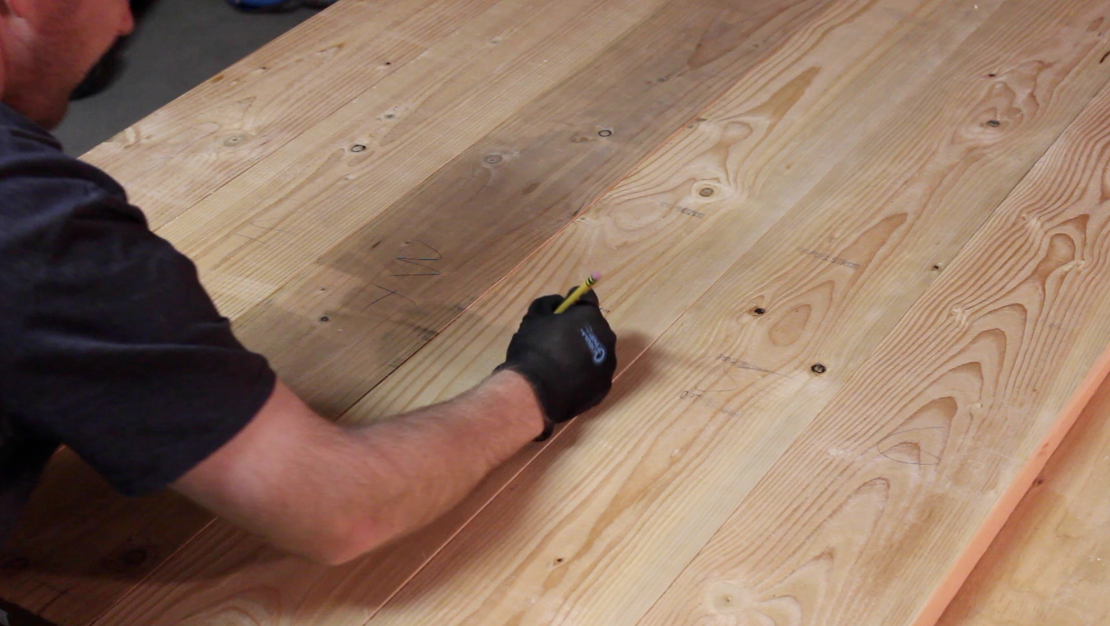
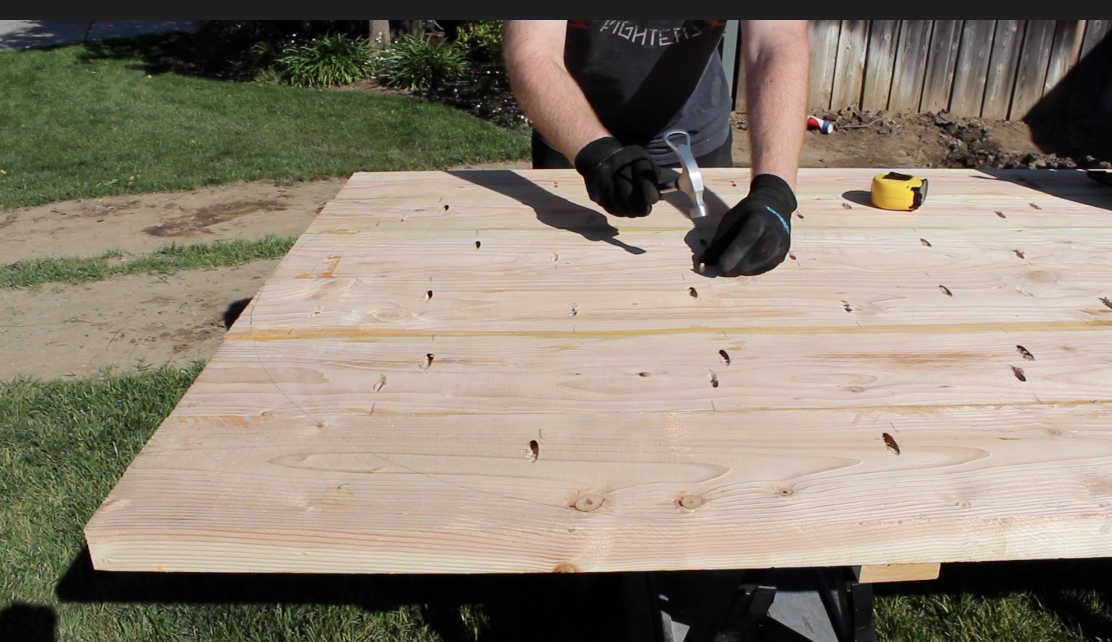
Before drilling pockets holes, draw the half circles lines using a pencil and string attached to a screw. Mark off alternating pocket hole locations – I spaced my out every 6 to 8 inches.
Pocket hole joinery is my favorite method for joining boards together, and I highly recommend getting a Kreg Jig of some kind to make this work go my faster. I used the Kreg K4 jig on this project. Drill all the pocket holes needed and layout the boards to prepare for assembly.
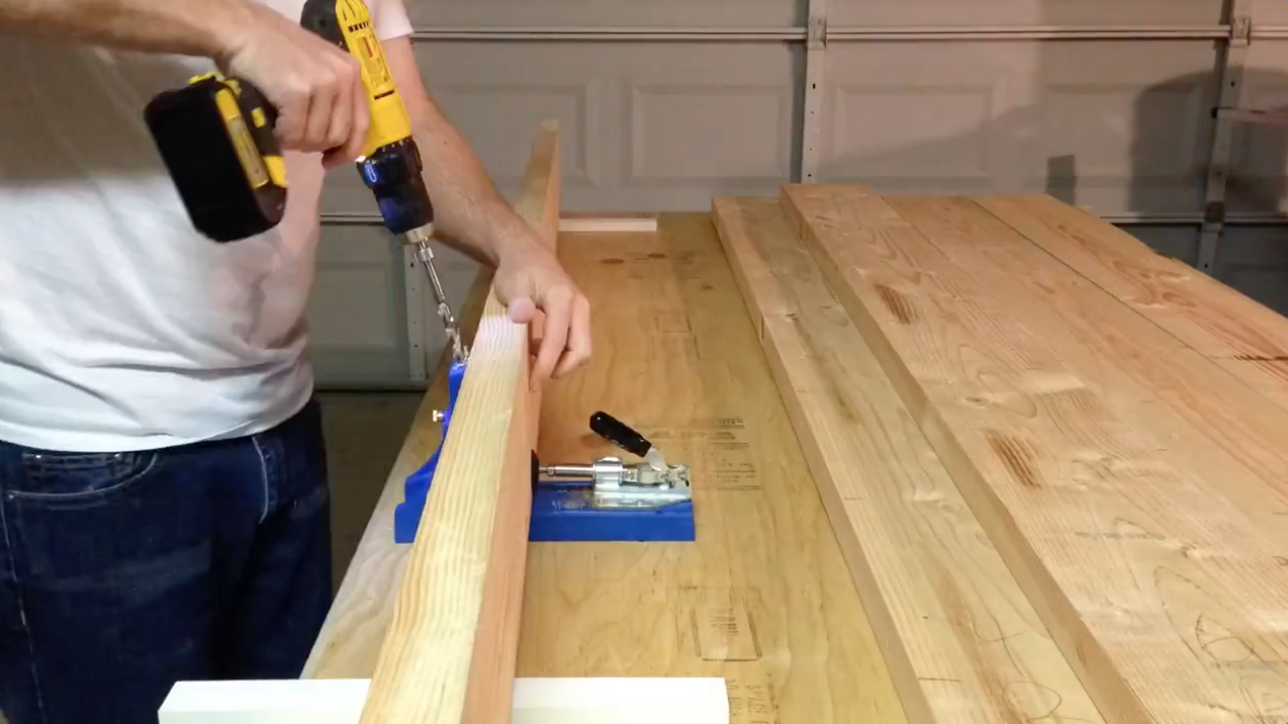
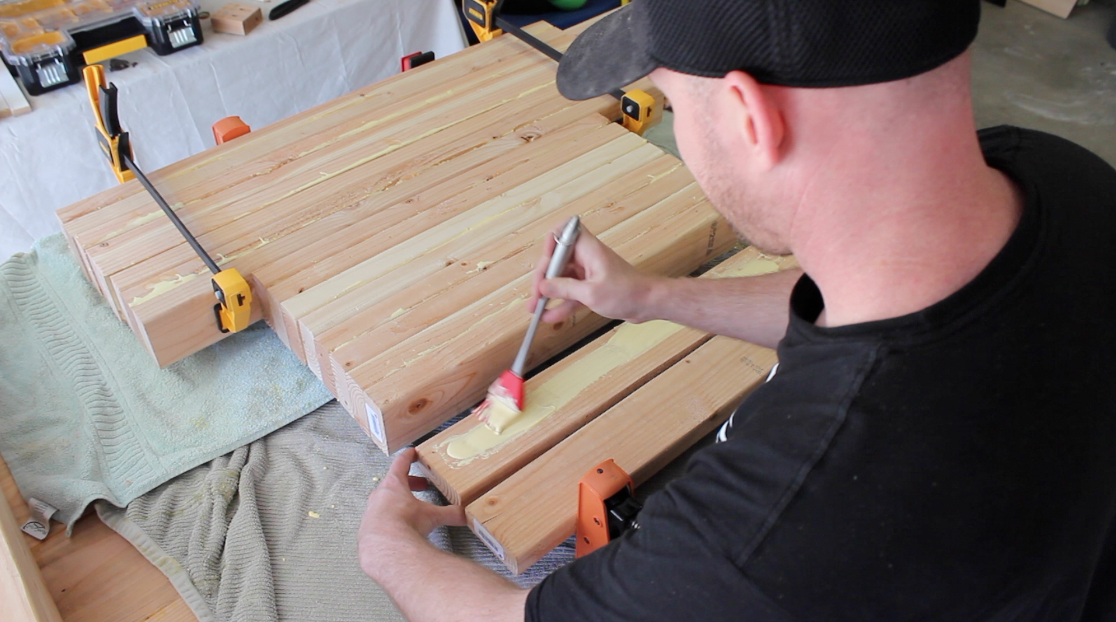
The boards of the tabletop will be joined using pocket screws, glue, large clamps and a constant eye on board alignment. One board at a time, brush on a generous helping of wood glue and clamp them together. Make sure the boards stay flush the in the specific area in which your driving the screw. I used two 48-inch clamps to apply the pressure and made sure there were no gaps in between boards. If you’ve got more clamps, assembly will go faster, but it’s worth at least getting one if you don’t already have one in your shop.
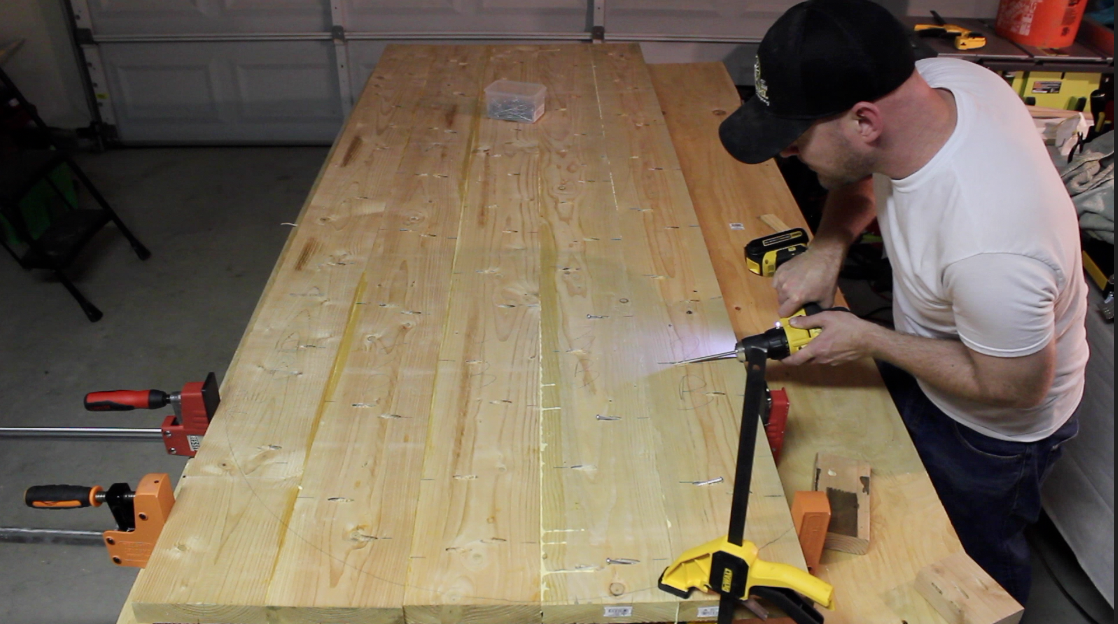
As assembly goes, you might find that some boards need some extra help to be bent to stay flush. As pictured above, it helps to use smaller clamps to keep boards straight. When assembly is complete, wipe away any excess wood glue, and let the tabletop set for 6 hours or so to let the glue fully dry.
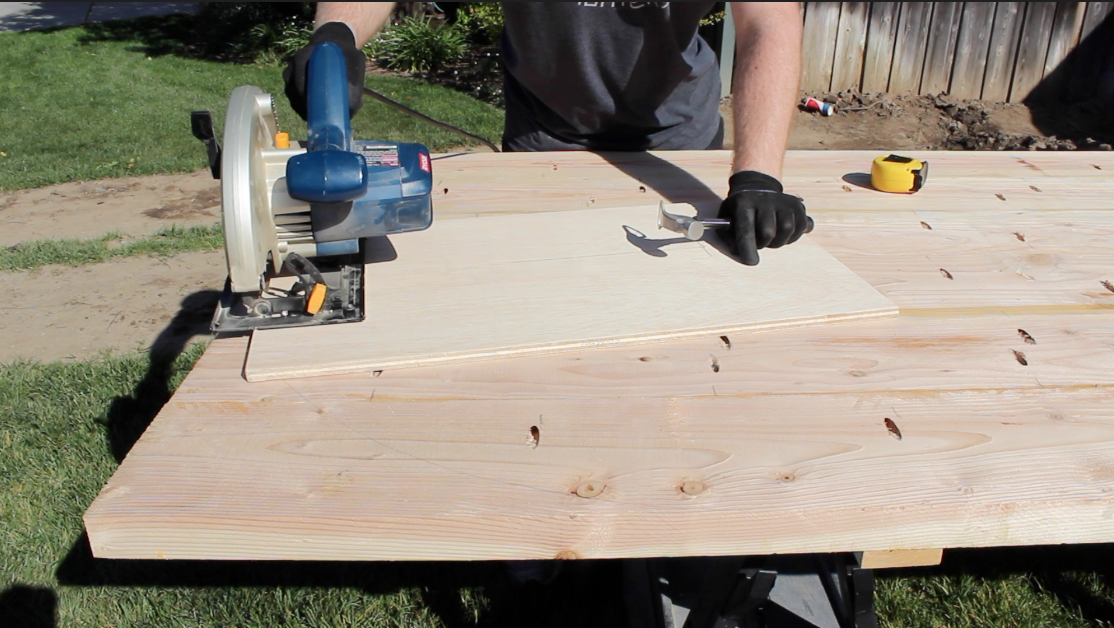
Making the half-circle cuts at the ends of the tabletop involves making a simple jig to hold a circular saw. I used 1/4-inch plywood for my jig that was roughly cut to fit the size of my circular saw and just over half the width of my tabletop. Secure the circular saw to the plywood jig with shallow, but study screws.

The jig then needs to be positioned exactly at the center of the width of the table. Start by measuring the width of the table and divide it in half. Take that distance, measure from the inside of the saw blade and make a mark on the plywood. Insert a small dowel or screw into the tabletop, and with a small hole pre-drilled into it, mount the jig.
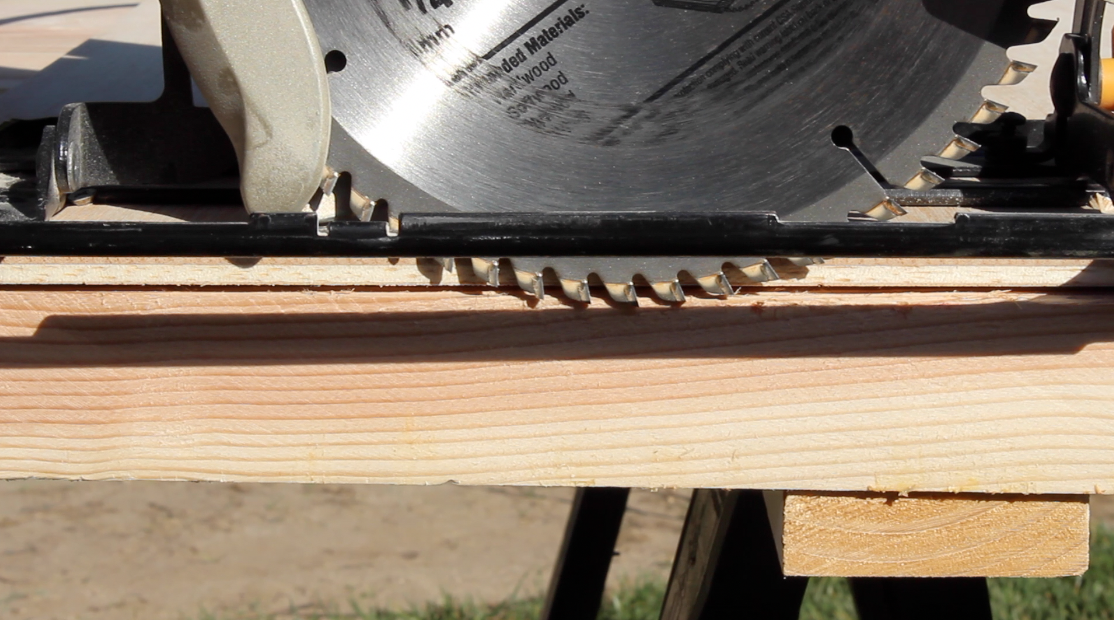
Now let’s get cutting. Set the circular to make a very shallow cut – about 1/8-inch deep. Get the saw up to full speed and slowly guide the saw along the path of the jig. Make a half circle cut from one side of the table to the other. Bring the saw back to the starting position and increase the saw blade depth another 1/8-inch. Repeat these steps – cut and increase blade depth – over and over until the end of the table has a perfect curve to it. Repeat the same steps for the other side of the tabletop.
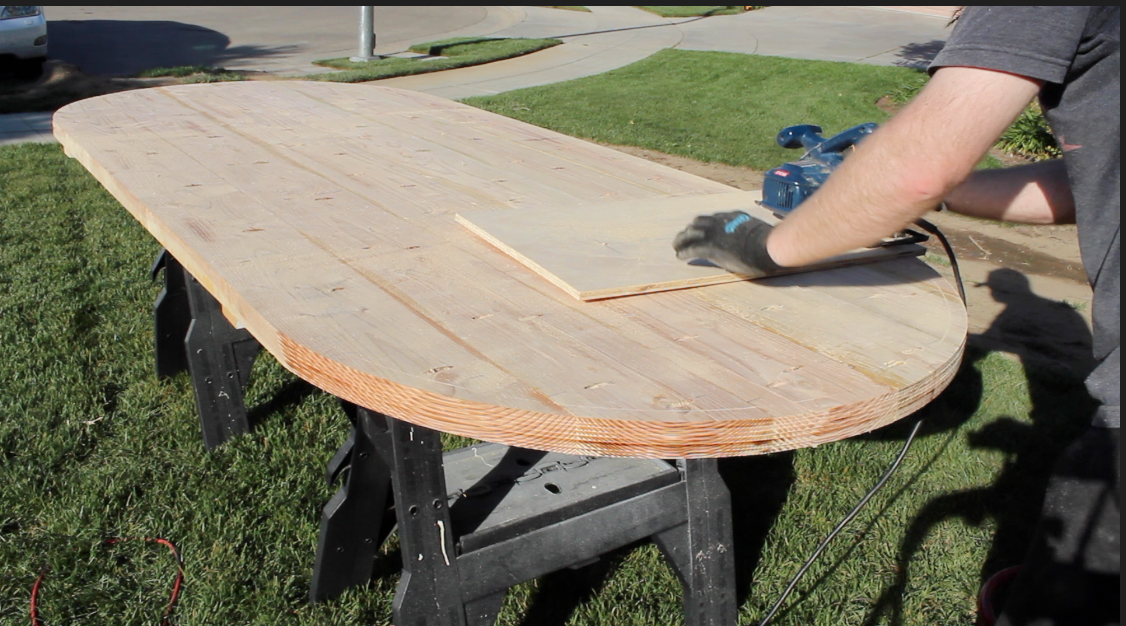
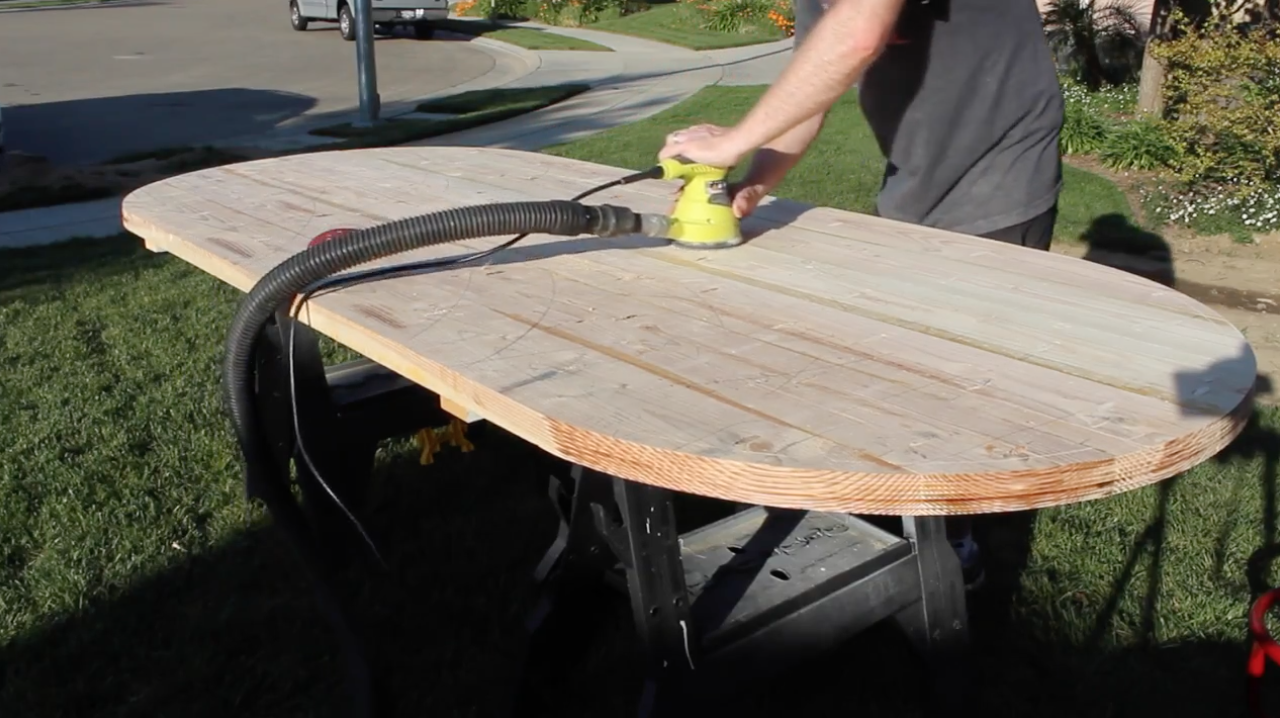
Sand both sides and all edges of the tabletop with 80-git sandpaper to eliminate tear-out from the circular saw, get rid of scratches and smooth out any uneven surfaces. Then sand the whole tabletop again with 120-grit paper to prepare it for staining and finishing – which we’ll get to after we build the trestle base.
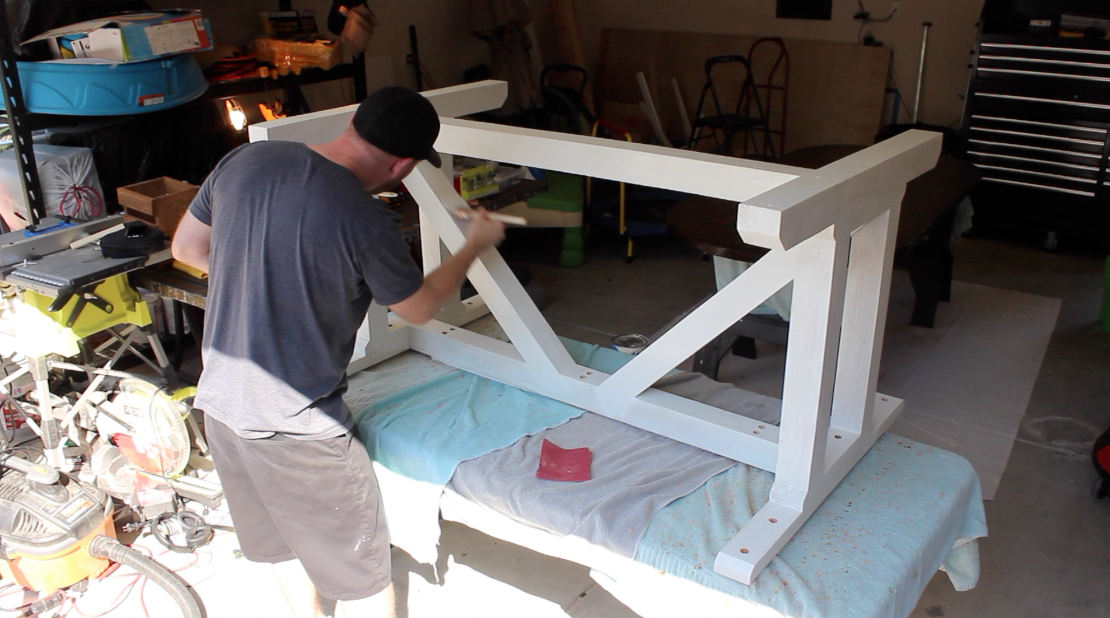
Building the Trestle Base
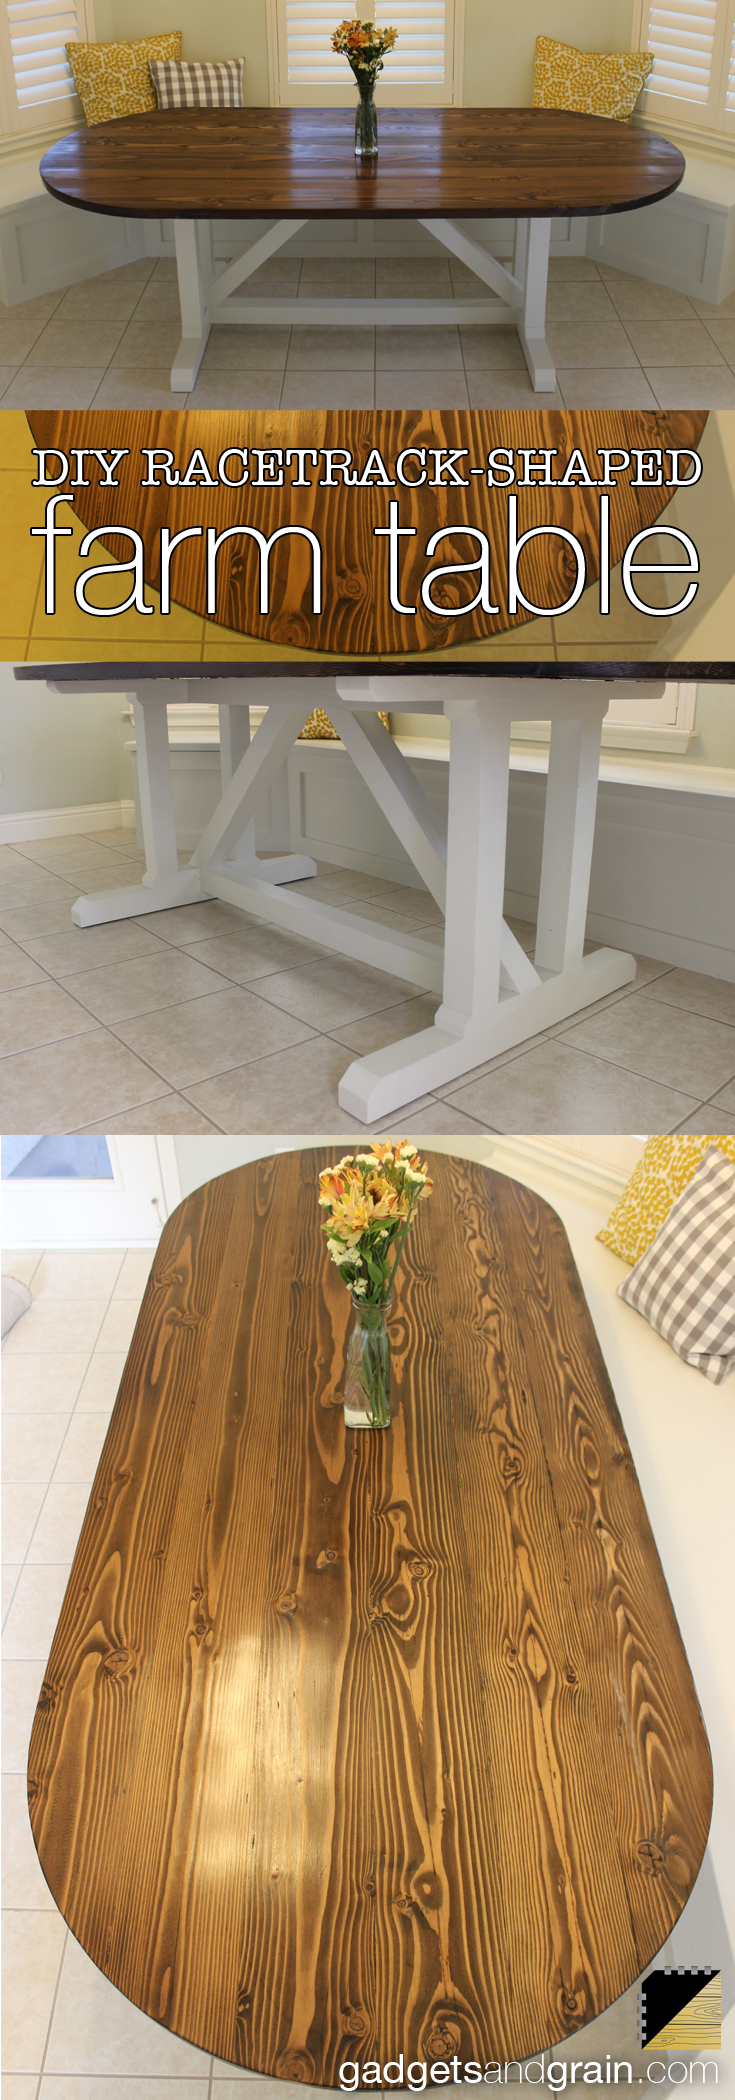
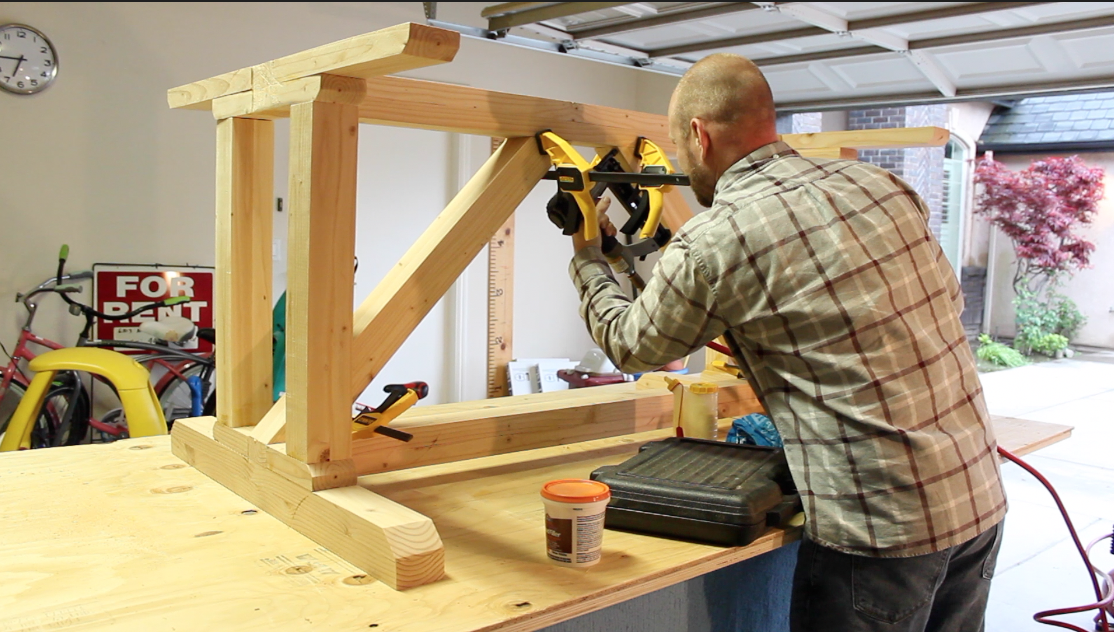
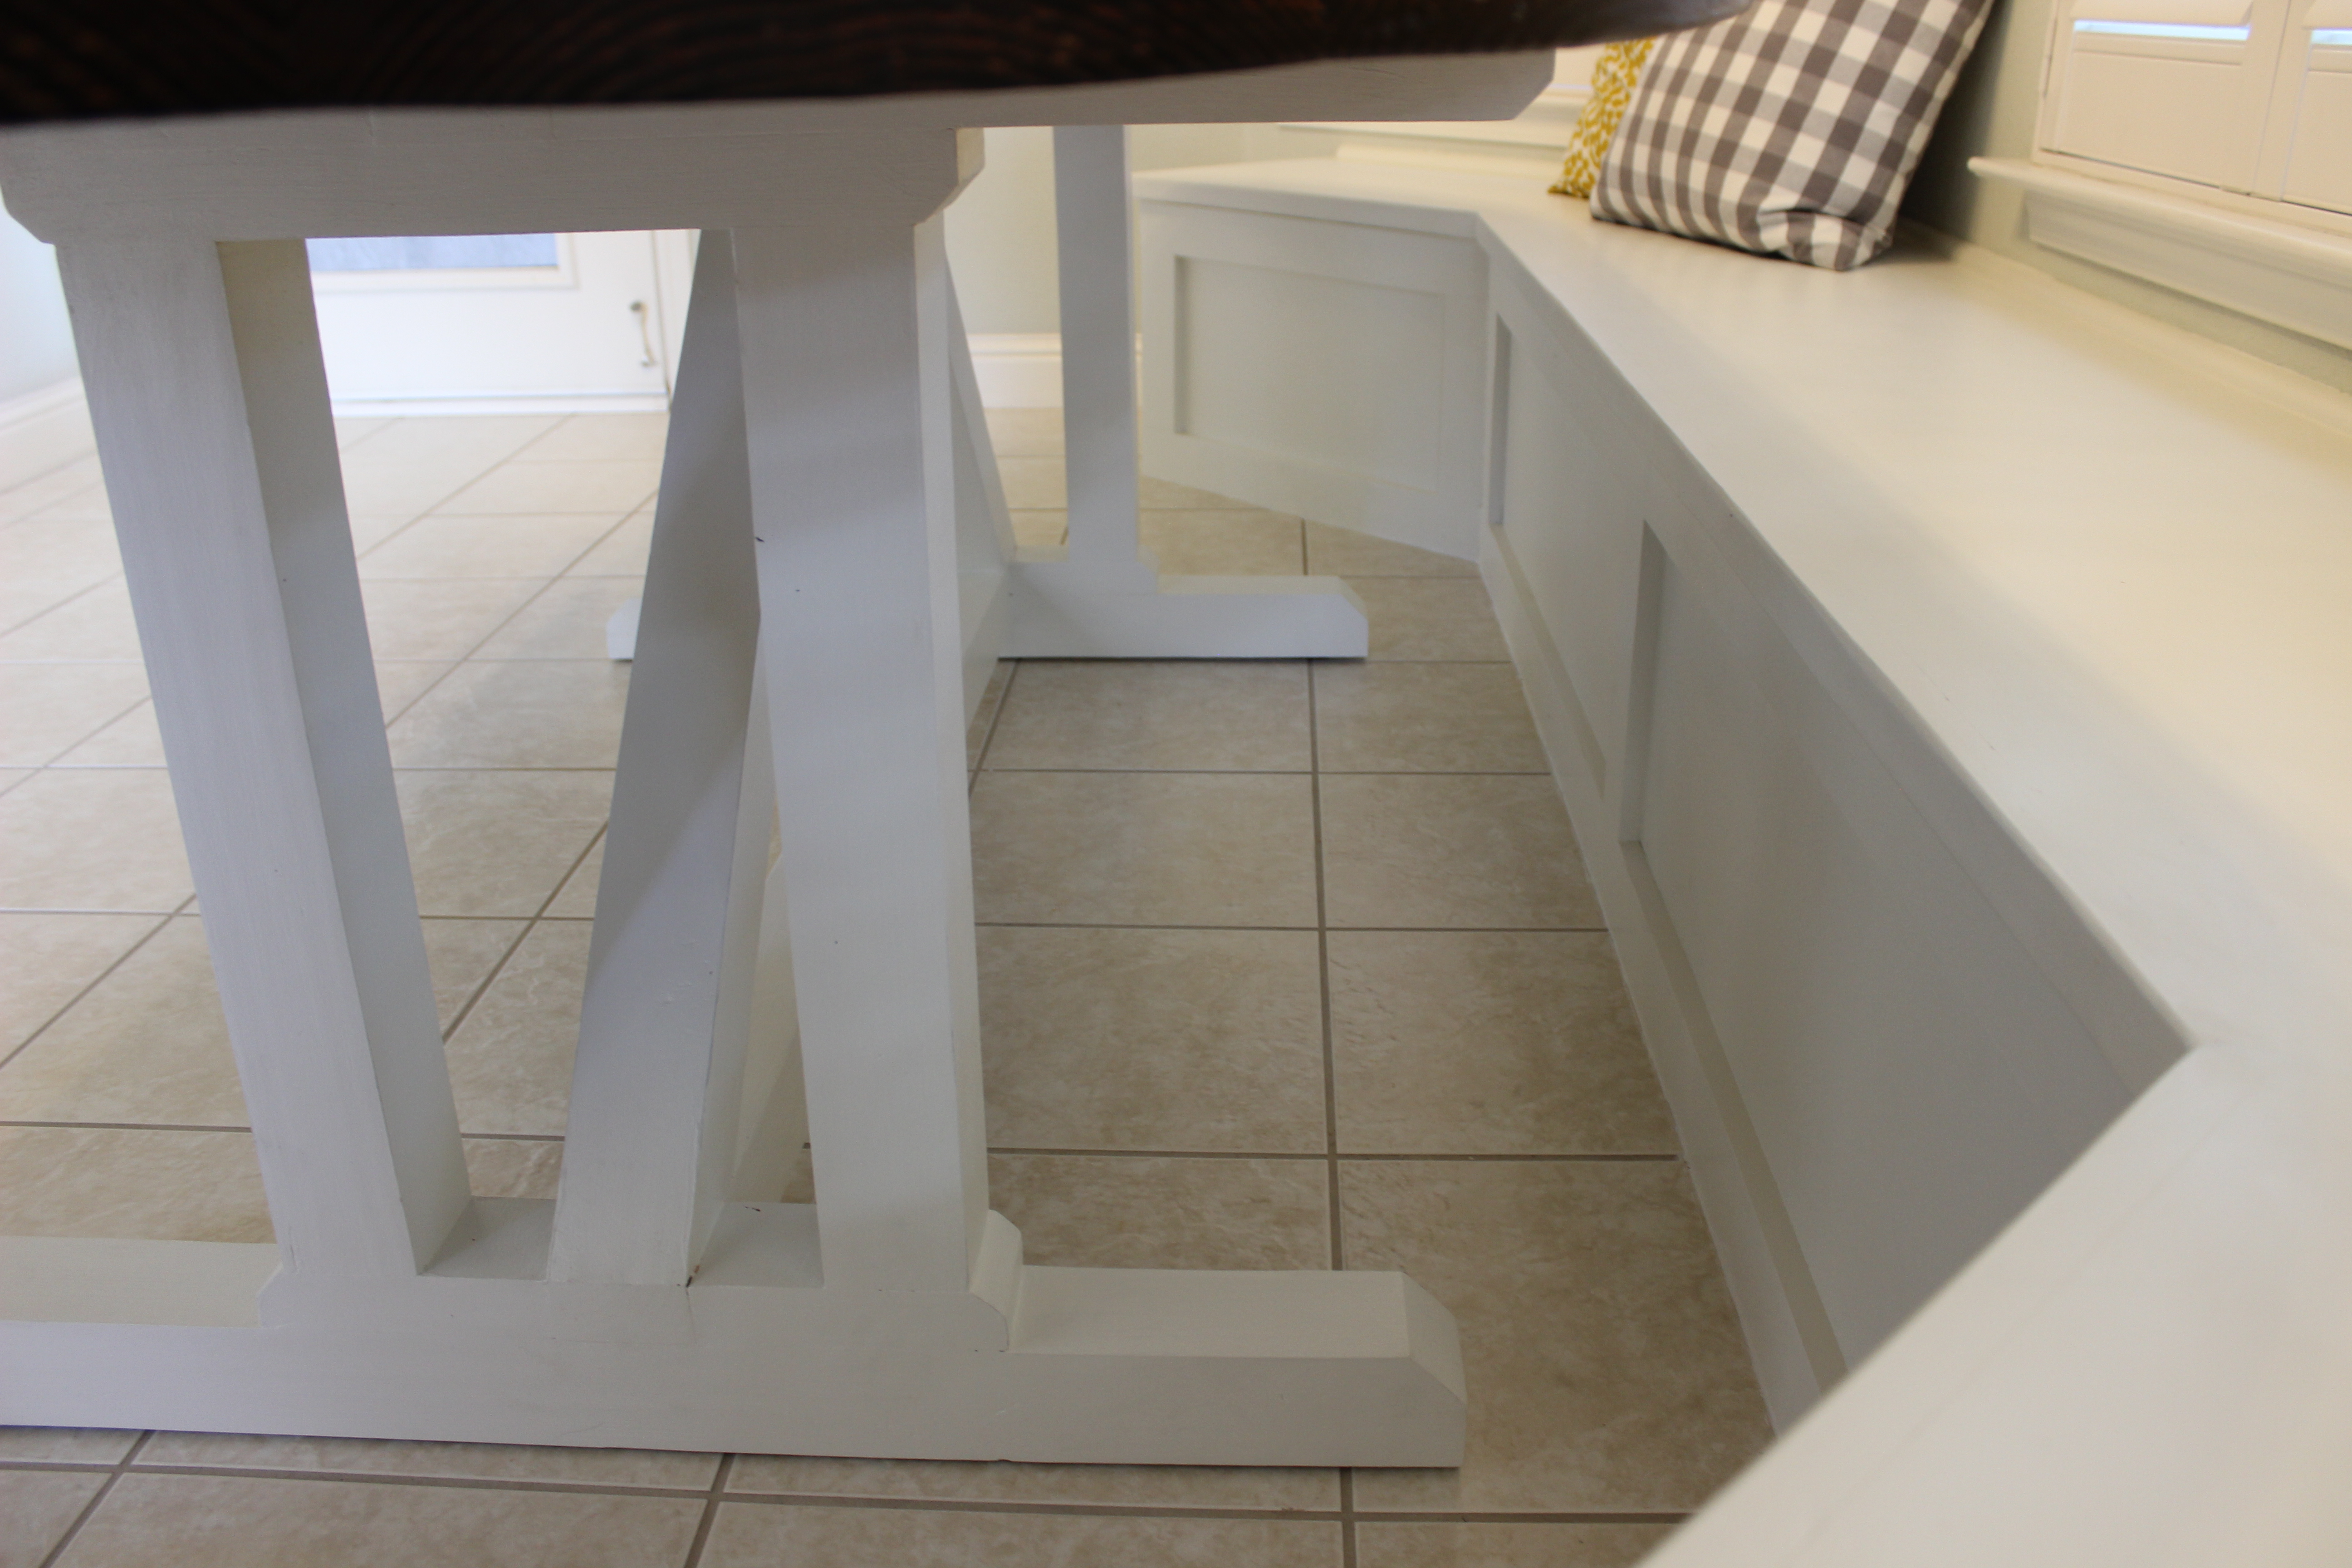
Since I needed people to easily scoot around the table while sitting at my banquette, I couldn’t have a base with legs that would bump the knees of my guests. While narrowing the design of the table legs, I had to make sure the frame would support the top.
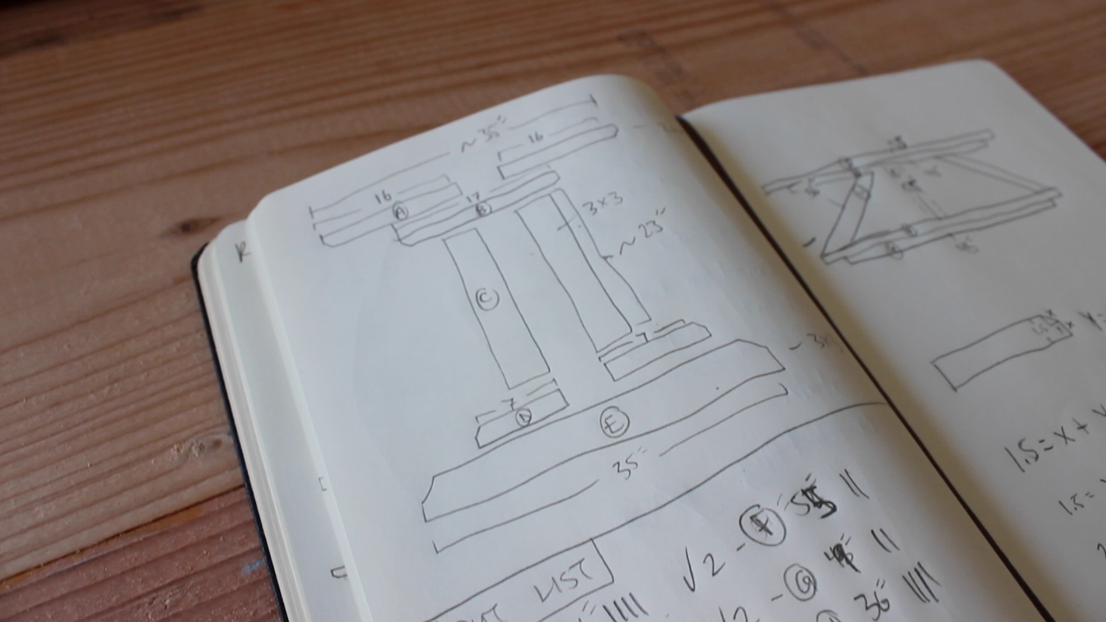
The frame of the base was made entirely of 2×4 boards, and for the thicker parts of the frame, like the legs and cross beams, the 2x4s were laminated together with wood glue. Using the design above, I had a good idea of how to cut my 2×4 boards, and I glued and clamped the thicker parts.
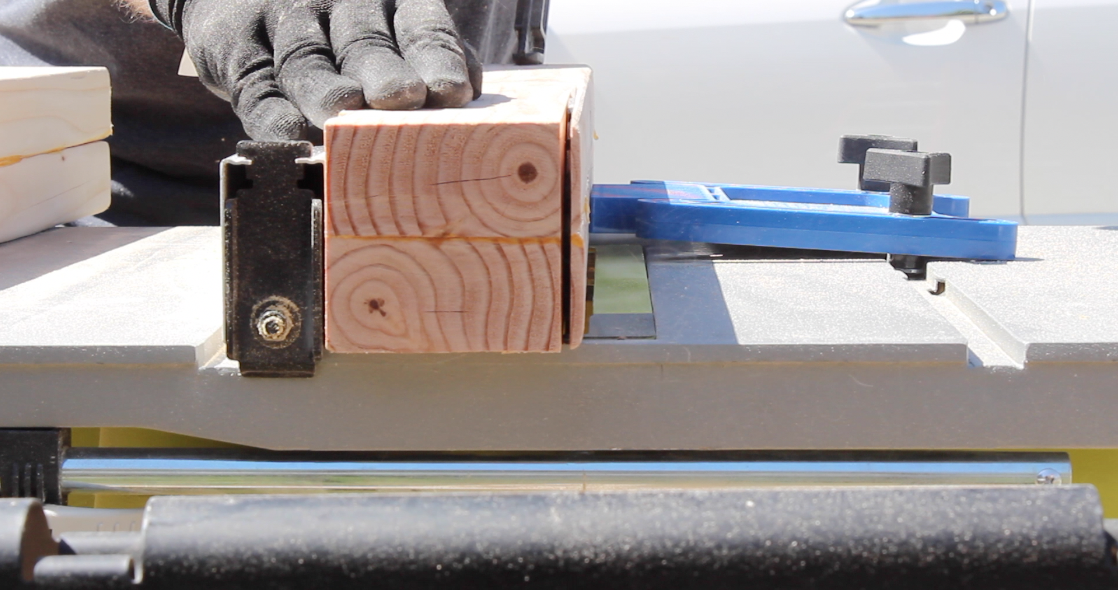
Also, to give the base a more seamless appearance, I ripped about 1/4-inch of material off of each side of the 2×4. For the thick pieces, this resulted in the boards that were perfectly 3 inches by 3 inches. For some parts of the base, I added 45-degree angled miter cuts to add a bit of design.
Using a combination of pocket holes, screw or brad nails – but always with lots of wood glue, I assembled the table base. Use wood clamps to firmly hold the parts in place as they are being joined. If you’re painting the base (I did), then you can fill holes, knots and seams with wood filler. I used a wood filler from Elmers that goes on pink and dries white. Sand the entire based with 80-grit sandpaper to smooth surfaces, and then move on to 120-grit sandpaper.
If painting the base, first apply an initial coat of primer, then follow up with at least two coats of the paint of your choice. I recommend very lightly sanding between all coats with 220-girt paper to give the base an extra smooth feel. Once the base is all painted, set it aside and get ready for staying an finishing of the tabletop.
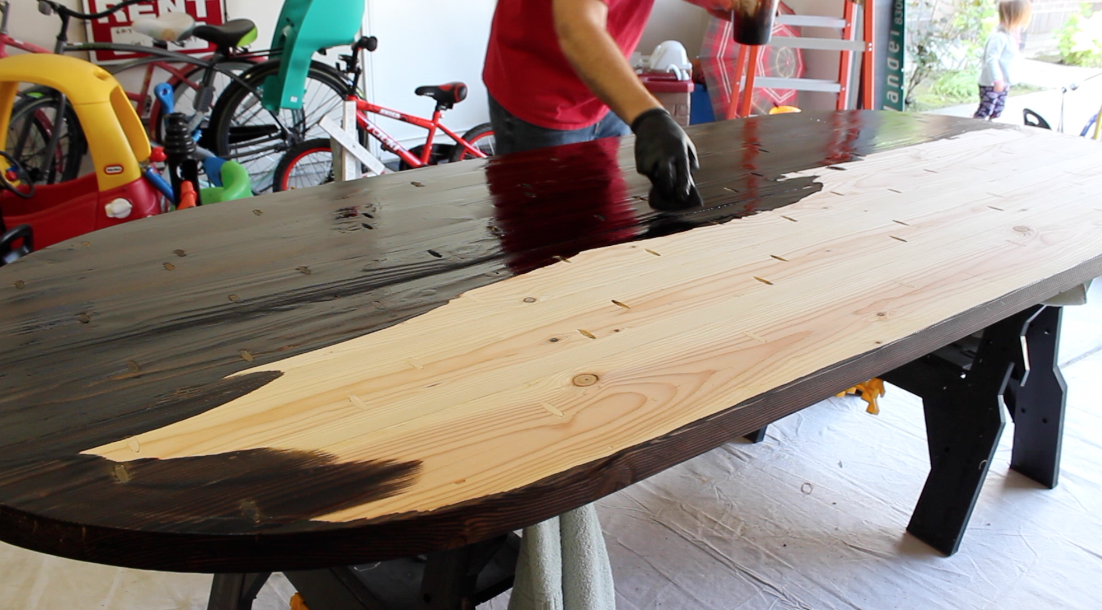
Staining and Finishing the Tabletop
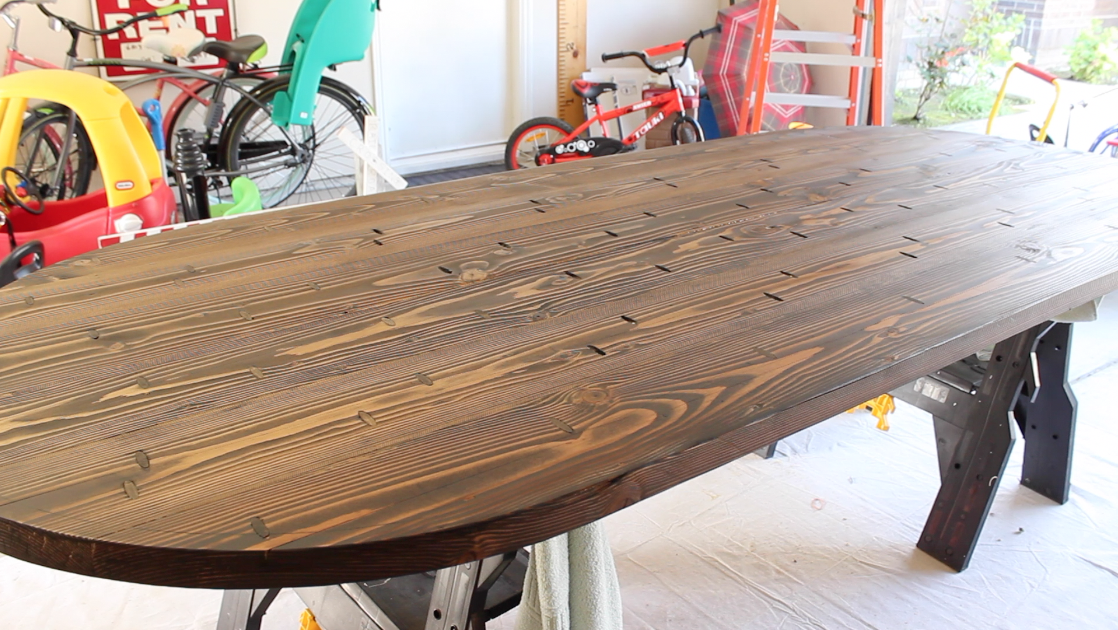
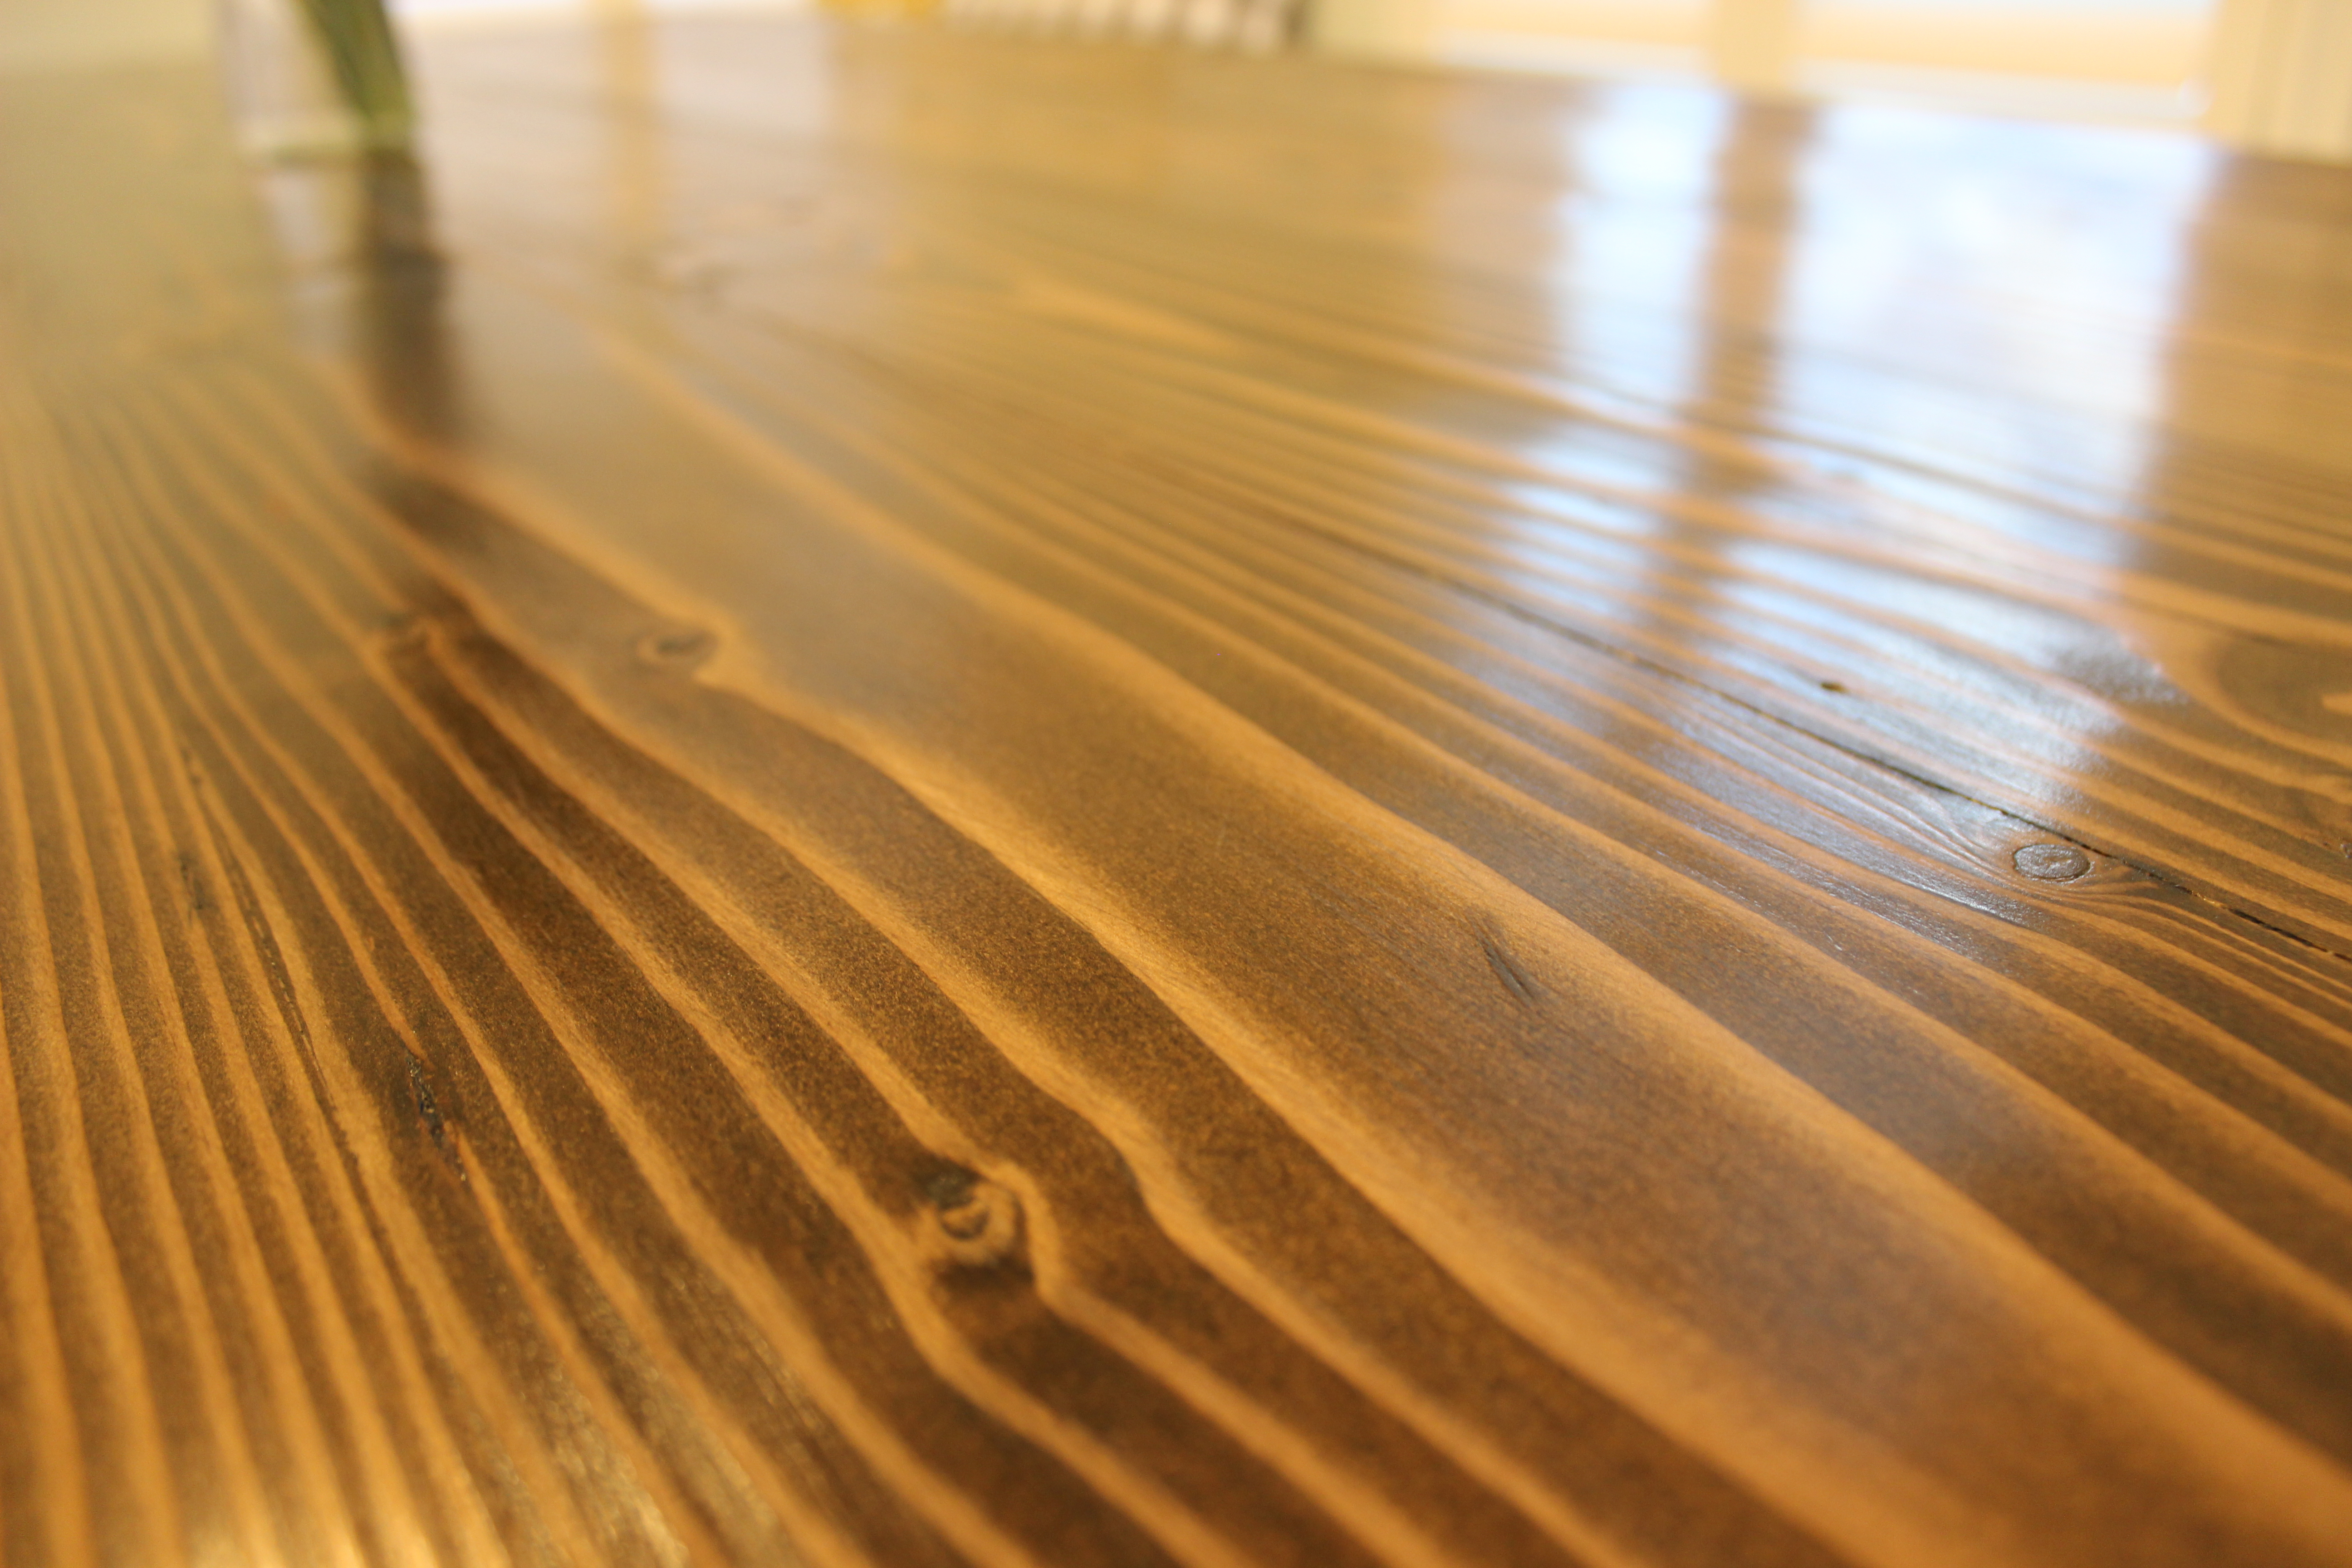
Now that you’ve built and assembled a flat, beautifully curvy tabletop, give it a beautiful natural color with a stain of your choice. First, start by wiping all side of the tabletop with a tack cloth to remove any residual sawdust from sanding. Then, you might want to prep the wood with a wood conditioner. I used a water-based pre-stain conditioner from Minwax to help made the wood grain pop and prevent blotchy acceptance of the stain. Then, apply a healthy coat of stain on one side of the table top. As most stains sit of the wood, they will make the wood even darker, so read the instructions on your particular wood stain, to achieve the level of color you are looking for. Using “Dark Walnut” from Minwax, I let the stain sit for about 15 minutes on the tabletop. before wiping it off with some rags. Allow adequate time (about 24 hours) for the string to dry and absorb before moving on to finishing. Also, be sure that the tabletop is in a well-ventilated area.
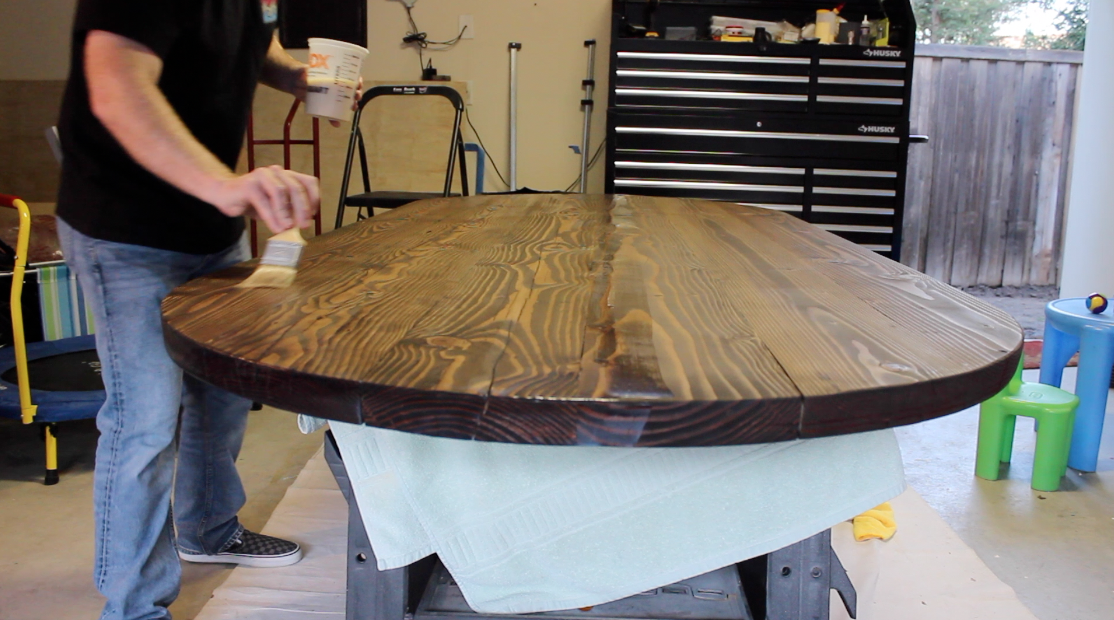
To protect and seal the wood, you’ll need to apply 2-3 coats of wood finish. I used Poly Whey furniture finish from Vermont Natural Coating. I let the finish dry for about 6 hours in between coats and lightly sanded with 220-grit sandpaper. Once the last coat of finish has had enough time to dry, it’s time to move on to the final assembly and attach the base to the tabletop.
Putting It All Together
Topside facing down, place the tabletop on a couple of sawhorses. Drive screws that are just long enough to go through the base, but not too deep as to poke through the table surface. Move the table into the house and enjoy. Here are picture of the table sitting next to its accompanying banquette. If you like the banquette, be sure to check out my other post about how to build your own banquette.


Links to Tools I Used
If you’re curious about some of the products I used on this project, check them out on Amazon. When you click on the links below, Gadgets and Grain gets a little commission when you check out – I would greatly appreciate it!
- Kreg Jig K4 Pocket Hole System
- Kreg Pocket Hole Screws
- Kreg Face Clamp
- Dewalt Trigger Clamps
- Dewalt 20V Cordless Drill
- Titebond II Wood Glue
- GluBot Glue Applicator