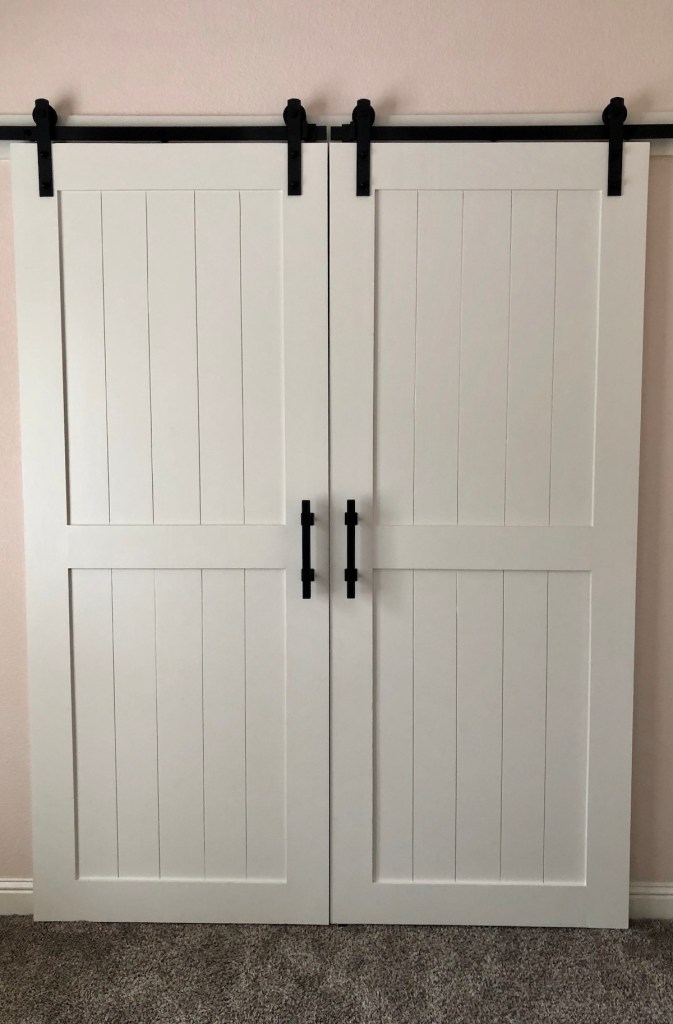
Sliding barn doors add great character to any room, and when you have the space, they do wonders to accentuate a bedroom closet. I recently replaced the closet doors in my daughter’s bedroom with these closet barn doors made from cheap pine lumber, plywood and hardware purchased on Amazon. If you’d like to add a dramatic look to a room with a rather simple woodworking project, take a look at the build video below:
For step-by-step instructions, detailed photos of the finished project and a list of what you’ll need to buy for this project, read on…
Just a heads up: This post contains affiliate links, and I can earn a small commission on items you buy online without any extra cost to you. It helps keep the lights on, so any help is much appreciated. Also, this post contains paid placement for links to White Shanty’s website.

Amazon & Home Depot Shopping List For This Project
If you are interested in building this project yourself, take a look at the list below. These are affiliate links so when you make your purchase, a small commission goes to me (while you pay nothing extra). Thanks in advance supporting me.
- 6 ft. slide barn door kit
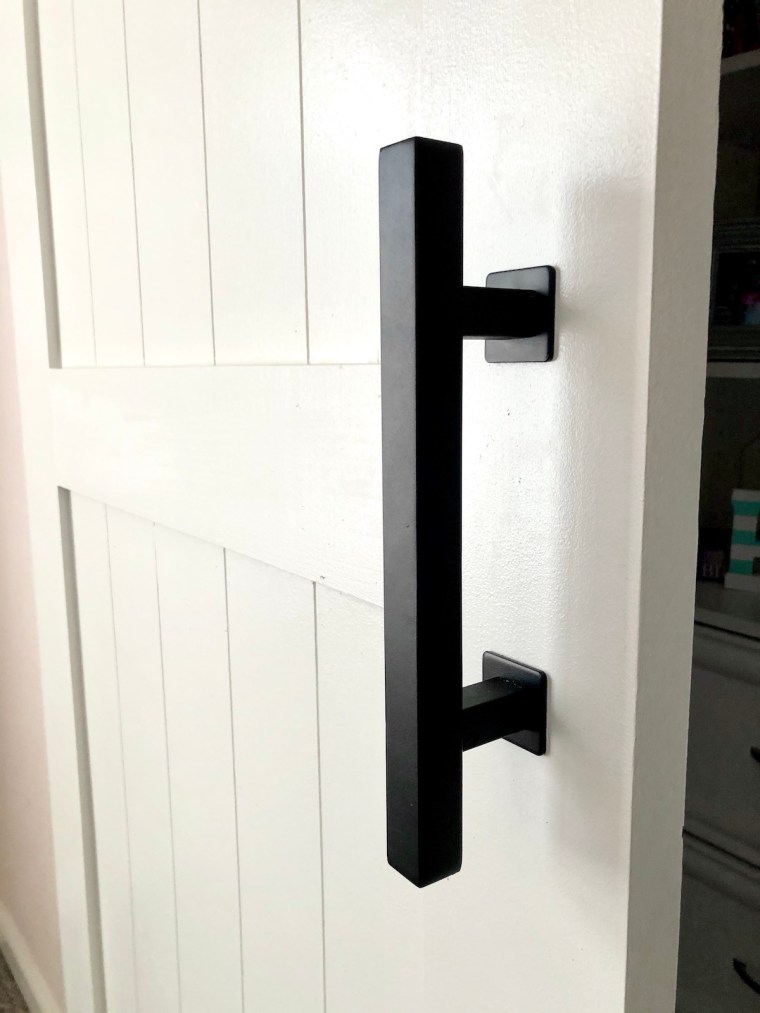
- 12-inch barn door handle
- barn door floor guide
- Sliding miter saw
- Cordless drill
- Pocket hole jig
- Face clamp
- Circular saw
- Circular saw guide
- Trigger clamps
- Glue bottle
- Brad nailer
- Brad point drill bits
- Air compressor
- Stud finder
Step-by-step Instructions
1. Remove existing closet door casing. To make removal easier, score the casing with a razor to cut through paint and caulking. Use a pry bar and hammer to gently separate the casing from the wall. Remove any finish nails that may remain in the dry wall.

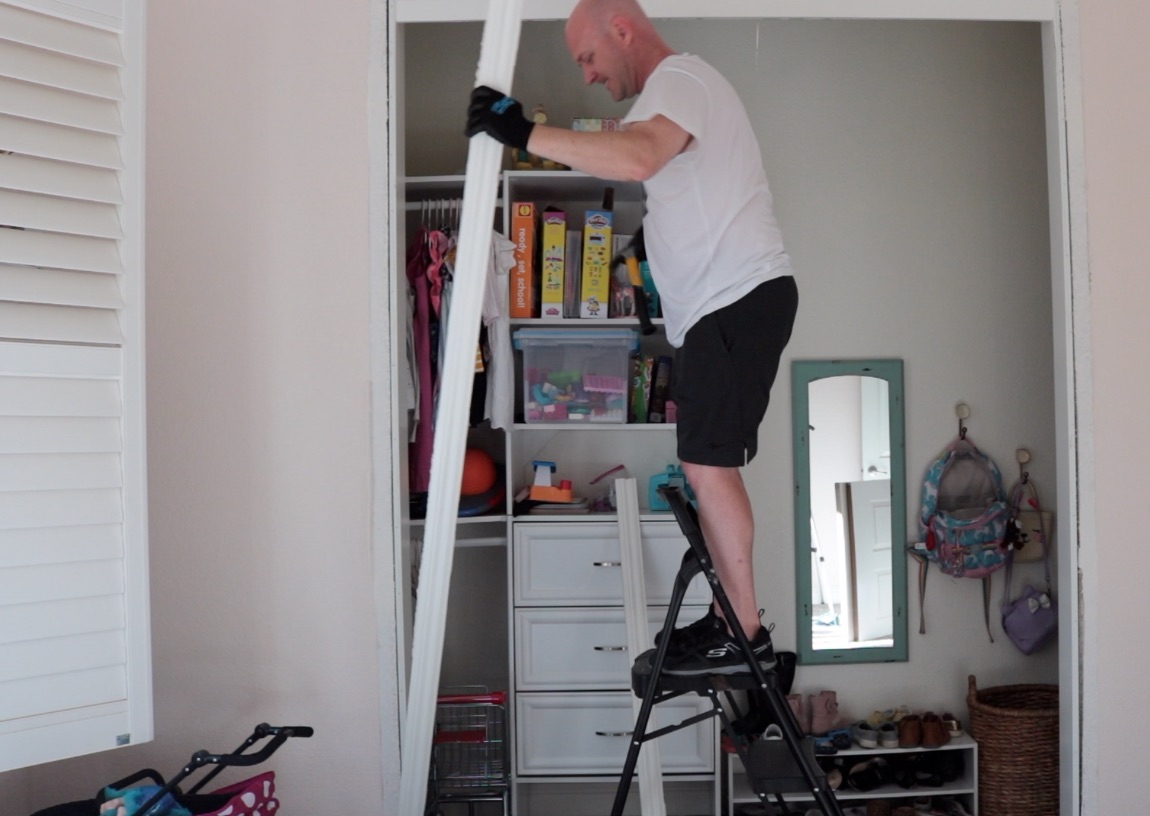
2. Measure the closet width and height to understand design requirements for the barn doors. Take into account that there should be enough room for the closet doors to fully open without bumping into any adjacent walls. When closed, the doors should be wide enough to conceal the casing boards on the side of the closet.
3. Cut and rip boards for new closet door casing. The casing should be the same thickness as the baseboards to which it’s adjoining. My baseboards are 3/4 inch thick so I used boards are 3/4 thick to match. I ripped my side casing boards to be 2 1/2 wide and the top casing, which supports the rail, to be 5 inches wide.
4. Prime and paint boards for new casing. I primed all sides of the board with one coat, and only painted the sides that would be visible.
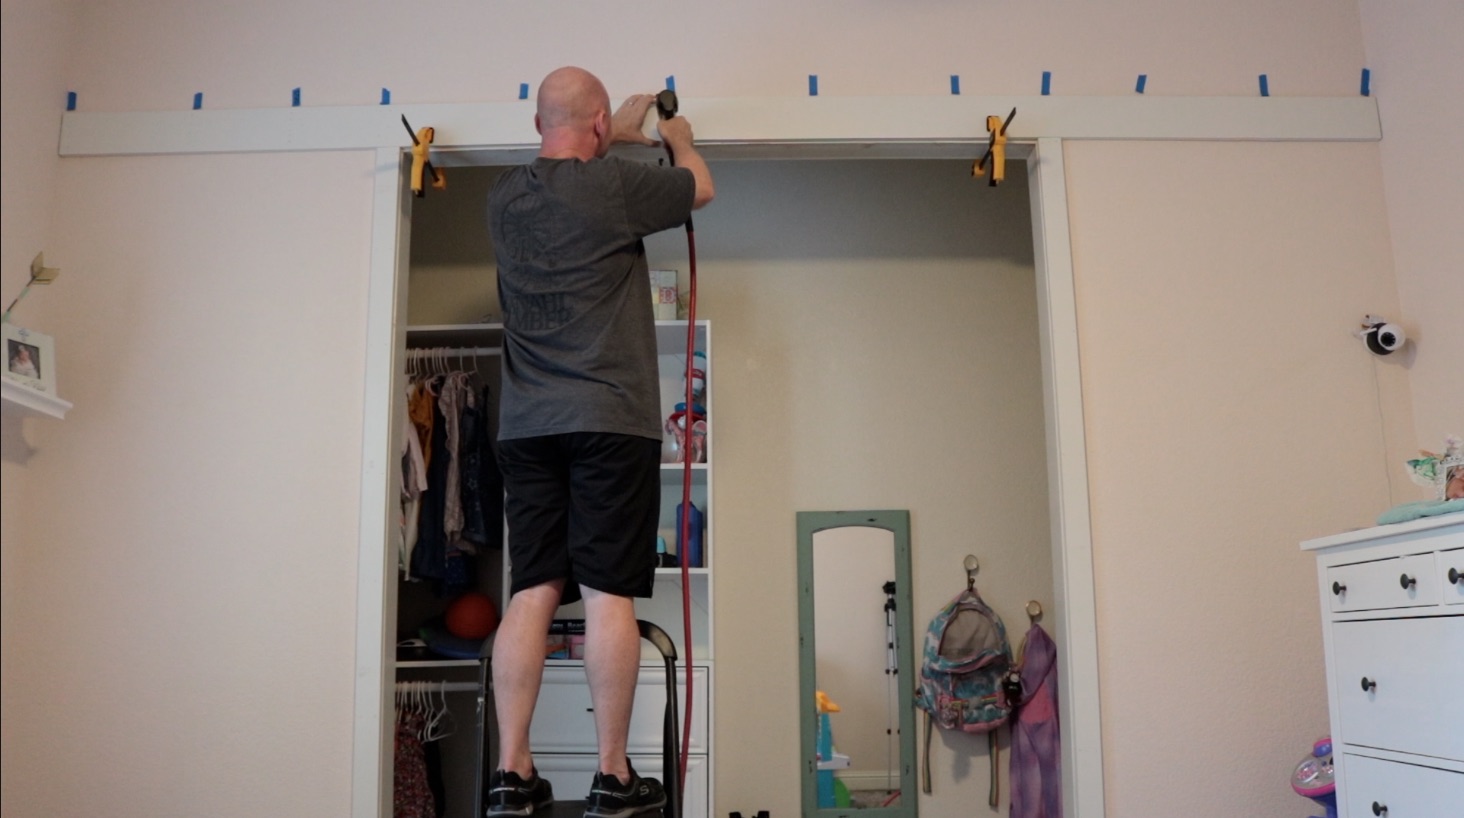
5. Find wall studs for attaching the new casing with a stud finder. It’s important that the top casing be secured to the wall studs since it will need to provide support for the metal rail, which in turn, will hold the hanging doors. I used an electronic stud finder and masking tape to mark where to nail the top casing.

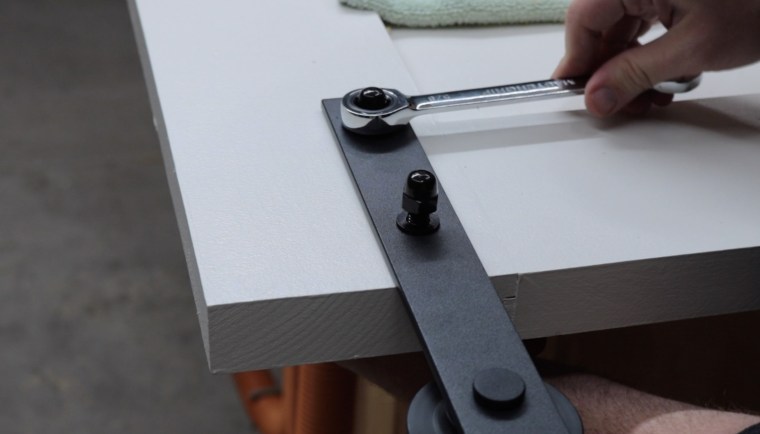
6. Secure new casing to the closet door frame with long finishing nails. I used 2 1/2-inch finishing nails. To make sure the top casing would provide plenty of support for the door rail, I applied 4 finishing nails at each stud. I highly recommend investing in a pair of trigger clamps to hold the casing boards in place while using the nail gun.
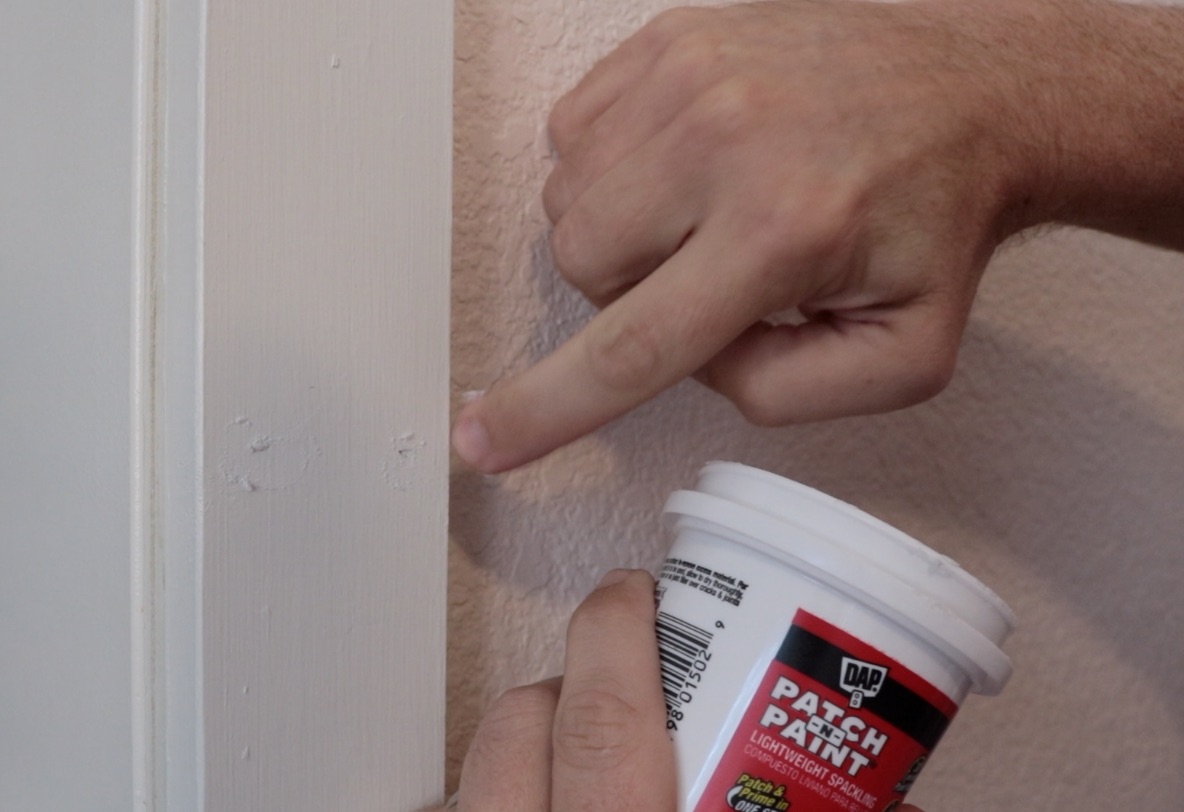
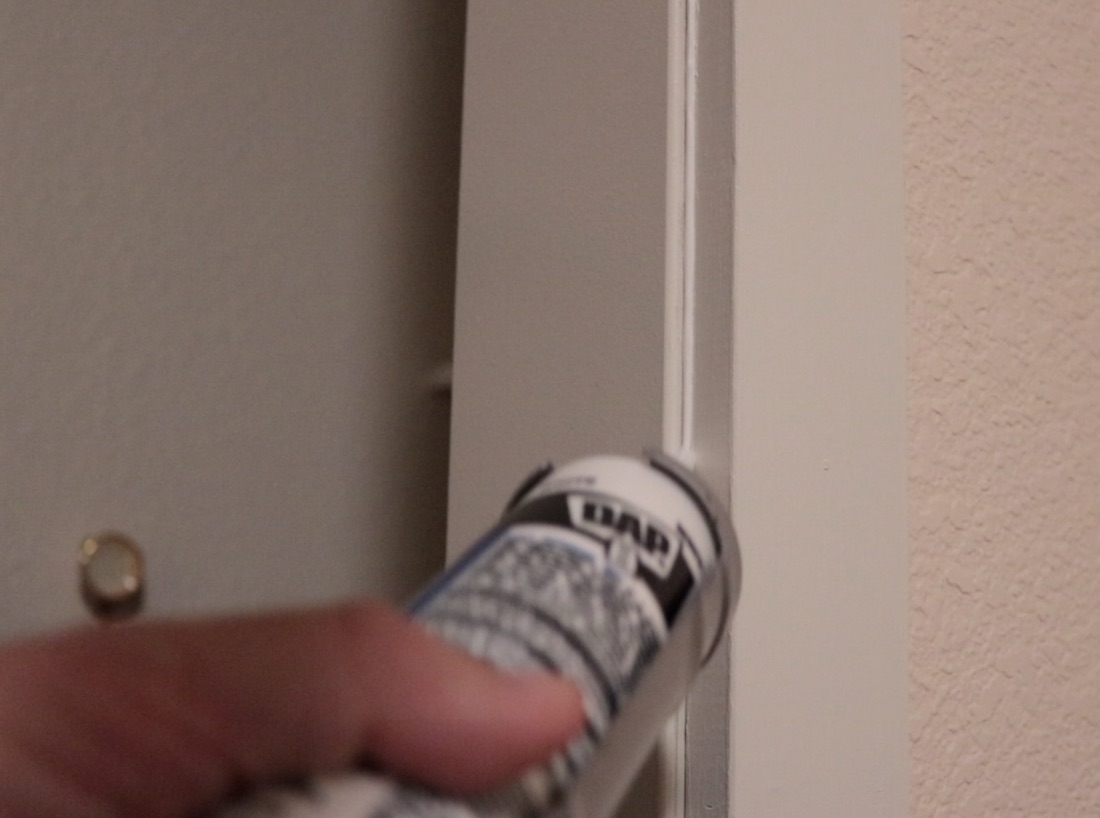
7. Patch all nails holes and apply caulking to seams on casing. To smooth caulking, run a finger along the seam to completely smooth it to the casing surface. Once the patching compound and caulking are dry, touch up your wall and casing with paint for a clean look.
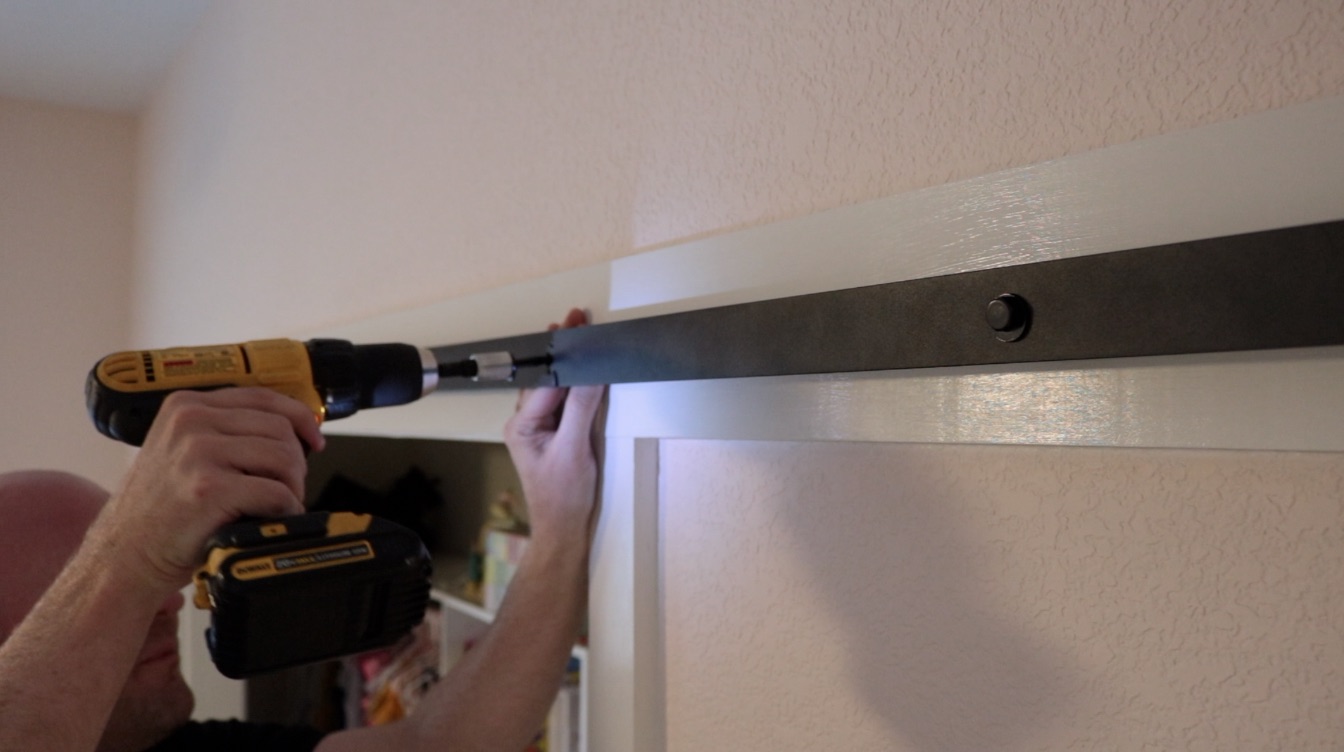
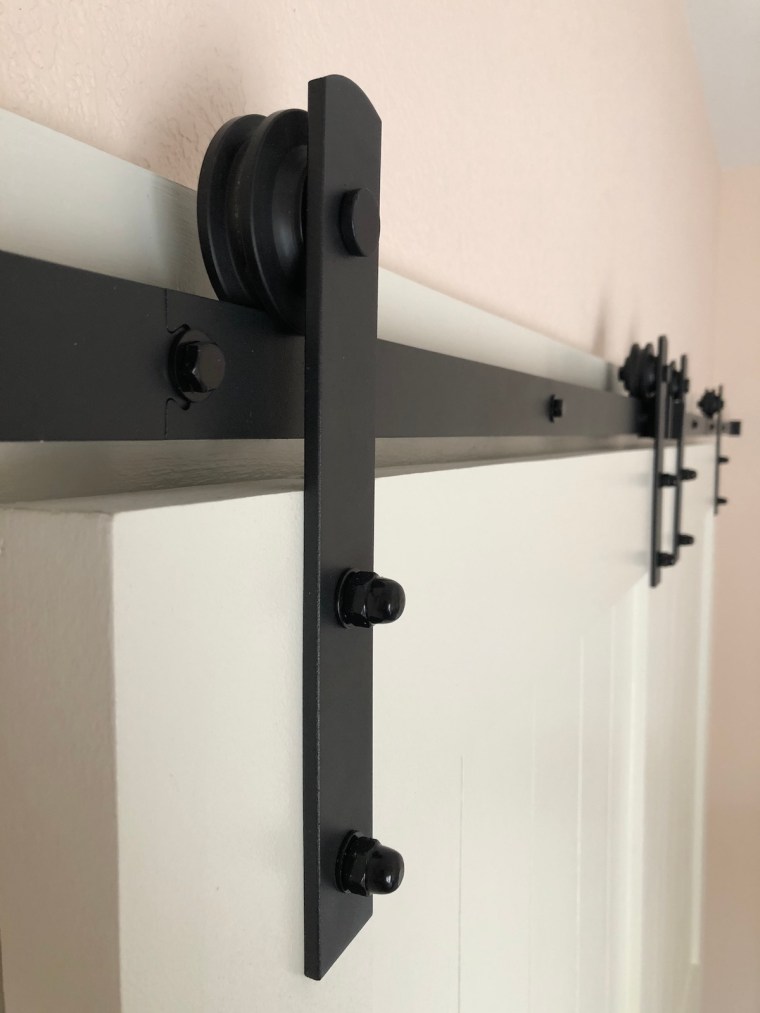
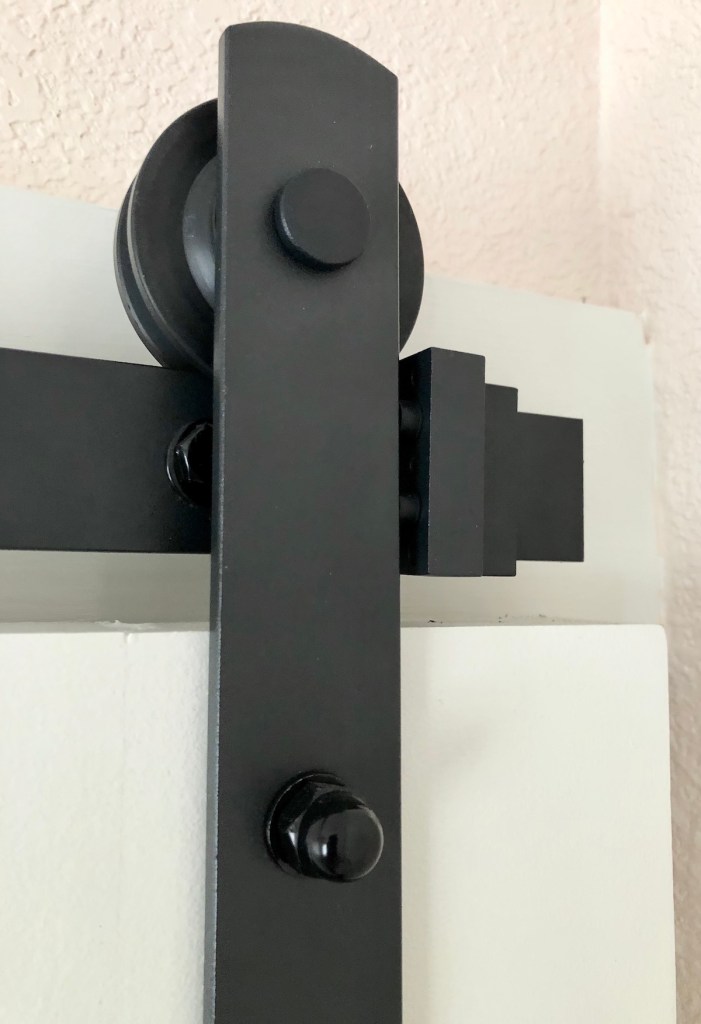
8. Install rails for barn doors using the included lags screws, washers and spacers. To mark the holes for the pilot holes, hold the rail up to the top casing board with a level to ensure its aligned properly. Mark the center of the hole in the rail for the pilot holes – for this rail, the holes were 16-inches apart.
To prevent the metal rail from scratching or marking, put some masking tape on the side of the rail that will come in contact with the top casing. And again, trigger clamps are very helpful here to hold the rail in place. Once all pilot hole locations are marked, drill with a 1/4-inch bit. Attach the rail to the top casing using the included lag screws, washers and spacers. In case the rail is being installed against a wall, it might make sense to loosely secure the door stoppers that come with the hardware kit. The door stoppers prevent the door from sliding off the rail and/or hitting wall.
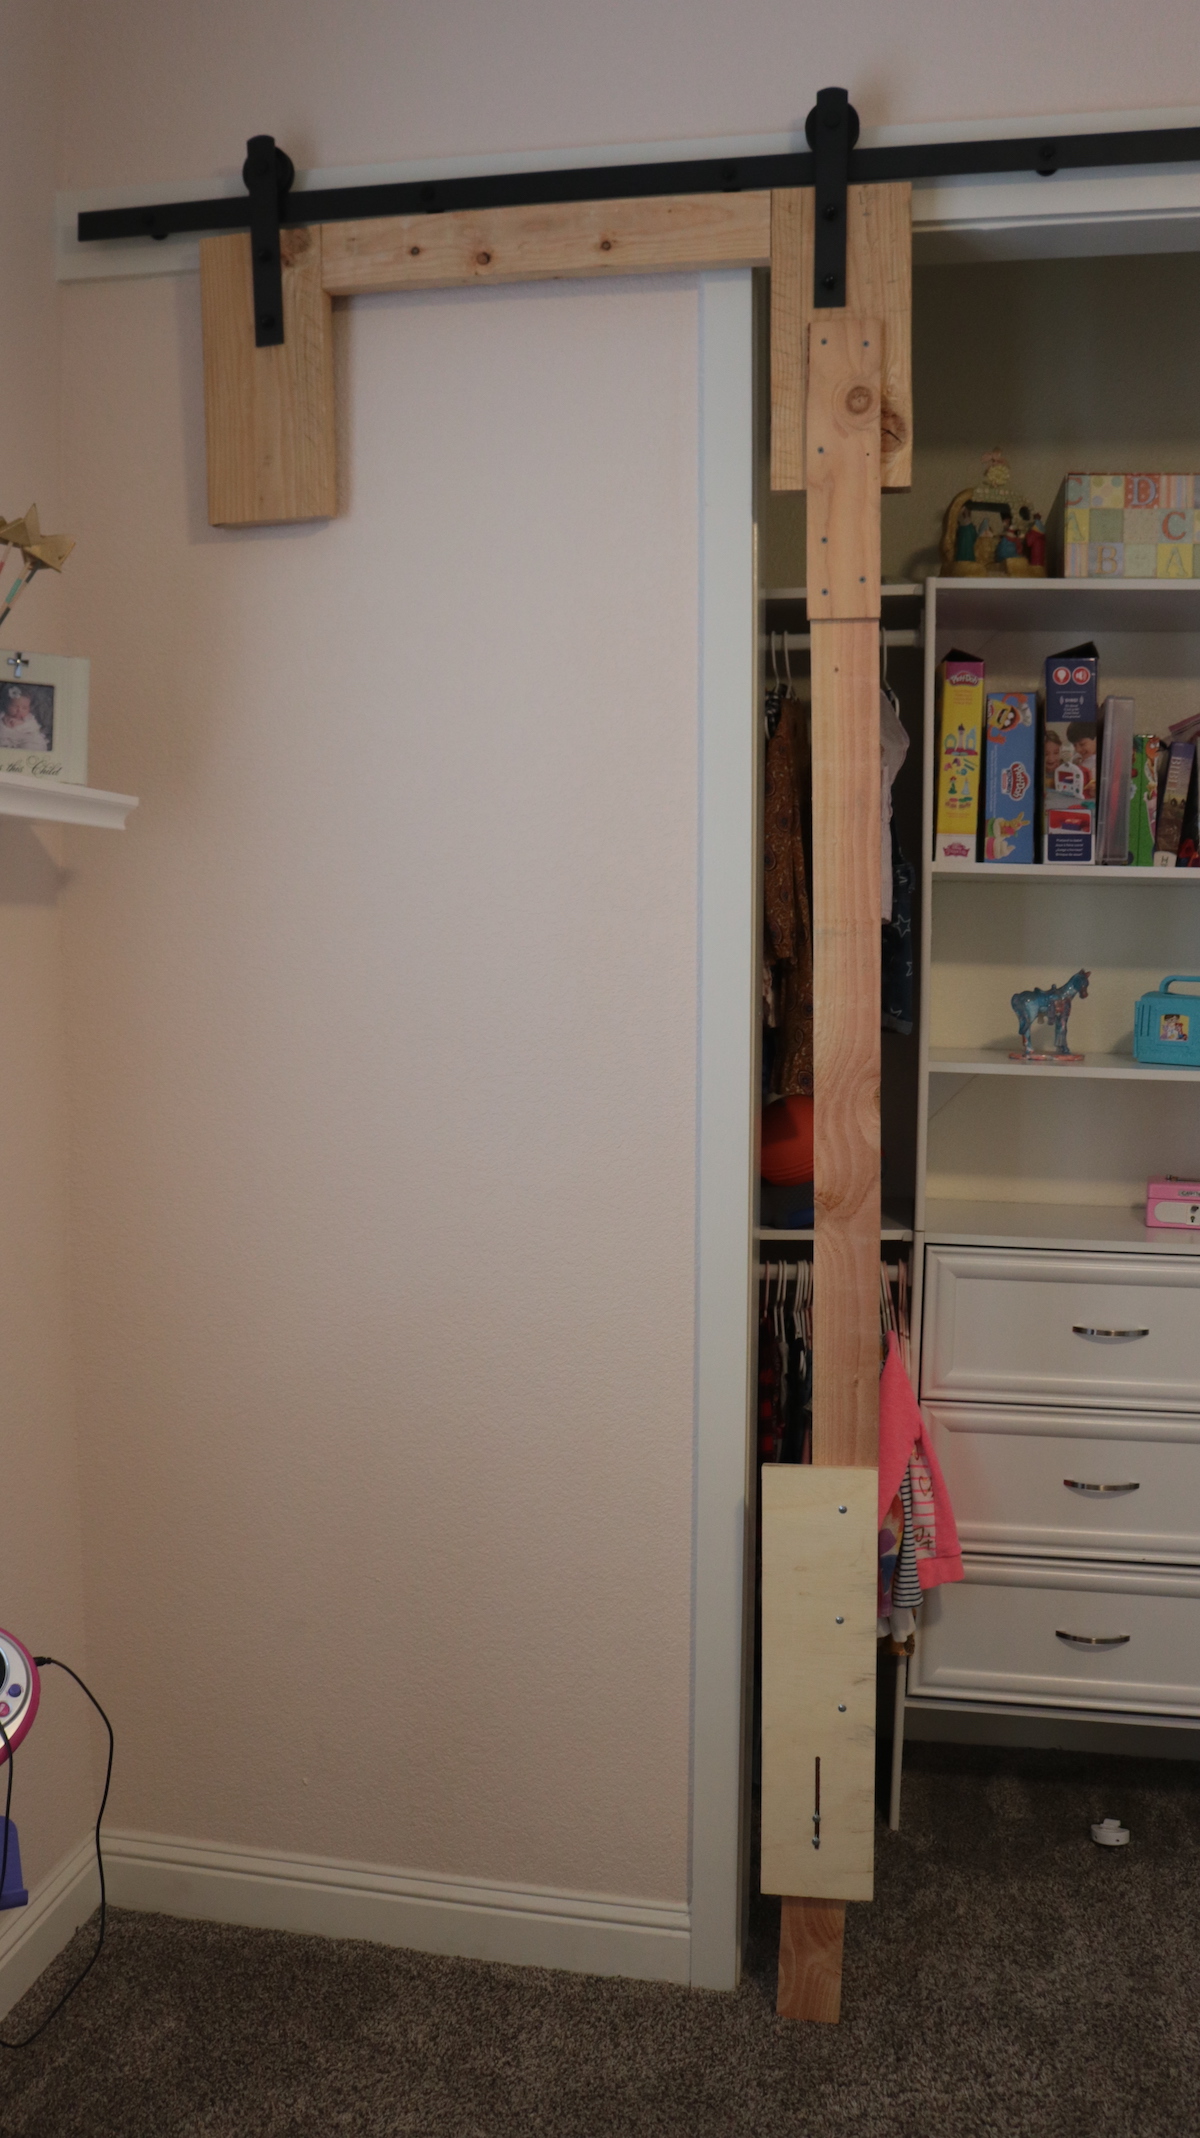
9. Determine the height for the door based on the height of the sliding rail. According to the instructions on this hardware I ordered from Amazon, the door height should be 1 11/16-inches less the height from the floor to the center of the rail. So if the center of your rail is 80 inches from the floor, the door height should be 78 and 5/16 inches – at least according to this particular sliding door hardware.
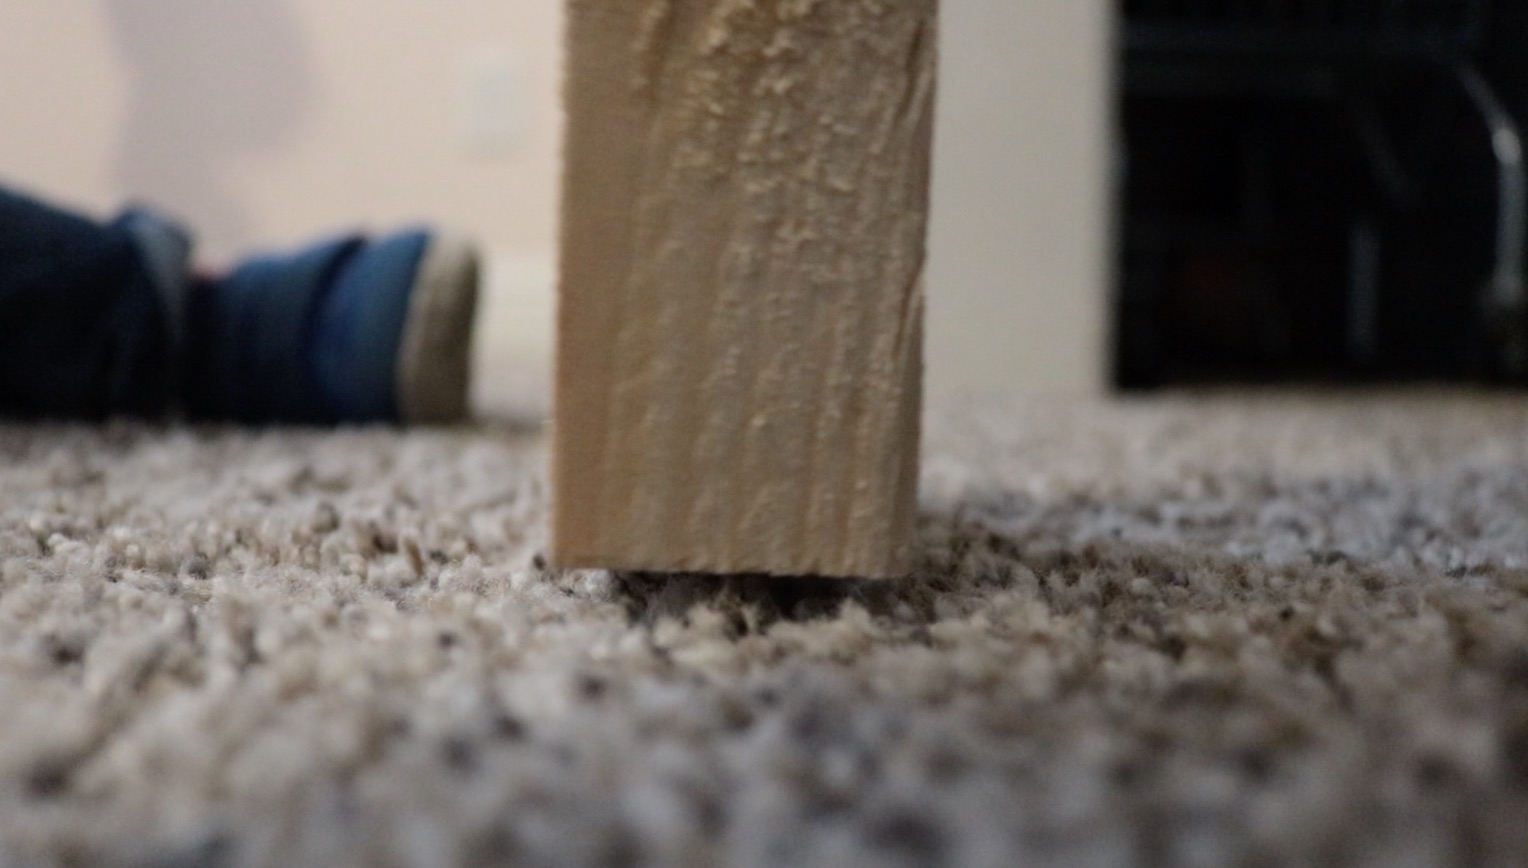
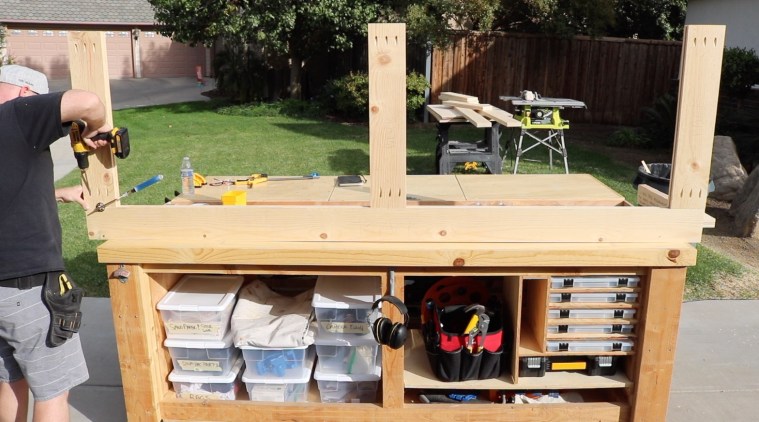
To ensure final measurements are 100% accurate, I mocked up a rough door frame with the sliding hardware (pictured below). At the bottom of the mock-up frame, I had a 2×4 that could slide up and down to fine tune the proper door height. I adjusted my frame to just barely brush the carpet on the floor. I took this final measurement to then construct the door frame.
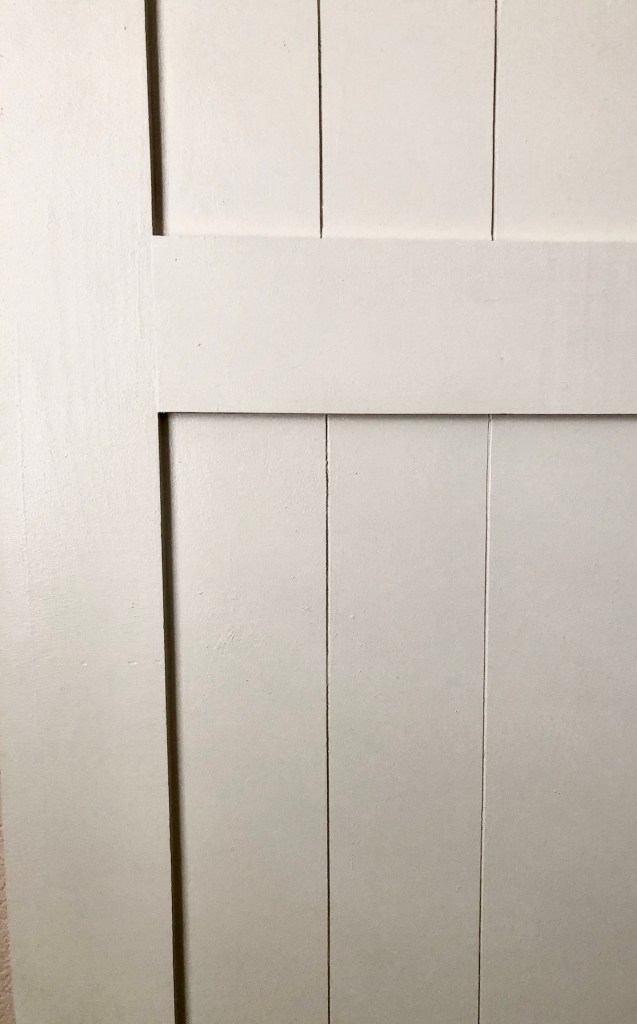
10. Cut boards for door frame. Most barn door hardware is designed to accommodate 1 1/2-inch thick doors – so basically 2×4 stock. Cut all boards to consistent width. For my doors, I found that 5 1/2-inches felt good given the size of the doors and the baseboards in the bedroom. Experiment with various widths using scrap pieces before milling all your boards.
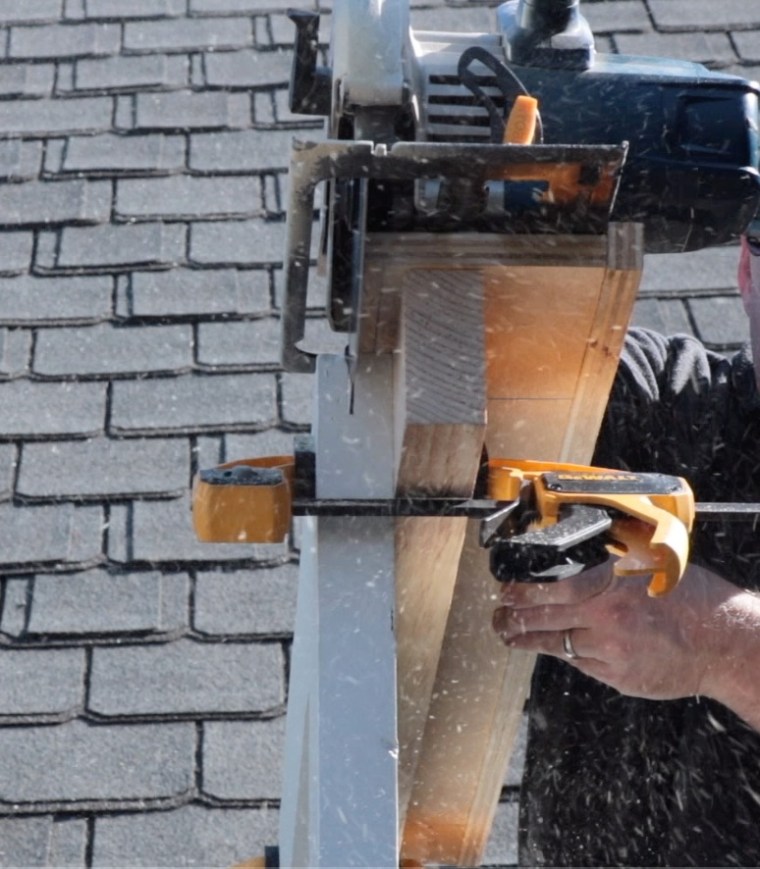
Set your table saw fence to the desired width and rip all boards for the frame. Then, using a miter saw or circular saw with a guid, cut the rails (the horizontal parts of the door frame) and the stiles (the vertical parts of the door frame) to their final lengths. For one door, there are two stiles and three rails (top, middle and bottom).
For this project, I sourced my lumber from a smaller independent supplier rather than from a local home center (like Home Depot or Lowes). This allowed me to get higher quality white pine that was free of ugly knots and defects that one would typically find in construction-grade boards.
11. Cut grooves into frame for door panels with a table saw. Since the plywood for the doors panels is 3/4-inch thick, set the fence of the table to be 1 1/8-inch away from the saw blade. Also set the table saw blade to a height of 1/4-inch so it rips a shallow 1/4-inch groove into the stile and rail boards. Rip the inside edges of the stiles, top rails and bottom rails on the table saw. For the middle rail, rip the groove on both edges since each will need to accept a panel. To ensure consistent results, rip all the frame boards at once while the table saw fence is in the desired position.
After the first groove is ripped, rotate the board 180-degrees and make another pass on the table saw. From cut-to-cut, this should be the ideal width to fit the door panels. Rip additional grooves while slightly edging the table saw fence closer to the blade, and rotate the work piece to make a secondary pass.
This will eventually results in a 3/4-inch wide groove in the frame boards. Use a 1/8-inch wood chisel to remove any remnant shavings.

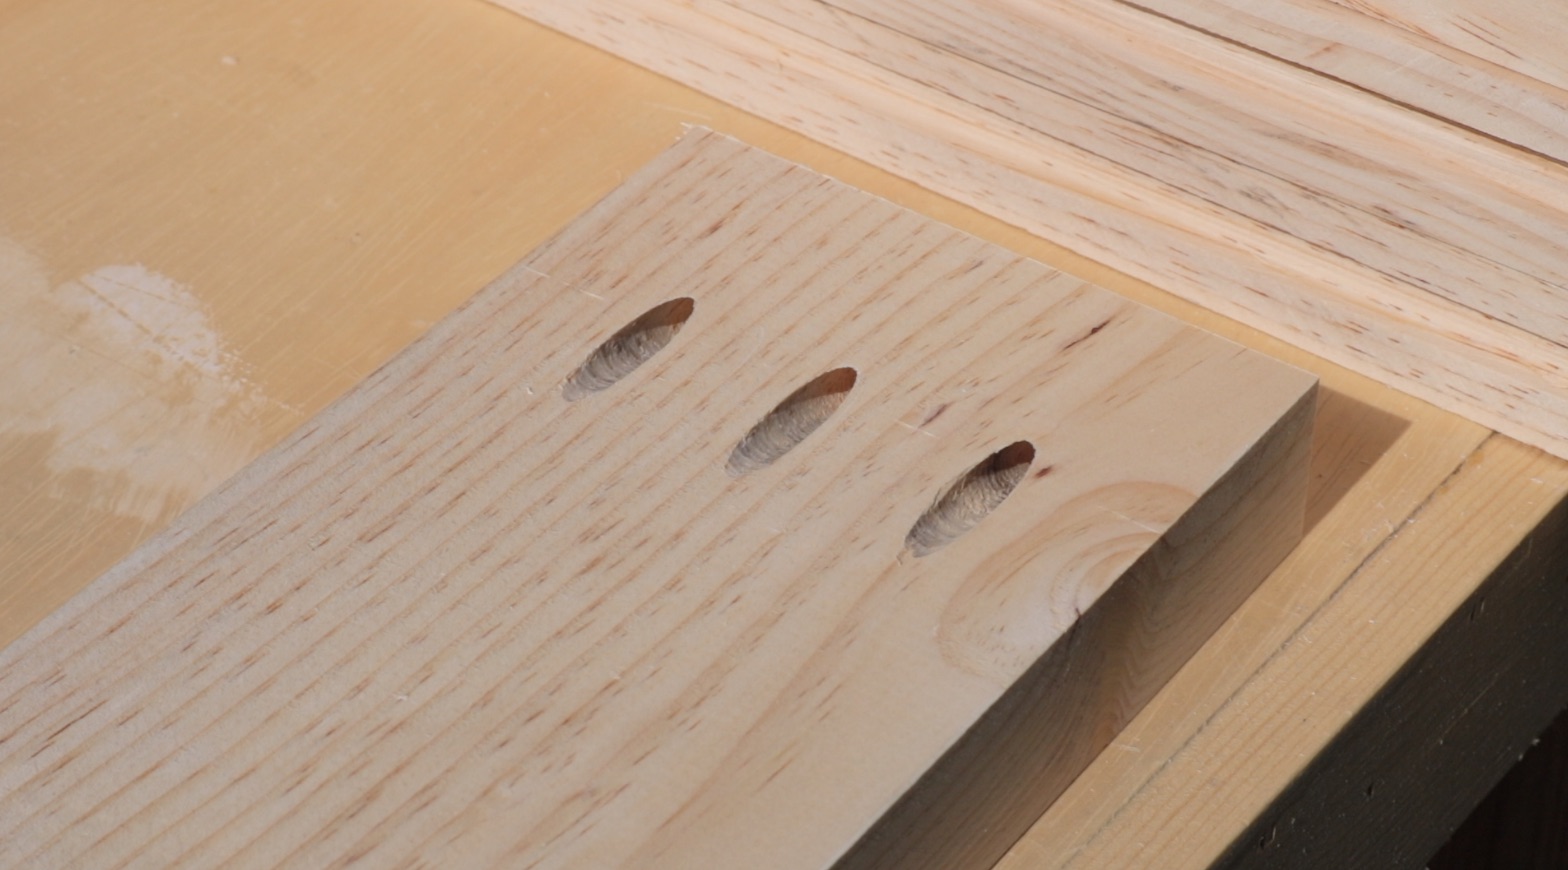
12. Drill pocket holes into the backs of all rail boards. This will create a clean joint between the rails and the stiles with the door frame is assembled. Given the width of the frame and size of the door, I chose to drill three holes at the end of each rail. I highly recommend the Kreg K4 pocket hole jig.

13. Partially assemble door frame using just pocket screws – no wood glue yet. Since it’s only a partial assemble, only 2 of the 3 pocket holes need screws to join the rails to the stiles. Only one stile needs to be used.
14. Measure the space between door rails and stiles and record the measurements. Then add 3/8-inch to each measurement – this will be the size of the door panel for the respective section of the barn door. For example, if the space between two rails is 40-inches, the panel height should be 40 3/8-inches. And if the rail length is 30 inches, the panel length should be 30 3/8-inches.
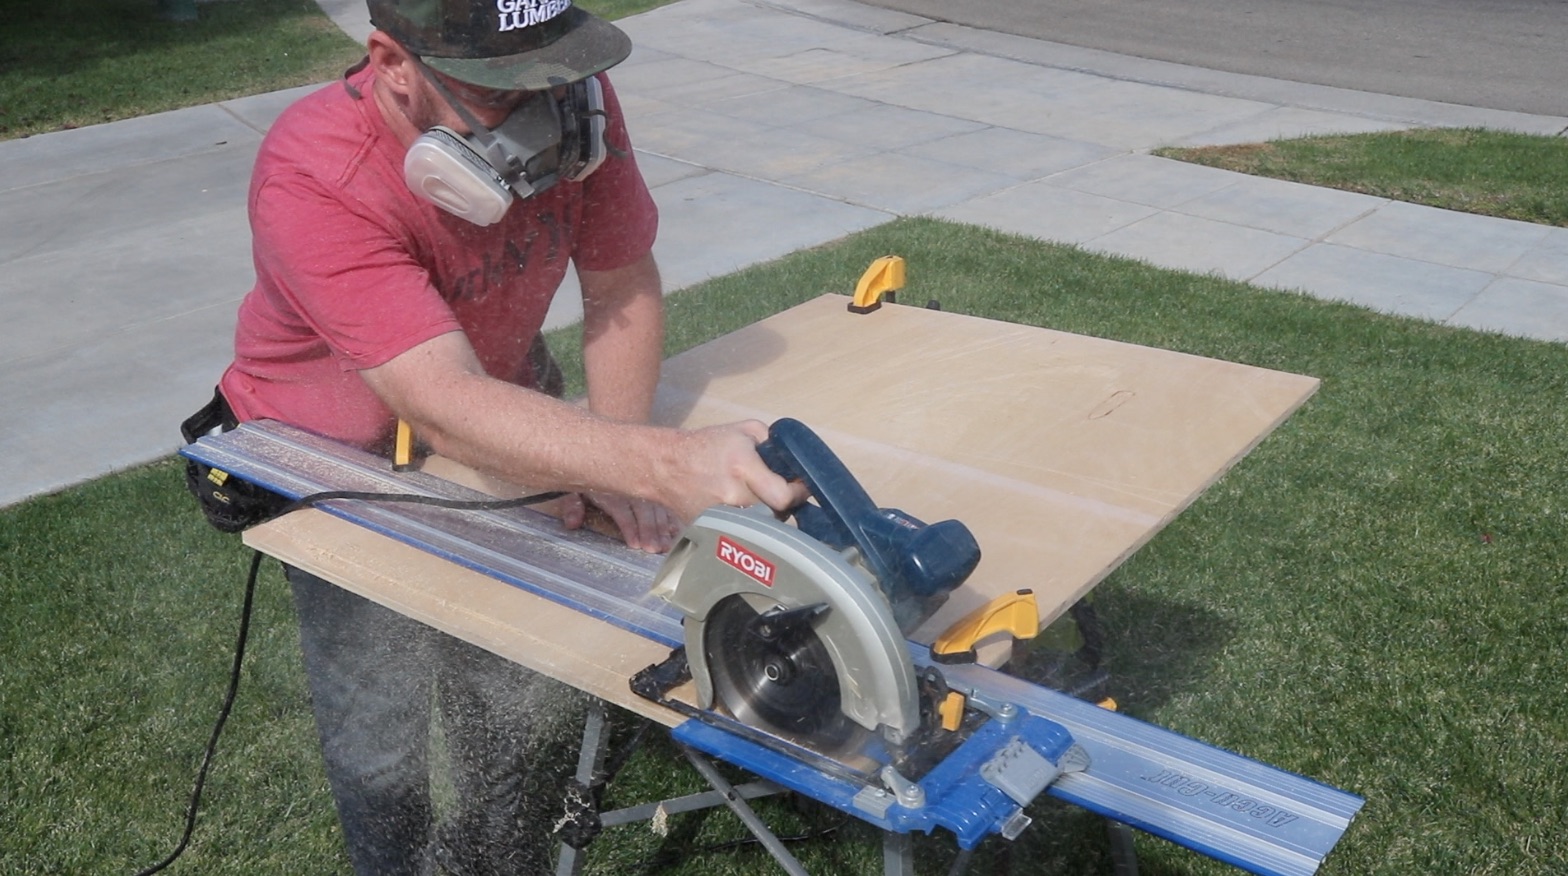
15. Cut down 3/4-inch plywood for the barn door panels using a circular saw. Use the measurements from the previous step, and be sure to label the panels based on their position in the door frame. Use cabinet-grade plywood to get the smoothest results. A freehand cut can be made with the circular saw, but cutting goes fast with a cutting guide like the Accu-cut from Kreg.
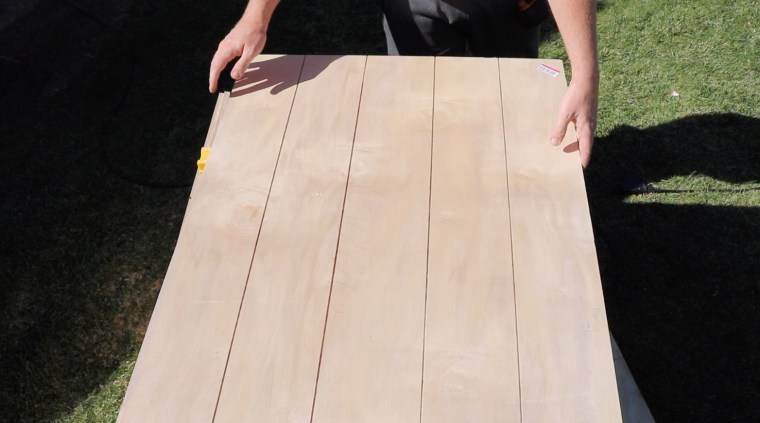
16. Cut grooves in door panels for a tongue and groove appearance. Measure and mark equidistant lines that are parallel to the longest side of the plywood panels. Make shallow cuts (1/8 inch deep) into the plywood using a table saw.

17. Dry fit panels, rails and stiles. If components are not fitting properly, make small cuts to make the door fit tightly together.
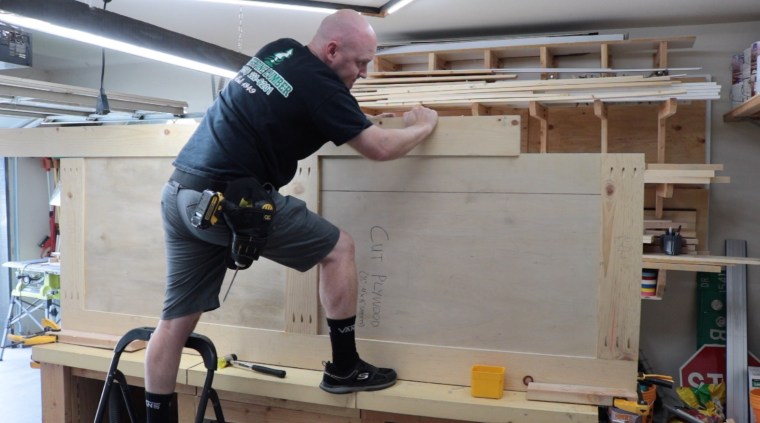
18. Assemble barn doors with wood glue and pocket screws. Use 2 1/2-inch Kreg pocket screws for softwoods. Start by gluing and screwing the top and bottom rails into one stile. Then add the panels using glue in the inside grooves that were cut into the door frame. Be mindful that all door parts are facing the right way – pocket holes should be on the back of the door while the tongue and groove pattern is on the front of the door. Add the middle rail, securing it with glue and pocket screws. Then add the second stile. Since my plywood was not perfectly straight, I found that it was most effective to slide on the last stile as picture below.
19. Use wood filler to conceal any spaces from seams of cavities from knots. This step is optional, but I used wood filler because I wanted to cleanest look possible.
20. Sand down all sides of the barn door(s) with 120-grit paper. No need to go beyond 120-grit since the door will be painted. If you choose to keep the door a natural color or plan to stain it, sand down the door(s) with 220-grit sandpaper.
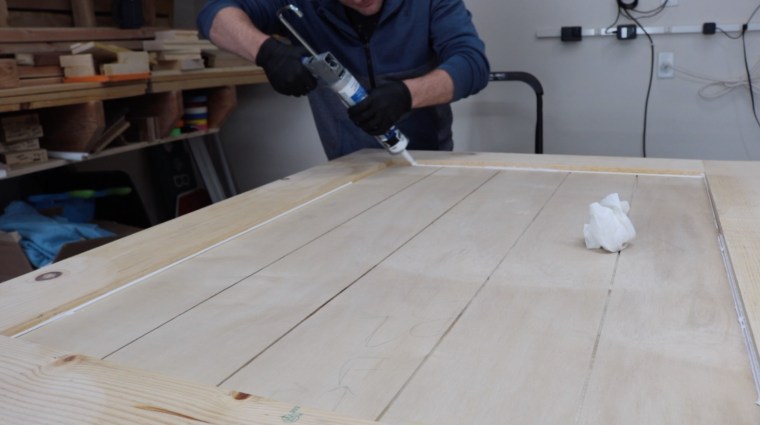
21. Apply caulking to seams between frame and panels. This step is optional, but I wanted to have a super-clean look. If you’re not painting your door(s), you’ll want to skip this steps since the caulking won’t look very good 🙂
If you’re not painting your door(s), you can go ahead and skip to step 24.
22. Apply one coat of primer on all sides of the barn doors.
23. Apply two coats of paint on all sides of the barn doors.
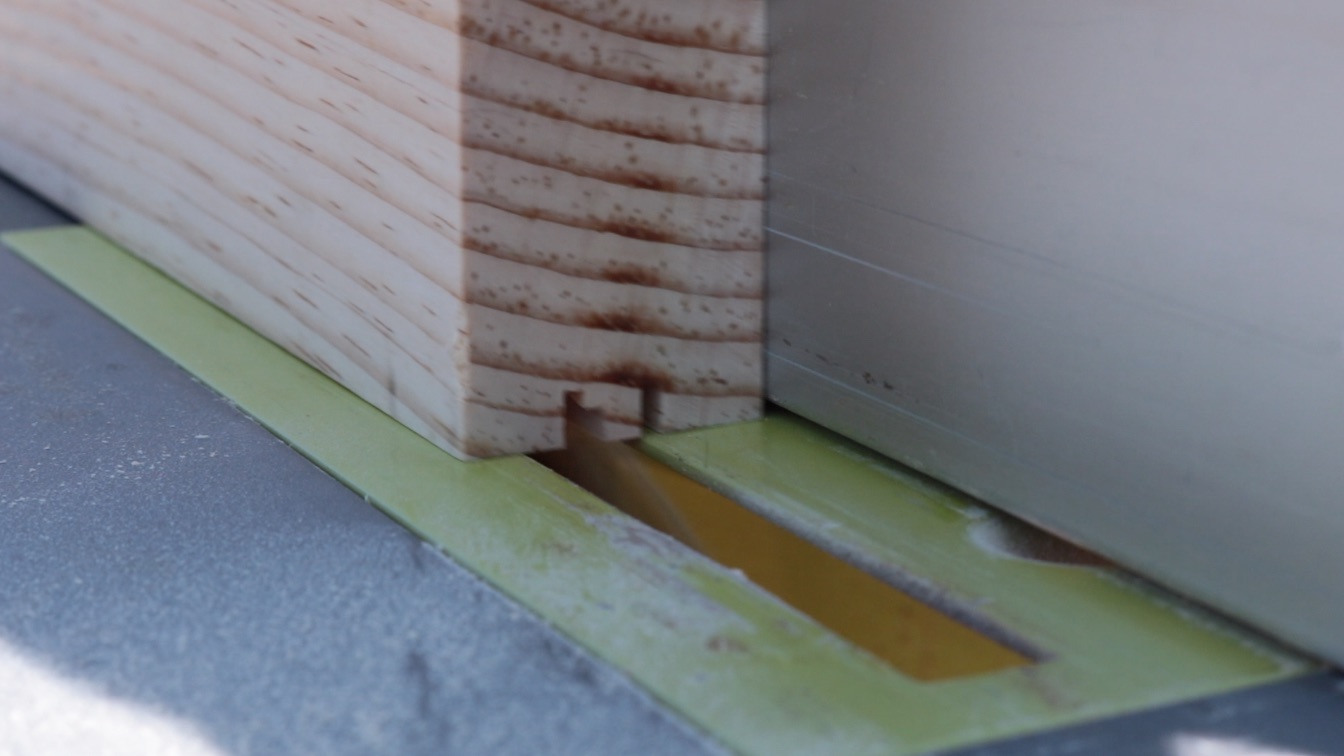
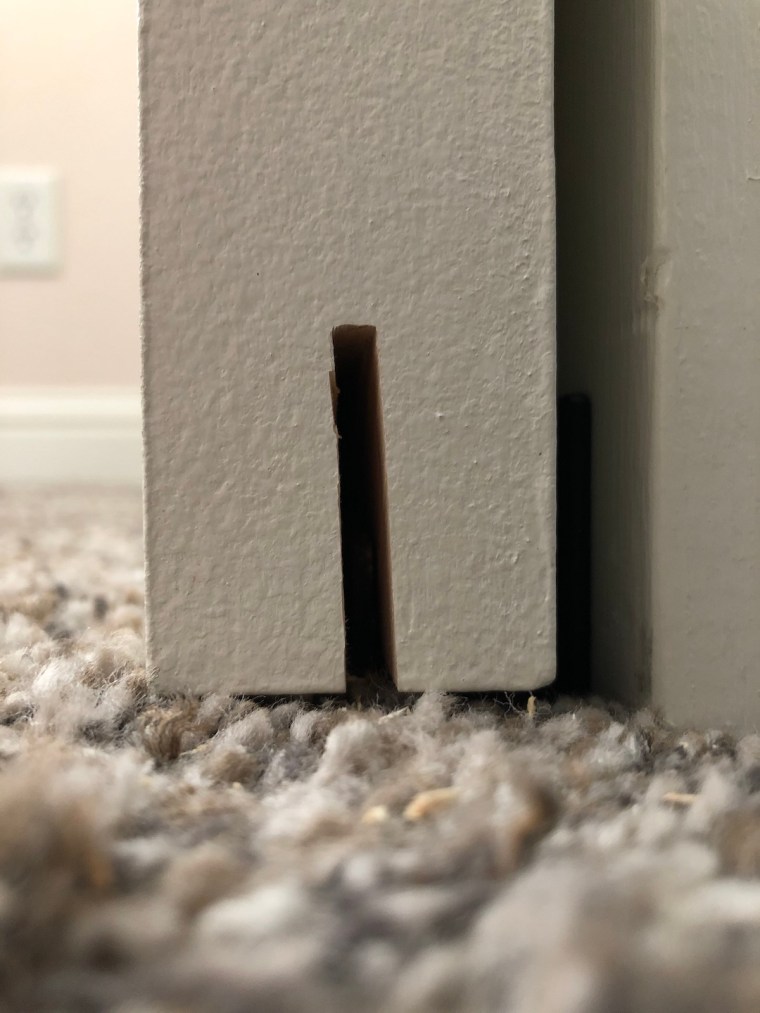
24. Cut a slot in bottom of each barn for for the floor guide. Use some type of straight edge guide with a circular saw to cut along the entire length of the door. Most floor guides are thicker than a saw blade, so two passes with the circular saw may be necessary. For the second pass, move the cutting guide/jig over slightly to essentially widen the groove. For my second pass, I used masking tape to wedge small stacks 2 quarters on the inside of the cutting guide.
Test if the groove is wide enough by sliding the floor guide back and forth.
25. Add door handles and hanging rollers to barn doors. I recommend use brad point drills bits to ensure drilled holes are exactly where they need to be.
26. Install floor guide(s) at the bottom of the closet door casing.

27. Hang the barn door(s). Balance the door so the groove at the bottom engages with the floor guide. Then secure the hanging rollers on the metal rail. The door(s) should smoothly glide back and forth. Be sure to tighten the screws on the door stoppers at the end of the rail.

Let me know what you think of this project and if you run into any questions as you’re building your own. Feel free to check out my other projects and subscribe to Gadgets and Grain on YouTube. And if building your own closet barn doors seems too daunting, feel free to check out a great selection of stained and finished doors at White Shanty. They have tons of great reviews and carry almost any style you can imagine.
Finished Project Photos


Super cool project! Love the actress, she’s the real talent!
LikeLike