Your garage does a great job of keeping your car in its own parking spot. But what about the other “vehicles” in your family? If you have any number of children, you’ve realized that they can accumulate quite a few bikes and scooter, and unfortunately, they don’t always have clear parking spots. At my house, bikes and scooters are often dumped parked in a corner as shown in the video above. In an effort, to take back precious garage floor space and help my kids be a little more tidy, I set out to design and build the ideal bike and scooter rack.
Watch the video above to see how you can build your own, and if you’re ready to jump into it, follow the step-by-step instructions below.

What Makes an Ideal Bike & Scooter Rack?
1. It’s easy for kids to use
The whole point of having this rack is to keep your kids’ bikes and scooter organized and out of the way. If the rack makes it tough for kids to get the vehicles in and out, they’ll stop using it, and the garage will be strewn all over the garage – which was the problem in the first place. This rack features some miter cuts and bevels to make sliding bikes and scooters into a breeze.
2. It’s easy to build
This design uses simple butt joinery along with nails and glue for strength. You won’t need any fancy tools or know any complicate woodworking skills. Just buy the boards based on the plans below, and you should be able to knock this out in half a day.
3. It can fit a variety of bikes and scooters
Kids will accumulate a variety of vehicles of varying sizes over the years. An off-the-shelf bike rack will most likely not accomodate scooters or smaller bikes, so it’s key to have a design that can fit non-bikes. The ideal rack should have universal-sized “parking spots” – because the last thing anyone wants to do it give their kids instructions on what bike or scooter goes in which space.
Will this design work for you?
I designed this rack for my kids bikes and scooter. And here are the minimum and maximum clearances and the types of vehicles that worked for me…
Diagram of cross-section with colored outlines of the bikes and scooters
What Will You Need To Build This Project?
Supplies and Material
- (3) 2×8 boards
- (3) 1×8 common boards
- 120-grit sandpaper
- 2-inch 18-gauge brad nails
- Wood glue
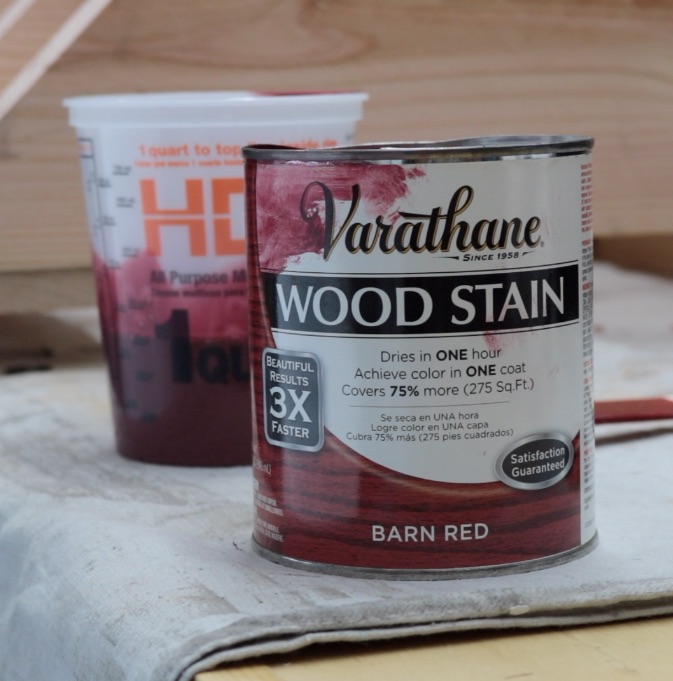
- Wood stain (Optional – I used “Barn Red” from Vartahane
Recommended Tools and Equipment
- Tape measure
- Precision square
- Speed square
- Miter saw (mine is a sliding compound miter saw)
- Table saw
- Sanding block
- Air compressor
- Brad nailer
- Gluebot glue dispenser
Just a heads up that this blog contains affiliate links. If you end up buying anything from the retailers above, I receive a small commission and it goes to supporting my channel and blog.
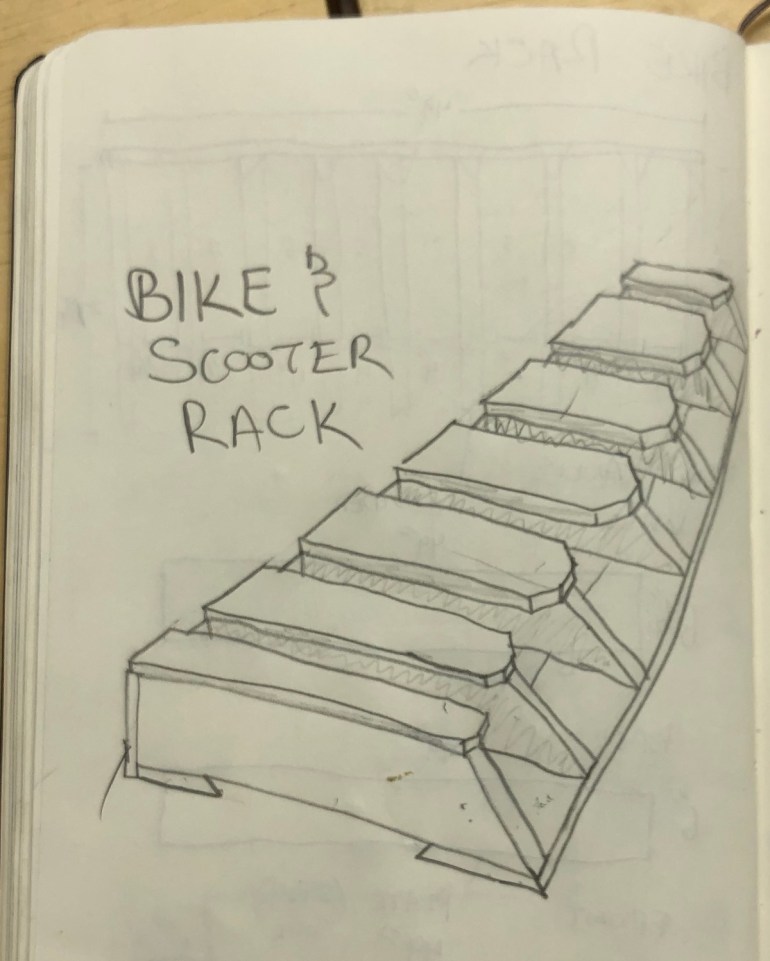
Project Plans and Cut List

Making adjustments to this design
Step-by-step Instructions
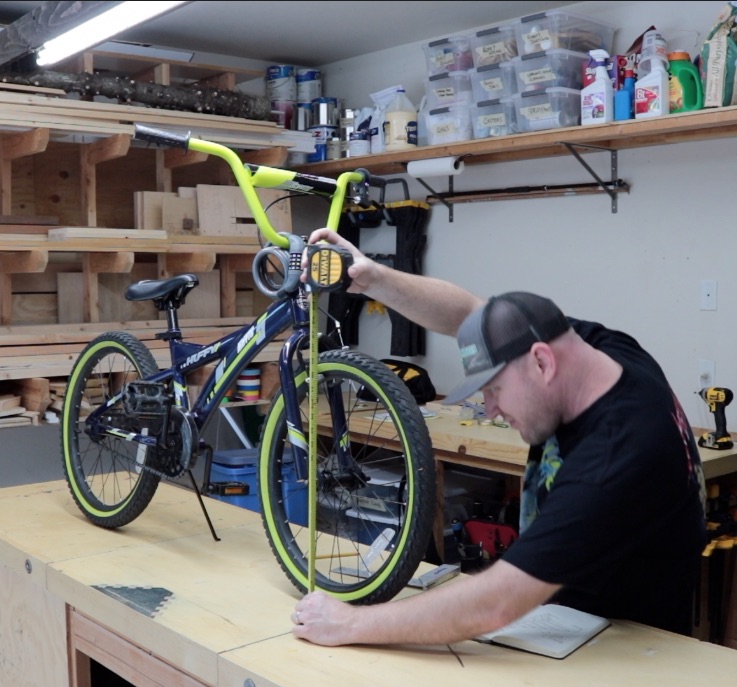
1. Measure bikes and scooters for the rack
Use a tape measure and precision square to find the widest parts of the bikes and scooters that will be parked in the rack. For kids bikes, find record the tallest point on the smallest bike – this is the maximum height of the rack. For my kids bikes, the smallest bike could be effectively held upright with a support 7 1/4-inches tall, so I knew this would be the height of my bike rack.
The spaces in the rack should also be narrow enough so that they can “pinch” the bike tires in such a way that the bikes will stay upright, and not fall over. For me, this width is 2 1/2-inches.
For scooters, measure and record the width of the widest scooter. This will be the minimum distance needed between the divider boards. If the space between the dividers is any narrower, that widest scooter will not be able fit in the rack. For my kids’ bikes and scooters, I found that I need two sizes: one that is 4-inches width for my kids’ bikes and Razer scooters and another that is 5 3/4-inches wide for a toddler scooter and Gide Bike.
2. Cut dividers to size
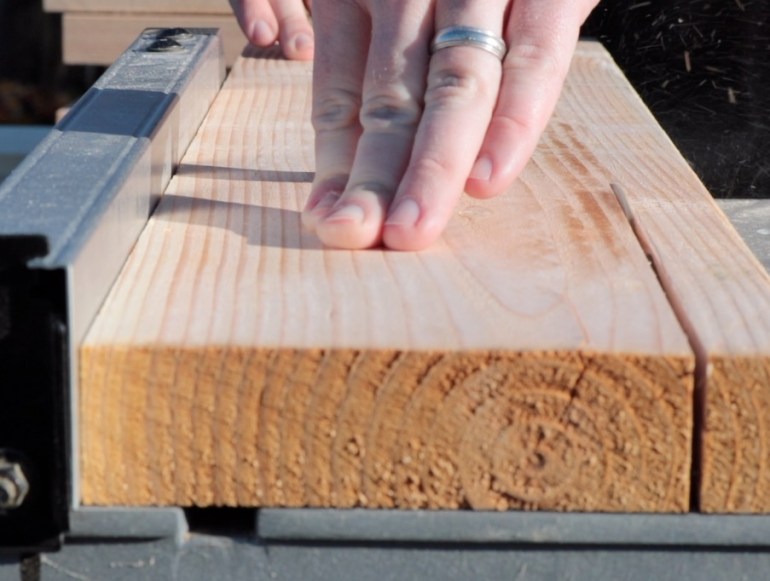
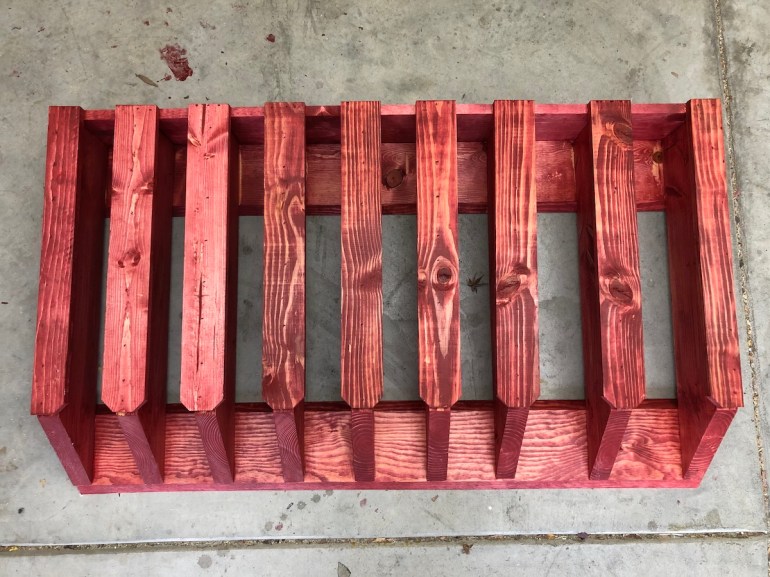
Using a miter saw or circular saw, the 2×8 boards to lengths of 27 3/4 inches. The number of divider parts needed will be the number of bikes/scooters plus one. For this project, 8 bikes and scooters will be parked in the rack, so 9 dividers are needed.

Use a table saw to rip the divider boards to a width of 5 3/4 inches. Rip each side of the board to remove the rounded edges. This will ensure a more stable rack because the dividers will have a wider edge grain making contact with the sole plate boards
3. Cut miters on the end of each divider board
Set the miter saw to 45-degrees and cut a miter at the end of each divider board.


4. Cut sole plate and bumper boards to size
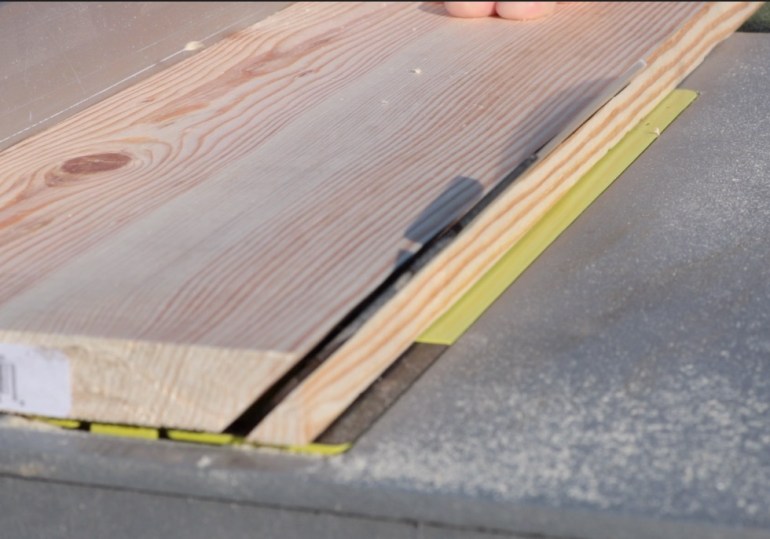
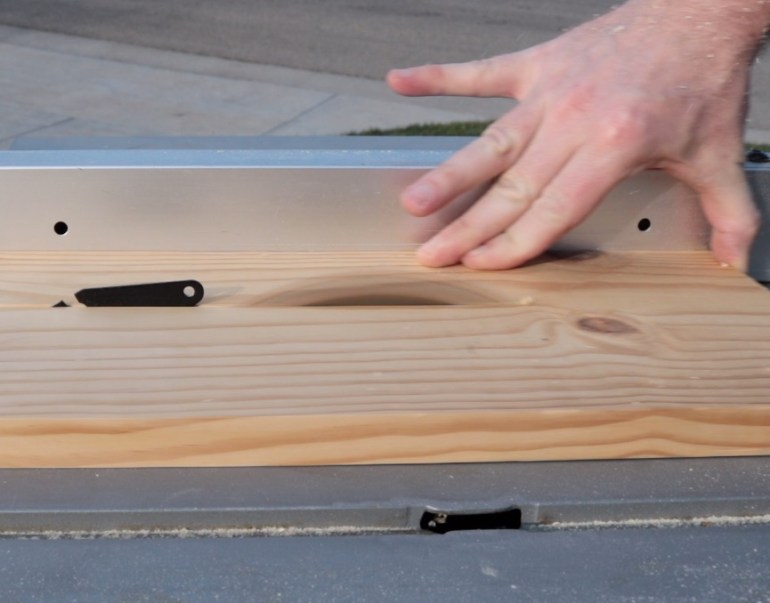
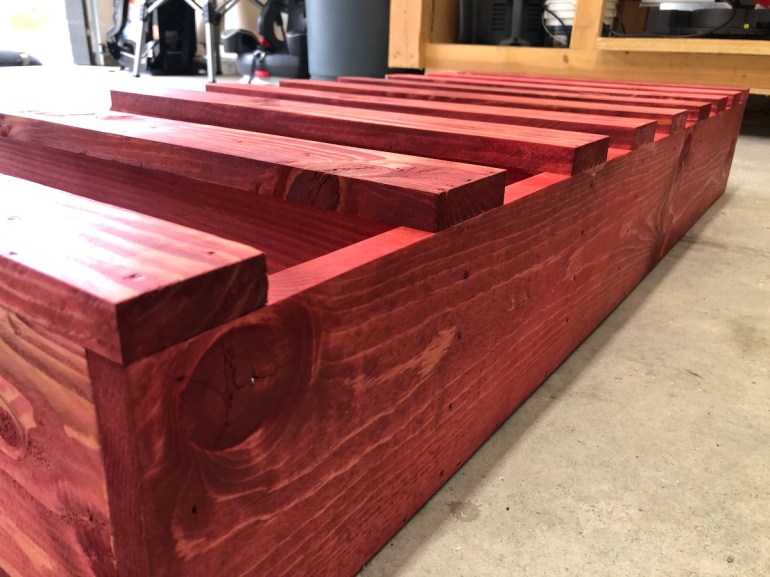
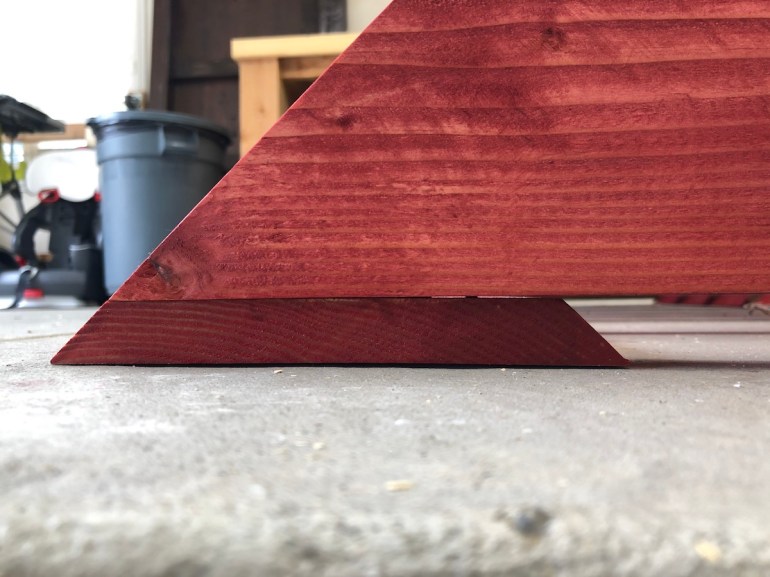
Use a miter saw or circular saw to cut the 1×8 boards to a length of 49 inches for the sole plates and bumper. Then using a table saw, rip the back sole plate and bumper to their respective widths as outlined in the plans above. The front sole plate won’t need any cutting here since it’s already 7 1/4 inches wide – the actual width of a 1×8. The back sole plate should be 6 inches wide and the bumper should be 6 1/2 inches wide. Finally adjust the table saw cut at a 45-degree angle as shown in the video above. Run both edge grain sides of front sole plate through the table saw, so both side have a 45-degree bevel. These angles on the sole plate will allow bikes a scooter to more easily slide in and out of the rack. Also cut a bevel on one edge grain side of the back sole plate.
5. Cut top plate boards to size
Using the 1×8 boards, cut and rip seven top plate boards to a length of 22 3/4 inches and 3 inches wide. Also cut and rip two side top plate boards to a length of 22 3/4 inches and 2 1/4 inches wide.
6. Cut miters in top plates
The seven top plate boards (the ones that are 3 inches wide) need a miter on each side, whereas the side top plate board need just one – the side that faces into the rack. Set the miter saw to make a 45-degree miter cut. Make a mark 3/4-inch from the end of the top plate boards, and then make the cut. This should leave an end-grain side 3/4-inch wide at the end of the board.

7. Nail and glue back sole plate to the first divider
Apply some wood glue to bottom of a divider board and adhere it to the end of the back sole plate. Use a speed square to keep the plate and divider perfectly perpendicular to one another. Secure the boards together with 5-6 brad nails.

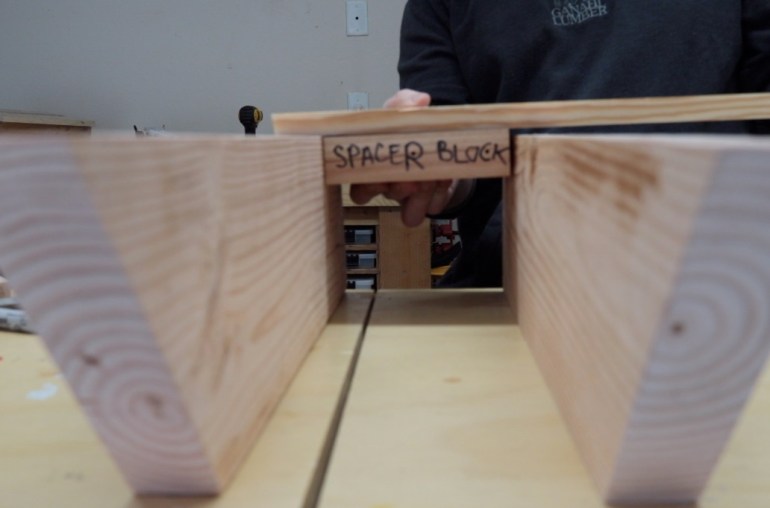
8. Attach the remaining dividers to the back sole plate
Repeat step 7 for the remaining dividers. Use a spacer block to maintain a consistent width between the dividers. I used a 4-inch block for six slots and a 5 3/4-inch block for two slots.
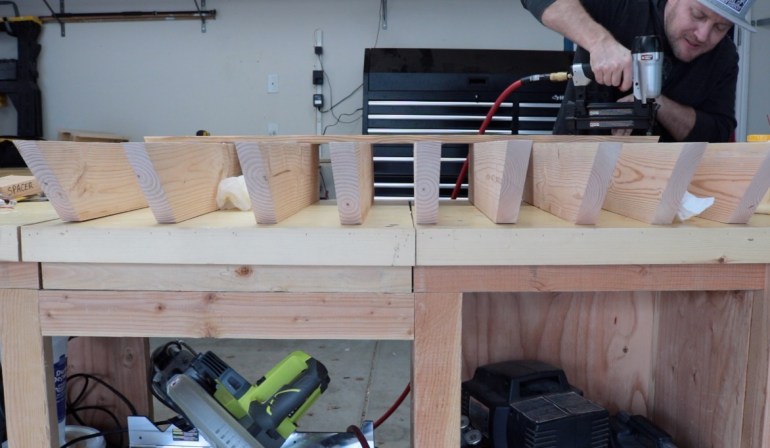
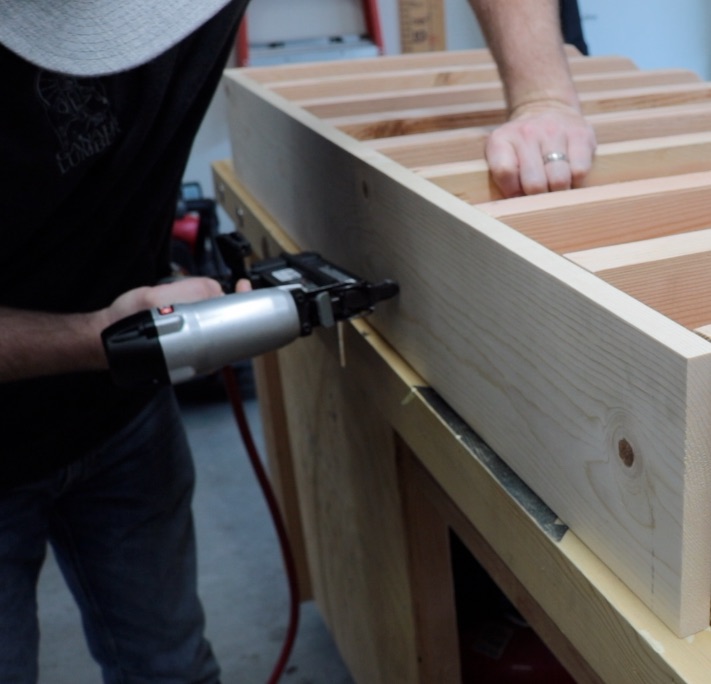
9. Attach the front sole plate
Position the front sole plate so that its 45-degree bevel perfectly aligns with the 45-degree miter from the divider boards as shown below. Secure the boards together with wood glue and brad nails. Use the spacer blocks from step 8 to maintain a consistent between dividers.
10. Attach bumper
Use wood glue and brad nails to attach the bumper board to the “back” of the rack. The edge grain sides of the bumper should be flush with the top of the divider boards and bottom of the rack as it sits on the floor.
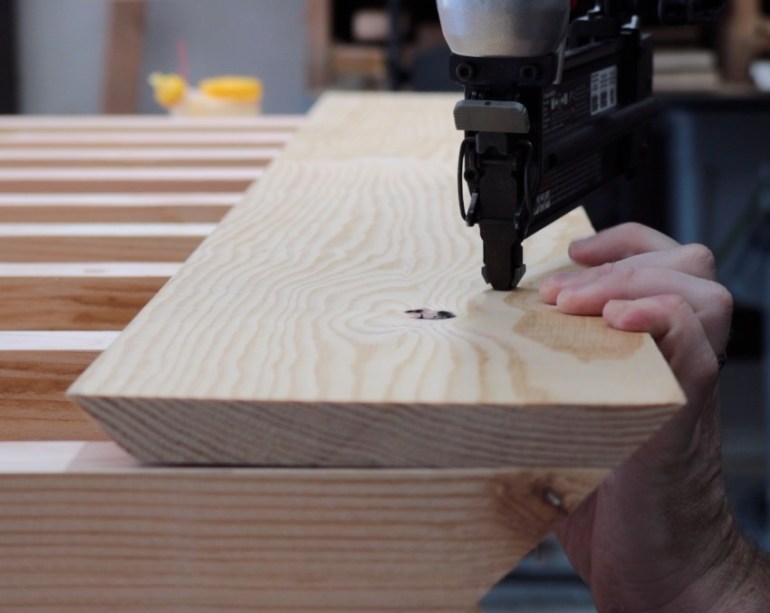
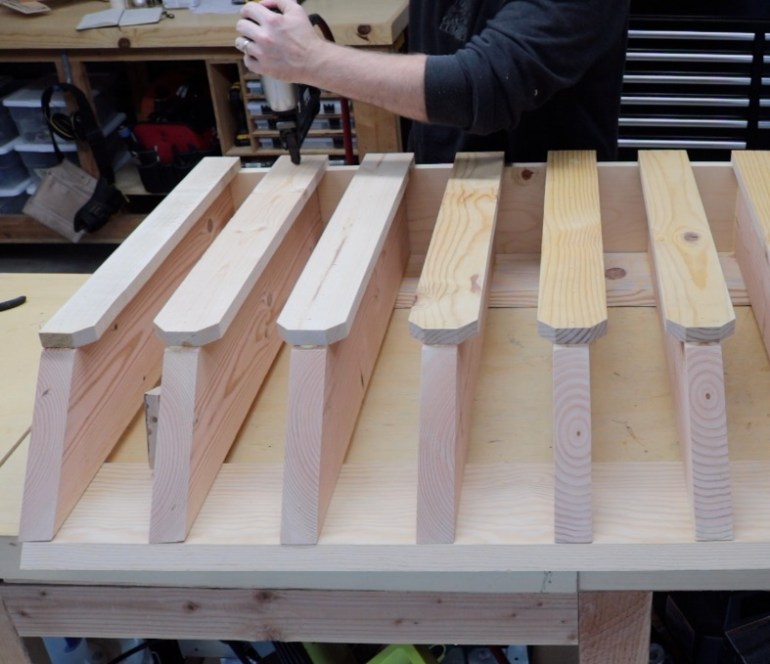
11. Attach top plates
Using wood glue and brad nails (again!), secure the top plate boards on top of the divider boards. The widest ends of the plates should be flush with the face grain of the back of the bumper. Use a speed square to ensure the plate boards stay perpendicular to the bumper.

12. Apply stain to make it pop! [Optional]
Since this is a project for the kids, it might worth the extra time to give it some flare. Apply a stain of your choice following the manufacturer’s directions.

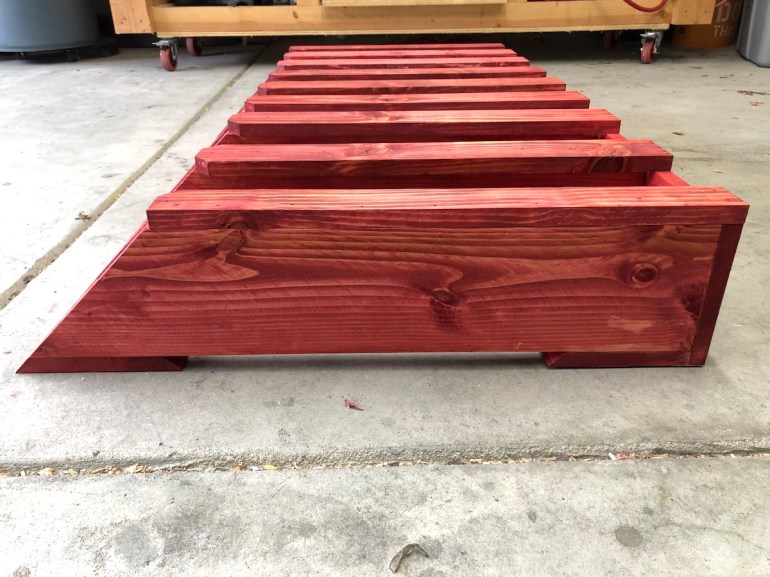
Photos of the Finished Project


As always, please leave your comments and questions below.
